RECENT ARTICLES

Dosing a Saltwater Aquarium – Everything You Need To Know!


At some point in your saltwater journey you will begin to add corals or Coralline Algae will begin to grow and the main path to success with coral is stability in your water parameters. I remember reaching this point and after several months of testing I was noticing some of my water parameters were dropping lower and lower. This was when I found out about Supplemental Dosing.

This is what I found out and implemented on my own system.

What Is Supplemental Dosing?

Dosing a saltwater aquarium is the process of adding trace elements like Calcium, Alkalinity, and Magnesium to the waterbecuase coral is consuming them faster than can be replenished with water changes alone. Dosing can be done manually or via automated liquid dosing pumps.

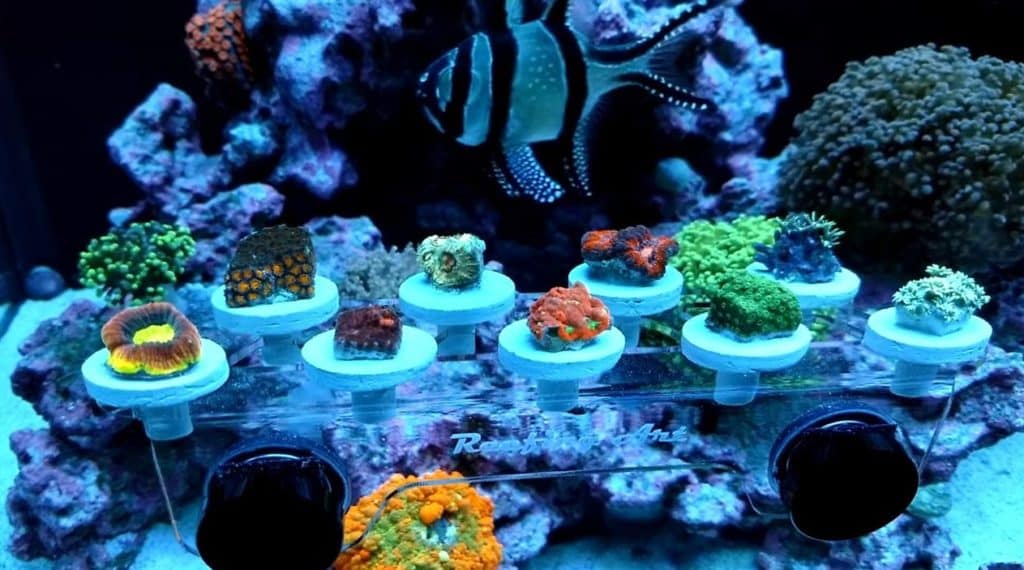
Once you begin to get Coralline Algae and you start adding corals to your aquarium, especially corals with hard skeletons like LPS and SPS they will begin to consume two main elements from your water.

The two main elements are Calcium, and Carbonate, more commonly referred to as Alkalinity, and they are used in conjunction with one another for the coral to build its hard skeleton. There is a third element that is also important to monitor and that is Magnesium. This needs to be in the correct range to allow these elements to stay free in the water to be absorbed and used by the coral.

The topic of how each of these elements works together is far too in-depth for this article, but this awesome video from Bulk Reef Supply explains everything:

So, in a nutshell, dosing is required to ensure the optimum levels of Calcium, Alkalinity, and Magnesium are maintained in your water so that your corals can grow.

Can Water Changes Replace Supplemental Dosing?

Regular water changes are usually able to keep up with the demand of trace elements the corals consume in tanks containing mainly soft and LPS coral. SPS and LPS corals consume the most and water testing is the only way to see if water changes are sufficient to keep up with consumption.

Water changes work really well for most aquarists that do not have a lot of coral or have an aquarium mainly consisting of soft corals like Mushrooms, Zoa’s & Palys, Kenya Trees, Pulsing Xenia, and GSP, to name a few.

These corals will still consume the elements, but because they are not building a hard skeleton they do not use anywhere near as much as LPS and SPS do.

You may find that your water changes will suffice and keep your levels stable for a long time, years in fact. The only way to monitor your water parameters is with regular testing with good-quality test kits.

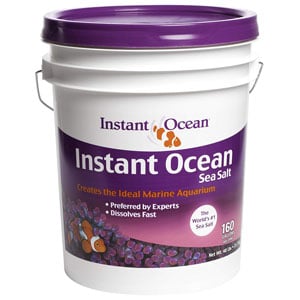
If you do notice your Calcium, Alkalinity and Magnesium are beginning to drop slightly, the first thing you could do is change your salt.

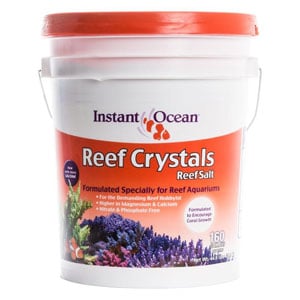
This was my first step when I began adding corals. I initially ran Instant Ocean Salt, but then I switched to Instant Ocean Reef Crystals as it has higher levels of Calcium, Alkalinity, and Magnesium, specifically to help with coral growth.

Instant Ocean Salt Bucket
Instant Ocean Salt – Excellent General Aquarium Salt
Find it Here at Amazon.com
Reef Crystals Aquarium Salt
Reef Crystals Aquarium Salt – For Heavily Stocked Coral Aquariums
Find it Here at Amazon.com

Here is an extract from the Instant Ocean website regarding Reef Crystals…

“Instant Ocean Reef Crystals is an enriched formulation. Optimum effectiveness. Formulated specially for use in reef aquariums, Reef Crystals contains essential ocean reef elements in concentrations greater than those found in natural sea water. Extra Calcium to help ensure the growth of large and small polyp stony corals as well as coralline algae.

Extra Trace Elements to provide an additional measure of vital nutrients.
Extra Vitamins to ensure vigorous growth and survival of corals, anemones and other invertebrates in a captive environment.
Metal Detoxifier – to neutralize traces of heavy metal often present in domestic water supplies.

InstantOcean.com

As your corals grow, as you get more Coralline Algae, as you add more snails, the demand for those ions increase. Once the demand becomes more than what is being added each week by the water change, that becomes the time when you have to then start adding more.

For Example:

  • You have a Hotdog Stand at your kids’ ball games
  • Each week during the regular season you sell 50 hotdogs
  • Your kids’ team gets into the playoffs
  • Next week more people are at the ball game, you still only have 50 hotdogs but 60 people come to your stand.
  • Next week 70 people come
  • The week after that 80 people come
  • If you cannot meet the demand, those people who came after the first 50 will start to get hungry. This is the same for your corals.

So how do you keep everyone happy? You get more hotdogs!

This is supplemental purchasing and is the same as supplemental dosing. Meeting the demand.

How Do You Dose An Aquarium?

There are a few ways in which to dose Cal, Alk, and Mag to your aquarium:

  1. Change of Salt
  2. Manually Adding
  3. Automatically Adding Via Dosing Pumps
  4. Calcium Reactor

1. Switch to Salts with Higher Trace Elements

This is usually the first way many aquarists try as it is the easiest. Instant Ocen Reef Crystals and Red Sea Coral Pro are the two most common salt mixes formulated with higher levels of calcium, alkalinity and magnesium for growing corals.

Try changing to one of these first and continue to test weekly for Alk, Cal, and Mag to see if they are able to maintain your levels. This might buy you another year or a few months, depending on how rapidly the demand increases.

Any One of the High-Quality Salt Mixes Below is a Great Option:

Reef Crystals

Coral Pro

Pro Reef

Reef Pro

2. Manually Dosing

Once your salt mix is unable to keep up the corals demand, now is the time you need to switch to supplemental dosing. It is really easy and once you have done it a few times you will soon have it mastered.

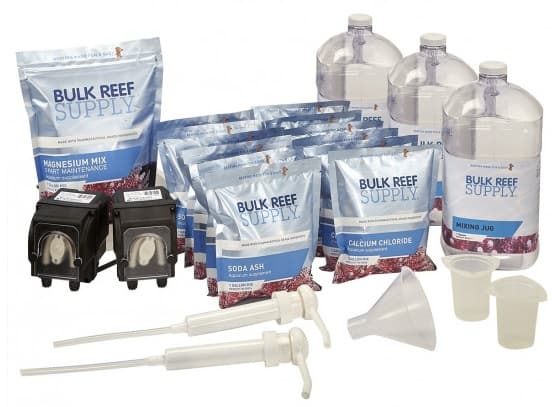
The easiest way, and the way myself and many other aquarists start is by purchasing a Manual 2-Part Starter Kit from Bulk Reef Supply:

Bulk Reef Supply Dosing Starter Kit

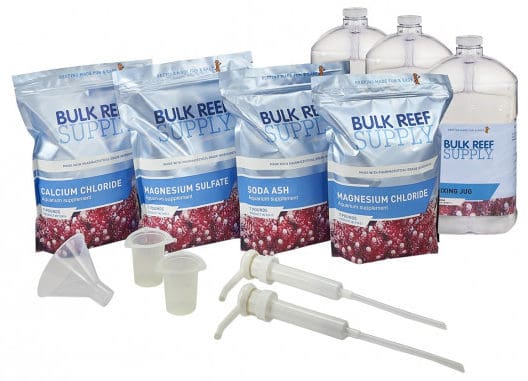
This $99 kit contains EVERYTHING you need to get started with dosing. Simple to mix, simple instructions and you will find it will last you a long time if your demand is small.

Don’t worry about it saying 2-Part. It contains granules to create liquid dosing solutions for Calcium, Alkalinity, AND Magnesium!

You can find out more information, reviews, and the Starter Kit Here at Bulk Reef Supply

The only part about manually adding a measured amount of dosing solution every day to your aquarium is that YOU have to do it EVERY DAY, or find someone to do it for you!

So what about when you are on vacation? This is where automation comes in!

3. Automated Dosing

This is where pretty much most aquarists will end up if they are dosing fluid solutions! Dosing manually can get a pain in the butt real quick! But there are simple solutions to this problem – Automated Dosing Pumps.

These are a simple pump that will pump very calibrated amounts slowly from your solution containers into the aquarium. They will pump when you want and exactly how much you want! Set & Forget!

There are two ways to start automated dosing:

1. The Bulk Reef Supply Starter Kit WITH included dosing pumps:

BRS 2-Part Starter Kit with Dosing Pumps

You can find the Bulk Reef Supply Starter Kit with Dosing Pumps HERE

or

2. Purchase a Stand Alone dosing pump system and run it with the 2-Part Starter Kits.

3 Pump Automatic Aquarium Doser

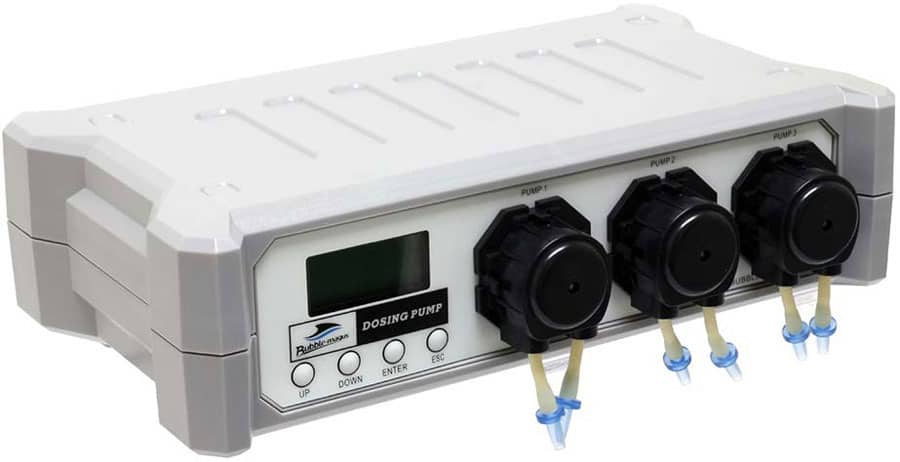
You Can Find a Great Selection of Dosing Pumps Here at Amazon.com

and find out even more information on Dosing Pump systems in this article:

What Is An Aquarium Dosing Pump?

4. Calcium Reactors

These are not for the Beginner, but something you can work up to if you get a big aquarium.

For the most part, dosing the liquid mixes above will suffice but when you have a large aquarium +150 Gallon) full to the brim of SPS, then a Calcium Reactor setup will be the best option – But they are not cheap!

Calcium Reactor Package from Bulk Reef Supply

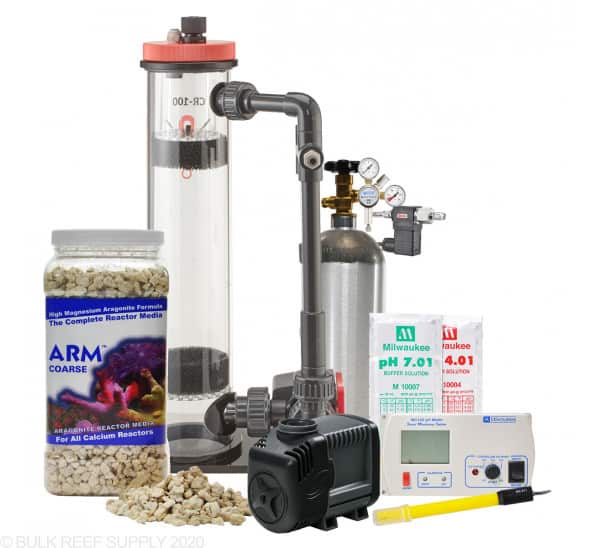
A Calcium Reactor is a tube filled with dead coral skeleton pieces that has Carbon Dioxide injected into the tube. The CO2 dissolves the dead coral skeleton and all the trace ions dissolve into the water.

This water then drips into your aquarium at a controlled rate that you set to meet the demand and the whole system is monitored by a Ph controller. Because you are melting dead coral, all the ions that were bound up in the dead coral skeleton are now released for your new coral skeletons.

Calcium Reactors work really well, but they are a complex system that you need to really understand and are beyond the scope of this article. They need an entire article dedicated to them!

What Time Do You Dose A Reef Tank?

It is recommended to dose Alkalinity during daylight hours and Calcium during opposite night time hours. Dosing Alkalinity and Calcium in a saltwater aquarium needs to be done at sepearte times. Dosing together will cause the Calcium to precipitate out of the water and turn it cloudy.

In layman’s terms, Precipitation is the Calcium undissolving from the water. Once it precipitates, your corals are unable to absorb the Calcium.

To prevent this, most aquarists set up dosing routines in two possible ways:

  1. If the amount you have to add each day is small then you dose:
    Alkalinity in the morning as the majority of Alk is used during the day
    Then dose Calcium in the evening
  2. If you have an automated doser or you have a large amount to dose each day then dose:
    Alkalinity on the odd hours x12
    Calcium on the even hours x12
  3. Magnesium is dosed as required to maintain your desired parameter. No more than 100ppm per day for an increase though 😉

To Finish

For the majority of beginners to a saltwater aquarium,, it is going to be a while before you may have to begin dosing. Some of you may never need to dose at all.

But when you do, there is so much information from Bulk Reef Supply, especially in their YouTube videos that it is a simple process to get set up and get started.

I think the BRS Starter Kits are now the Go-To method for every aquarist starting dosing! Once you begin to get the hang of it and really like LPS and SPS coral it is easy to meet their consumption.

Just test every week, keep a journal and you will be able to see any trends of declining element parameters so you can then start on this next fun aspect to our great hobby!

Further Reading

For further details or more in-depth information to some items mentioned in this article you may find the following articles from us helpful:

HOB/Power Filters: Can They Be Used On Saltwater Aquariums?


A Hang-On-Back Filter or Power Filter as they are also known by are very popular in freshwater aquariums at providing a simple, easy-to-use and easy-to-clean filter, but how well do they work with a saltwater aquarium?

“Saltwater aquariums need high-tech, top-of-the-line equipment, Right?” Wrong!

You can easily run a small saltwater aquarium with very basic equipment. You just need to understand its limitations and the work you have to do to maintain it for success.

A Hang-On-Back (HOB) or Power Filter can be used on smaller saltwater aquariums with Live Rock & a Protein Skimmer to provide the 3 means of filtration required for a healthy reef tank. HOB filters are mainly used for housing chemical filter media.


Many successful saltwater aquariums are run using HOB filters and correct selection, sizing and setup will ensure a good start to your reefing journey!

If you wish to view a nice selection of HOB Power filters to refer to while reading this article you can find them below:

TBR Recommends

HOB Power filters can be a great way to start your first saltwater aquarium or perfect for Quarantine Tanks

Find Them Here At
Amazon.com

Read On to find out more…

What is a HOB or Power Filter?

A HOB or Hang-On-Back Filter is exactly what it sounds like. It is an aquarium filter that hangs on the side or back of an aquarium.

The general way in which these filters work is to suck up water from the aquarium, pass that water through the filter media and then return it back to the aquarium.

The media that is placed in these filters can be changed to suit the aquarium or the operation.

HOB filters also make great little Refugiums for nano aquariums with the simple addition of some Cheato Macroalgae and a grow light.

How Do You Use A HOB Filter On a Reef Tank

At the start of the article I mentioned how you can use a HOB ‘With’ Live Rock & a Protein Skimmer, this is because a HOB filter does not provide enough filtration on its own to cope with the filtration demands of a saltwater aquarium.

There are 3 forms of filtration that you have to meet for your aquarium to maintain an ecological balance:

1. Mechanical Filtration

This is the capture and removal of large particulate matter and organic compounds. In a saltwater aquarium, this is usually taken care of by:

  1. Filter Floss
  2. Filter Sponges
  3. Filter Socks
  4. Roller Mat
  5. Protein Skimmer
  6. A combination of the above

2. Chemical Filtration

This is the capture and absorption or conversion of microscopic particulate matter. In a saltwater aquarium, this is usually taken care of by:

  1. Activated Carbon
  2. Chemi-Pure Elite
  3. Purigen
  4. Bio-Pellets
  5. Granular Ferric Oxide (GFO)
  6. A combination of the above

3. Biological Filtration

This is the growing and reproduction of bacteria used to process toxins. In a saltwater aquarium, this is usually taken care of by:

  1. Rock
  2. Sand
  3. Filter Sponges
  4. Ceramic Pieces
  5. Bio-Balls
  6. Colonizing Material – MarinePure
  7. A combination of the above

Most HOB filters will come with a series of filter media designed to meet the needs of each type of filtration.

In a saltwater aquarium, these media are just not enough to successfully process all the waste that a reef tank produces. The main reason why there is so much more waste in a saltwater aquarium, compared to their freshwater counterparts, is the number of living organisms in a reef tank.

To cope with the processing of all this matter you need to use a HOB filter as part of the total filtration package. As well as your HOB filter, you are going to require the following:

Sand – Either Dry Sand or Live sand. Over time your Dry Sand will grow Nitrifying Bacteria and become Live Sand. This is will become part of your Biological Filter as your aquarium cycles.

Rock – Either Dry Rock or Live Rock. Just like the sand, it will become colonized over time and become the MAIN area for your Nitrifying Bacteria to colonize and become part of your Biological Filter.

Protein Skimmer – This will be your main method of Mechanical Filtration by removing organic particulate from the water.

The best way to set up your HOB filter to aid in helping these above filters is to:

  1. Remove and dispose of the media that came with the filter.
  2. If you don’t have much Live Rock add some MarinePure Gems to the filter to increase surface area for Nitrifying Bacteria to colonize.
  3. Insert a bag of Chemi-Pure Elite to provide chemical filtration. Chemi-Pure is a mix of Activated Carbon, GFO & Ammonia/Nitrite/Nitrate absorbing material.
  4. Place filter floss on the top as a mechanical filter.

By using the filter media mentioned above they work really well for smaller aquariums, last a long time and you can fit them in small areas – Perfect for HOB filters!

If you have plenty of live rock than the HOB filter will just be a holding vessel for the Chemi-pure and the filter floss.

If you have a larger aquarium and you have additional space on the back wall to add more equipment, you could consider adding a second HOB filter to give extra holding space for MarinePure media, additional filter floss or even converting it to a Refugium to hold MacroAlgae.


To find out even more about what each of the filter media mentioned above does and what is a refugium see the further down and in the links in the ‘Further Reading’ section at the end of this article.


Here Is My Quarantine Tank Using a HOB Filter – On Right Hand Side

Are There Cautions To Be Aware of with HOB Filters?

Although HOB Filters can be a great starter filter to your new aquarium there are a few cautions you have to be aware of to ensure it works at its best.

Using Sponges

The sponges that come with the HOB filter really need to be discarded and never used. Sponges are notorious for trapping detritus and particulate matter.

As this matter breaks down they release Nitrates and Phosphates into your water. Even with diligent cleaning, it is hard to purge all the waste matter from the sponge. This is why sponge material is very rarely used in the saltwater side of the hobby.

Using Ceramic Media

Just like sponges, the ceramic media can trap detritus if not washed regularly (When I say washed, that is not washed under a tap! That will kill all the Nitrifying Bacteria on it – Wash it in a bucket of saltwater!)

The surface area of the ceramic pieces is also not that large. By swapping out the ceramic pieces with $13.00 worth of MarinePure Gems you are massively increasing the surface area on which your Nitrifying Bacteria can colonize.

More surface area for a given space will help process waste better and allow for higher bio-loads = More livestock 😉

Bio-wheels

The bio-wheels on some HOB filters are designed to provide additional surface area for Nitrifying Bacteria to colonize, but if you have lots of Live Rock or MarinePure Gems they are not required – Just remove them.

HOB Filter with Rotating Bio-wheels

The additional problems that the bio-wheels can create is salt creep. Any splash from saltwater leaves behind the salt as it evaporates. This can build up over time and cover screens, glass tops, light bulbs, and the water spill-way from the filter.

Cleaning Frequency

This is one of the biggest reasons why many aquarists will not use a HOB filter once they upgrade. To keep a HOB filter working efficiently and prevent the build-up of detritus it could need cleaning every couple of days.

The filter floss can quickly become clogged if you feed heavy or have an overstocked aquarium and this can lead to a filter overflowing. You also need to remove all the filter media each week to suck up the detritus that collects in the bottom of the filter.

A turkey baster is good for this or a piece of airline running a siphon into a bucket.

Because of this maintenance, a weekly maintenance routine is required on your aquarium to keep it clean. This could be a lot for a beginner!

Correct Sizing

If you are starting out you will be wanting to watch the wallet and setting up an aquarium can be a big expense. Correctly sizing your HOB is important.

The best way is to first purchase the best skimmer recommended for your aquarium. If it is a HOB protein skimmer, install it and then see how much room you have left along the back wall of your aquarium.

My advice here would be to rather than by the biggest in the range, buy two filters that will fit side by side. Buying two will almost certainly give you more area for filter media which will greatly improve your aquarium.

For Example: 50 Gallon Aquarium 36″ Long x 18″ Wide

Protein Skimmer:
Reef Octopus Classic 1000 HOB Protein Skimmer (View it Here at Amazon.com)
Footprint = 8″ x 3.5″

This will leave us with 28″ to fit HOB filters.

HOB Filters:
Running 2 of any of the filters below will fit the space left over and give you optimal media capacity.

2x MarineLand Penguin 200 BIO-Wheel Power Filter
2x Aqueon QuietFlow LED PRO Aquarium Power Filters
2x Hagen Aqua Clear 70 HOB Power Filter
2x Fluval C4 Power Filter
(All links to Amazon.com for further info)

Salt Creep

Briefly mentioned earlier, any splashing from saltwater will leave salt deposits as the drip dries. The water cascading down from HOB filters will splash into the water surface when returning back to the aquarium.

Salt creep must be monitored and cleaned off regularly to not only keep it from affecting other equipment, but prevent it from leaking out of the filter.

Salt creep building up on the HOB filter’s spillway can redirect the water over the edges and onto the floor. Not only does this create a mess on the floor, but if you have an Automatic Top-off system fitted to replace your aquarium for evaporation loss, it will top off your aquarium with freshwater and your salinity will drop.

If left unchecked this drop in salinity will be enough to kill your fish and coral!

Are There Any HOB Filter Upgrades You Can Make?

To really get the most out of your filters there are a few upgrades mentioned earlier and some others that can really improve their operation.

Filter Material

Purigen

This is a synthetic filter media that is designed to absorb Ammonia, Nitrite and Nitrate compounds. It also has an added benefit of polishing the water similar to what Activated Carbon does.
As the Purigen becomes exhausted it changes its color to dark blue and eventually black. The great benefit to this product is that you can recharge the media by removing it and washing it in a bleach and water solution.

Purigen can be run in a mesh bag in your HOB filter.

Recommended usage is 1ml for every gallon

Chemi-Pure Elite

This is a manufactured mix of Activated Carbon and a ‘Purigen’ type of ion-removing compound that helps to remove organic waste and absorb the harmful Ammonia, Nitrate and Nitrate compounds.

It comes in a bag which can be placed in the filter and will have to be disposed of once it is exhausted.

The manufacturer recommends you change this out every 4-6 months providing you have sized the amount of Chemipure correctly. Once your aquarium begins to get cloudy, it’s time to change the media.

You can now also get Chemipure Elite which adds a Ferric Oxide material to the media to help reduce Phosphates and Silicates at the same time, but only lasts 4 months.

Recommended usage is 1 unit for every 5 – 40 gallons

Activated Carbon

Carbon or Activated Carbon are sticks or granules made from high quality, high porosity Bituminous Coal.

The main purpose of Activated Carbon is to absorb organic pollutants and heavy metals from the water.

The other benefit of using Carbon is that it will polish your water and make it sparkle. If you look at your tank and you see the water has a yellow tinge to it, then its time to replace the Carbon.

MarinePure

This type of filter media is designed to house beneficial bacteria. They are created just like the sponges to provide the most amount of surface area per piece to get as much bacteria growing as possible.

The MarinePure Gems are specifically designed to be small in size to allow them to fit in the small media areas of HOB filters and All-IN-One Aquariums.

Media Baskets

Media Baskets are a nice little invention pioneered by SteveT over at InTank.

The media baskets are designed to replace standard media trays that come with many filters, but allow for better water flow through the media and for easy cleaning.

His media baskets for HOB filters allow for just the filter floss to be easily replaced without having to remove the whole media basket.

For Media Baskets to fit many different filters and aquariums see here:
InTank Media Baskets at Amazon.com

Are There Alternative Filter Methods to HOB/Power FIlters?

If you are in the planning stages of your first aquarium, your next aquarium or are just wondering about HOB filters then here are some other aquarium options to think about.

The main downsides to using Hang-On-Back equipment, not just filters are:

  • All the equipment is visible both in the aquarium and above the aquarium taking away the beauty of what’s inside it.
  • You are limited to the range of products you can find as Hang-On-Back
  • You are limited to the amount of equipment you can place in the space provided
  • Maintenance can be laborious and regular with HOB equipment

Luckily there are some other options you may want to consider:

AIO Aquariums

AIO Aquariums stand for All-In-One Aquariums and they are in essence an aquarium with a filter compartment manufactured into the back of the tank. This allows you more space for equipment and it can keep everything out of sight.

There are some awesome AIO aquariums from the small 13.5 Gall Fluval Sea Evo all the way through to Innovative Marine’s Nuvo 80 Gallon with every size in between.

Fluval Sea Evo XII Large
Fluval Sea 13.5 Gal AIO Aquarium – Tank Setup Guide

Sumps

An aquarium with a sump is probably the most common setup you will find in saltwater. The aquarium comes with an overflow system with drilled holes that allow the water to drain into a sump below and then returned to the aquarium via a pump.

Having a sump allows you lots of space for equipment and it keeps EVERYTHING hidden out of sight. They give better access for maintenance and you will be surprised at what you can fit into the aquarium cabinet!

See This Tank In My Setup 30g-75g Guide Here

You can buy aquarium systems complete with the aquarium, sump, and stand or you can buy all the parts individually to suit your needs.


For more information on setting up an AIO or a Sump-Based system please take a look Here at my Setup-Guides. I have a range of all different tank sizes, recommended equipment, and costs to help you decide your next aquarium!


Can Any Filter Be Used on a Saltwater Aquarium?

Any filter can be used on a saltwater aquarium providing it has the correct media to provide mechanical, biological, and chemical filtration. Most saltwater tanks use a minimum of Live Rock, Filter Floss or Socks, a Protein Skimmer, and Activated Carbon to filter the water.

HOB filters and canister filters can be used but their efficiency is nowhere near as good at filtering the water as a protein skimmer and live rock. A small saltwater aquarium with a few fish will work fine on these types of filters but as the aquarium size and water, volume increases better filtration equipment is advised.

Can Freshwater Filters Be Used on a Saltwater Aquarium?

Filters used in a freshwater tank can be cleaned and used in a saltwater aquarium providing new filter media is used. Most filter media can be used in either freshwater or saltwater but it cannot be transferred between water types. Filters used on freshwater tanks are common when moving into saltwater.

When many newcomers to saltwater decide to start a reef tank they usually have a freshwater water aquarium and wish to know if they can use their existing equipment. Yes, the equipment can be used just note that the efficiency of most freshwater-based filters is not that good for saltwater so low stocking levels will be required to ensure the filters can cope.

When changing from a freshwater setup to a saltwater setup the new tank and filtration must undergo a complete nitrogen cycle to ensure the filter bacteria is sufficient in quantity to process waste once fish begin to be added.


To find out more about the Nitrogen Cycle please read this article:

Fish Tank Nitrogen Cycle – Your Step-By-Step Guide


Do Saltwater Aquariums require Special Filters?

Any filter can work on a saltwater aquarium providing it has filter media for mechanical, biological, and chemical filtration. On small tanks, HOB, Powerfilters, and Canister filters can be used, but large, well-stocked reef tanks will require live rock and a good protein skimmer as a minimum.

When setting up a saltwater aquarium you need to try and buy the best equipment you can afford as corals require stability in the water parameters not thrive and be successful. Used equipment is a great way to get good-quality filtration for an aquarium at a fraction of the cost.

Saltwater aquariums do best when they are fitted with filters designed specifically for saltwater aquariums. As a bare minimum here is the filtration required to establish a successful saltwater aquarium:

  • Filter Floss or Filter Socks
  • Protein Skimmer
  • Live Rock or MarinePure Blocks
  • Activated Carbon

If you wish to find out more about the different types of filter media and how they work to keep a saltwater tank healthy please read this article:

What Type of Filter Do You Need For A Reef Tank?


To Finish

HOB filters are a great way to give started in saltwater aquariums and provide you size the filter correctly, fit it with a few of the upgrades and keep it maintained you will be on your way to a beautiful reef aquarium!

With time, you will probably find that it may become a lot of work and the decision to upgrade will start to rattle around in your brain. This is where most aquarists upgrade to an AIO or sump-system aquarium and then never look back.

Further Reading

If you found this article helpful please have a look at some of our other articles that go into greater detail on some of the items mentioned here.

Bryopsis Algae – These Methods Will Win The Battle!


After you have been in this hobby long enough there are times when algae will suddenly pop up in your aquarium. No matter how diligent you are about inspecting what goes into your aquarium, this junk still appears.

Hopefully, you don’t have too many algae appear, but I’m sorry to say you may get them all over the life of your aquarium! So far I’ve had almost everyone at some point! Its a pain in the rear, but knowing how to deal with it is key!

Bryopsis Algae is a very stubborn fern-like alga that can plague a saltwater aquarium. Common methods of eradication are maintained high Magnesium levels with Kent Tech-M Magnesium, Fluconazole, Hydrogen Peroxide, and Vibrant Aquarium Cleaner.

This article is how I treated my Bryopsis over 8 years ago, and since then there are some new products that are getting great reviews, so I’ve researched and added them in here too so you have ALL the options which have proven to work – It’s just hit or miss which one will work for you!

What Is Bryopsis Algae?

Bryopsis is an algae that belongs to the Family of Bryopsidaceae and within the Genus of Bryopsis, there are 138 different species. You can find more information Here at Wikipedia or Here at AlgaeBase.org

The 2 species that are most common in our aquariums are:

  • Bryopsis pennata
  • Bryopsis plumosa

But you could find yourself facing one of the other species. It does not matter so much with species you have as the eradication ways we discuss should combat the whole Family of Bryopsidaceae.

How Do You Identify Bryopsis Algae?

Bryopsis in our aquariums is characteristically given away by its Fern-Like appearance. It can start really small but it can soon spread and if left untouched you can easily have an infestation, especially if your water has high Nitrates and or Phosphates!

A Small Clump Of Bryopsis
Bryopsis Infestation – Image Source

How Do You Get Bryopsis Algae In Your Aquarium?

The two main ways that Bryopsis, and pretty much most algae enters your aquarium are Live Rock and Frag Plugs.

Live Rock

When purchasing Live Rock for your aquarium or you are receiving a piece to help seed your Dry Rock then you really need to closely inspect every piece. This can be a very difficult task but the easiest way is to do it while the rock is underwater as all algae flops over and looks the same when the rock is out of the water.

If you are buying the rock at a local store have a really good look at the rock holding tanks and if you see ANY pests or nuisance algae in it just walk away and go somewhere else. The battles you could face are not worth the cheaper rock!

Frag Plugs

This is by far the most common transportation method for nuisance algae and living pests to enter your aquarium. Very careful inspection of every frag plug you intend to put in your aquarium is needed.

If you can, remove the coral frag and glue it to a brand new plug, then dip the coral. If the coral has encrusted over the plug then scrape as much of the plug as you can with a scalpel blade to remove any possible living spores, then dip.

Non-Encrusted Coral Frag
Encrusted Coral Frags

For a more in-depth look at coral dipping see the ‘Further Reading” section at the end of this article.

Are There Ways To Eliminate Bryopsis Algae?

Some ways involve some manual labor, some ways are a chemical approach and some ways are a bacterial approach. These are really the only ways to fight Bryopsis, unless you are one of the VERY lucky ones who has a fish that eats it, but if that’s the case you probably never knew you had Bryopsis in the first place!

Manual Removal

No matter how much Bryopsis you have, the fastest way to get rid of the majority is manual removal. Pick out as much of it as you can to help thin out the herd and then this will allow one of the other methods to work better.

The more algae that is present, the more plant there is to eliminate, thus diluting the removal powers of the substance. If you have fewer algae material in the tank for the same dosage, the treatment will work far better.

High Magnesium Using Kent Tech-M Magnesium

This was the only method that worked for me all those years ago. It was slow, but with patience it worked.

“Yep its not fun to deal with and if untreated it will own your system eventually. Here is one for you. Mostly all plants (Bryopsis included) have an affinity to bind up and absorb metals, actually metals are essential for the metabolisms of plants.
The problem is that when plants threshold limits have been reached in terms of metals, the metals become an enzyme inhibitor and enzyme inhibitors, in the case of Bryopsis, is just what we are looking for.
So, the plan is to stuff that plant with as much metal as we can so it reaches its threshold. Ok, ok, metals and corals are not such a good plan…but there is an exception…our buddy, Magnesium.”

Mike O’Brien (Mojofeef) – Reef Central Forum

Here is the common dosing process:

  • Raise the Magnesium level in your water to over 1600ppm and then keep it at this level for at least several weeks until all the Bryopsis has gone
  • Raise the Magnesium by no more than 100ppm each day
  • Each time you do a water change re-dose to maintain Magnesium level above 1600ppm

To work out how much to dose based on your total aquarium volume you can use this handy calculator:
Reef Chemistry Calculator By JDieck

Things To Consider When Using Kent Tech-M:

  • Do not exceed 2000ppm
  • Do not add livestock while treating for Bryopsis
  • Remove poly filter material – known to absorb elements within Tech-M formula
  • Test regularly using quality test kits like Elos, Red Sea or Salifert
  • If the test is off the scale – dilute with 50% RO/DI water and half the reading
  • Ensure you have enough Kent Tech-M to last possibly 6 weeks
  • Continue water changes as normal but re-dose to replenish Magnesium to maintain >1600ppm
  • Monitor Specific Gravity (Salinity) closely
  • Once Bryopsis has gone continue water changes without dosing until Magnesium is back at your normal level – 1250-1350ppm
  • Use treatment at your own risk – Process is not endorsed by Kent Marine

For whatever reason, this method ONLY seems to work with the Kent Tech-M Magnesium product. No one knows why and Kent will not divulge its ingredients but there is something in their Magnesium that works.

Myself and many others tried to take the cheaper road and use the bulk Magnesium granules we regularly use, but it never worked. Only when switching to Tech-M did the Byropsis receed.

There are rumors that Kent recently changed its formula for Tech-M Magnesium and aquarists are more Hit or Miss for it working in their aquariums. Something to think about, but they are rumors!

Here is a helpful article about using Kent Tech-M Magnesium to eradicate Bryopsis on the Nano-Reef.com forum.

Fluconazole

Fluconazole is a treatment intended for fish infections and diseases but it has been found to be a great treatment for the eradication of Bryopsis.

I could go into all the details here but there is an absolutely incredible, in-depth article with day-by-day photos and Q&A by NCReefguy over on the Reef2Reef forum about how he used Fluconazole to beat his Bryopsis infestation.
Click Here to see it.

Fluconazole works by blocking the cellular paths within the cells of the Bryopsis plant.

By blocking these paths, it impedes the distribution of a sterol that is similar to Cholesterol in humans. Without this sterol, the cell walls break down and the plant dies.

Two well-reviewed & popular Fluconazole treatments are:

Reef Flux
Available Here At Amazon.com

Flux RX
Available Here At Amazon.com

Things To Consider When Using Fluconazole:

  • Fluconazole will attack the cells of Macroalgae so any Refugium/Cheato must be removed before treatment.
  • Discontinue using Activated Carbon for 72 hours
  • Discontinue using any Phosphate remover for 72 hours
  • Turn down Protein Skimmer and remove collection cup

Depending on the brand of Fluconazole you use for treatment and the size of infestation you should see results within 1-2 weeks of starting the treatment. Be sure to follow each individual manufacturer’s instructions.


For some really good information on how the eradication of Bryposis using Fluconazole was first found, please see this forum on Reef2Reef where Jose Mayo, MD from Brazil talks about his research and findings.
Click Here To See It


Hydrogen Peroxide

The underdog of fixing many problems that most people never know about. Hydrogen Peroxide is a true giant of the things it can do and one of those is beating Bryopsis in our aquariums.

The only drawback with this method is for it to truly work you need to be able to remove the infested rock from your aquarium. This can be a quick, cheap fix if you have a nano aquarium or a smaller aquarium with a minimalist aquascape.

For those of you with large aquascapes or rocks cemented together this treatment is probably one to skip.

To treat Bryopsis using Hydrogen Peroxide here is a good procedure:

  • Remove the rock and place it into a clean bucket
  • Use a blade of some form to scrape off the Byropsis – Get as much as you can into the bucket.
  • Use a syringe full of undiluted 3% Hydrogen Peroxide and spot treat all the areas.
  • Leave it to soak for 3-4 minutes
  • Rinse the rock in some clean saltwater
  • Place the rock back into the aquarium
  • Repeat with other rocks as needed

If you catch it early enough this may be the only time you have to treat using this method. Many aquarists used to treat the whole tank to Hydrogen Peroxide but it could be harsh on your Coralline Algae and coral.

The new products on the market like Flucozane and Vibrant would be my recommendation if treating the single rock did not work.

Vibrant Aquarium Cleaner

Many aquarists seem to be getting very good results from a fairly new product called Vibrant Aquarium Cleaner by Underwater Creations.

Vibrant uses multiple strains of bacteria to attack the algae from different angles. One of the bacteria strains targets the Nitrates and Phosphates that feed your algae and turn them into biomass to be removed via your Protein Skimmer or water changes.

This product is also designed to work on any problem algae, according to the manufacturer.

You can read the forum thread HERE on Reef2Reef where Jeff the owner comes on and joins in the conversation regarding it! – Cool!

“Vibrant is a true beast and we have not yet come across a algae that Vibrant can not beat out. Below I will list a general timeline of how fast Vibrant works on frequent algae strains that cause issues in reef aquariums”.

Cloudy/hazy Water– 1 dose
Diatoms – 1-2 doses
Cyanobacteria – (Yes, it will outcompete another bacteria) 1-5 doses
Dinoflagellates – 2-5 doses
Bubble algae – 3-8 doses
Hair Algae – 3-5 doses (depending on species of hair and how bad the infestation is)
Turf Algae – 8-20 doses ( again, depending on species and how bad the infestation is)
Bryopsis – 6-30 doses ( again, depending on species and how bad the infestation is)

Jeff Jacobson
Owner – Underwater Creations, Inc.

TBR Recommends

Vibrant Aquarium Cleaner comes in 8oz and 16oz bottles.


This great product is getting fantastic results and the many owners in the forums are confirming this!


To Finish

Like many of the algae’s we face in our aquariums, some of the treatments work great for one aquarist and not so well for someone else. This was the reason I wanted to give you all the proven ways to get rid of this very stubborn pest so you can try each one until you find a solution that works.

As technology advances, we are seeing more products that are getting better and easier at targeting our problem areas and helping to solve them! For Bryopisis, a single $20 purchase could now save you some serious sanity!

Algae is just a part of owning a saltwater aquarium, but early detection and eradication is going to make this hobby far more enjoyable for you!

Further Reading

If you found this helpful please be sure to check out some of our other articles all designed to help you!

Bubble Algae – Tips For Effortless Removal & Eradication!


You have been looking at your aquarium and you see a shiny pea-looking thing growing on your rocks. You think it looks cool and let it be. Diversity right! Then, next time you look there are a few more. Weeks later you are overrun with green peas! Now what!?

This was my introduction to Bubble Algae and I was very lucky because it almost caused my aquarium to over flow! I had been battling this stuff for months and one evening I lifted my aquarium canopy to feed my fish and my water was about to brim over the tank!

Bubble algae had grown (unknowingly) in the drain pipe to my sump and impeded its flow. More water was coming into my aquarium than was draining away!

What Is Bubble Algae?

Bubble Algae is a saltwater alga that grows in spherical or elongated shapes resembling bubbles. Bubble algae reproduce fast and bursting the bubbles may release spores that increase the reproduction rate and make it harder to remove. Emerald Crabs & Foxface Rabbitfish eat Bubble Algae.

Bubble algae are a single-celled organism found in every ocean in the world and gets its name from the Green Bubble that it creates. It can range in color from light green to dark green with every shade in between.

Lighting and the size of the bubble will affect its coloration. It can be found as just one bubble or an elongated tube but can rapidly spread to outbreak proportions.

Spherical & Elongated Bubble Algae – Image Source

As the Bubble Algae spread in an aquarium, they can overtake corals, prevent pumps from turning and, like in my case, block pipes and cause overflows!

There are many, types of bubble algae that the aquarist may face but the most common is of the Genus Valonia and within that are 10 species according to AlgaeBase.org.

Some of the bubbles, if left to grow can reach very large diameters, which may appear interesting but are a disaster waiting to go off.

Where Does Bubble Algae Come From In An Aquarium?

Bubble algae is typically introduced into an aquarium via spores hiding on live rock or coral frag plugs. If these items have come from an aquarium containing Bubble Algae it is the most common method of transmission. Inspecting the live rock and frag plugs are paramount to prevent transmission.

When purchasing your Live Rock it can be very, very difficult to inspect every nook and cranny of every rock you place in your aquarium so diligent and close inspection is your first line of defense when looking at Live Rock. If ANY of the rock in the storage tank has ANY pests or nuisance algae growing then walk away! It is just not worth it!

One aquarist called ReeferAl on the forum, Reef Central conducted an experiment and left some Bubble Algae in complete darkness for 9 months and it was still alive and kicking, so algae hiding in deep holes in the Live Rock could be a possibility!

One way to avoid this possible entry is to start your aquascape with nothing but Dry Rock. This is what I did, for exact reasons like this, to prevent hitchhikers, but alas, Bubble Algae still found its way in – via a frag plug!

Richards Reef Dry Rock
My Reef With Dry Rock – Day 1

Frag plugs – They are also one of the biggest transportation means for pests and nuisance algae. I battled Bubble Algae, Aiptasia, and Bryopsis because of frag plugs!

When I first got into keeping corals I gave my new frags a visual inspection and dipped them, but apparently, this was not enough! It wasn’t until I did further research that I found this was where all my problems were coming from.

At this point, I changed how I now introduce new frags of coral to my system. I’ll cover my process later in the article.

Algae on Purchased Frag Plug = Bad Idea!

What Eats Bubble Algae?

Mithrax (Emerald Crabs) & Foxface Rabbitfish are the biggest eaters of Bubble Algae. Mithrax crabs will not be able to eradicate an infestation but are good for prevention. Foxface Rabbitfish will easily clear an infestation providing it can reach all the algae and your tank is big enough for them.

These are the two most efficient methods, but there are so many methods and they can ALL be hit or miss. Some have worked great for one person but then fail miserably for the next person.

Bubble Algae removal is purely a journey of trial and error, but unfortunately, it is going to be a battle, especially if you have a tank under 75 gallons!, as that it the smallest size tank a Foxface Rabbitfish can be housed in.

By far the best way to remove Bubble Algae is to remove the first bubble the second you see it. By catching it early you can hopefully prevent it spreading. By removing just one bubble each time you are in your tank you may remain lucky.

My Reef Overrun With Bubble Algae

Do Not Burst The Bubbles! – This seems to be a general consensus within the hobby as bursting the bubble releases spores which allow the algae to spread and take hold in another part of your aquarium.

No matter how deep I have researched, I have never been able to dig up any scientific data to back this up. Any animal that eats the algae will burst the bubble!

Another theory is by getting the bubble while it is still young it has not had time to reach reproduction maturity – again no data to validate. But the best way to get them is to manually remove the whole bubble and as much of the stork as you can without popping it. A sharp flat blade screwdriver works well.

Below is a list of some of the animals that have worked great for others.

Emerald/Mithrax Crabs

Mithrax sculptus

The female Emerald crab seems to have had better success in the hobby with removing Bubble Algae. They seem to be less distracted – Go Figure 😉

Be sure to keep an eye on any Emerald Crabs you buy as they have been known to prey on corals and sometimes small fish. If you see any aggression – Remove them.

Mithrax Crab
Get The Females

Foxface Rabbitfish

Siganus vulpinus

The Foxface Rabbitfish was what demolished my Bubble Algae outbreak.

You do require an aquarium of at least 75 gallons for these guys with lots of swimming space.

They can be hit or miss.

Tangs

Tangs are also a hit or miss fish. They are herbivores and some have mowed Bubble Algae like it’s their last meal, while others will not even look at it.

The main problem with using Tangs is they require large aquariums! You may be able to come to an arrangement with your local fish store to ‘Loan a Juvenile’. This is not something I only recommend as a very LAST RESORT, it could be the only thing to help you eradicate this algae.

Just be sure to return it and be very careful with stressing the Tangs as they are really prone to Ich!

Here is a selection of Tangs that have been proven to work in their owner’s aquariums throughout the forums. Again Hit or Miss for others!

Vlamingi Tang
Naso vlamingii

Image Source
Min Tank Size = 150 Gal

Convict Tang
Acanthurus triostegus

Image Source
Min Tank Size = 90 Gal

Desjardinii Sailfin Tang
Zebrasoma desjardinii

Image Source
Min Tank Size = 50 Gal

Achilles Tang
Acanthurus achilles

Image Source
MIn Tank Size = 100 Gal

Powder Brown Tang
Acanthurus japonicus

Image Source
Min Tank Size = 120 Gal

Purple Tang
Zebrasoma xanthurum

Image Source
Min Tank Size = 100 Gal

Naso Tang
Naso Elegans

Image Source
Min Tank Size = 130 Gal

Sohal Tang
Acanthurus sohal

Image Source
Min Tank Size = 150 Gal

For a great selection of these fish and Emerald Crabs please check them out
Here At Saltwaterfish.com

How To Get Rid of Bubble Algae?

There are 3 ways to get rid of Bubble Algae – Manually removing it, using Mithrax Crabs, Foxface Rabbitfish, or some Tangs, or by using Vibrant Aquarium Cleaner. Depending on your aquarium size and the severity of the infestation one or all of these methods may be required.

Vibrant Aquarium Cleaner

Many aquarists seem to be getting very good results from a fairly new product called Vibrant Aquarium Cleaner by Underwater Creations.

Vibrant uses multiple strains of bacteria to attack the algae from different angles. One of the bacteria strains targets the Nitrates and Phosphates that feed your algae and turn them into biomass to be removed via your Protein Skimmer or water changes.

This product is also designed to work on any problem algae, according to the manufacturer.

You can read the forum thread HERE on Reef2Reef where Jeff the owner comes on and joins in the conversation regarding it! – Cool!

“Vibrant is a true beast and we have not yet come across a algae that Vibrant can not beat out. Below I will list a general timeline of how fast Vibrant works on frequent algae strains that cause issues in reef aquariums”.

Cloudy/hazy Water– 1 dose
Diatoms – 1-2 doses
Cyanobacteria – (Yes, it will outcompete another bacteria) 1-5 doses
Dinoflagellates – 2-5 doses
Bubble algae – 3-8 doses
Hair Algae – 3-5 doses (depending on species of hair and how bad the infestation is)
Turf Algae – 8-20 doses ( again, depending on species and how bad the infestation is)
Bryopsis – 6-30 doses ( again, depending on species and how bad the infestation is)

Jeff Jacobson
Owner – Underwater Creations, Inc.

TBR Recommends

Vibrant Aquarium Cleaner comes in 8oz and 16oz bottles.


This great product is getting fantastic results and the many owners in the forums are confirming this!


Manual Removal

Failing any of the methods above your last option is manual removal. When you first notice a bubble this is how you need to remove it, but if you have a serious infestation then your arms are going to be in your aquarium, ALOT!

The trick to manual removal is to try and remove the bubbles without bursting them. The smaller they are the harder they are to burst.

One technique is to grab the bubble with your fingers and pull it off with as much of the root as you can. Many aquarists use a small piece of PVC hose to drain tank water into a bucket to suck up any removed bubbles or spores released from an accidental puncture.

For more stubborn bubbles, a flat-bladed screwdriver works well to prize them off the rock, then to scrape the area of the root and suck up the debris.

This method is going to take some serious effort and commitment, but over time your Bubble Algae infestation should diminish.

Are There Ways To Prevent Bubble Algae Returning?

Now that you have some ideas on possible ways to remove bubble algae we need to also look at ways to prevent it coming back! If you have spent the last 4 months diligently removing it by hand and it returns, it could push you over the edge to shut down your aquarium – That is something we cannot allow to happen!

Ways to prevent Bubble Algae from returning are to diligently inspect and quarantine any new frags or pieces of live rock, install a refugium and keep nitrate & phosphate low to remove its food sources and install an RO/DI water filter to prevent the introduction of its food sources.

Here are a few things to look into:

Nitrates & Phosphates

Nitrates and Phosphates are a primary food source for all plant life, including algae. By keeping these two parameters low you are helping to starve any algae before it has time to take hold.

Frequent water changes, good maintenance, minimal feeding, and minimal stocking all help to keep N & P low in your aquarium.

If you would like more info on Nitrate and Phosphate see these articles:

Install a Refugium

A refugium is an area dedicated to growing beneficial algae out of sight of the main display tank. You can convert an area of your sump or purchase a Hang-On-Back refugium to create this space.

In Sump Refugium
In-Sump Refugium

Filling the refugium with an algae called Cheatomorpha or ‘Cheato’ for short will out-compete your nuisance algae for all the nutrients they need to grow.

For more information on Refugiums and a device called an Algae Turf Scrubber see here:

Install an RO/DI Water Filter

The water you put into your aquarium is going to be one of the biggest factors to how much algae you fight, not just Bubble Algae, but all algae types!

The water you initially fill your aquarium with, do water changes with, and the water you use to top off for evaporation needs to be the highest purity you can get.

To do that I highly recommend you spend $100-$200 on an RO/DI water filter BEFORE you even purchase your aquarium!

RO/DI stands for Reverse Osmosis/De-Inoised Water and it is as clean as you can get. The system connects to your faucet and filters your water.

Marine Depot 4 Stage Advanced RO/DI System
A Typical 4 Stage RO/DI Water Filter
Find a Great One Here at Amazon.com

Water that comes out of your house tap can be full of Nitrates, Phosphates, Copper, heavy metals, odors, and other pollutants. City or well water will fuel algae in your aquarium.

For more information on RO/DI Water Filters see here:

Inspect/Replace Frag Plugs

Earlier you saw a picture of a coral frag with algae growing off the frag plug – This is one of the surefire ways to get an algae outbreak in your aquarium.

If you are able, remove the frag from the plug and super glue it to a brand-new frag plug. This will help keep your aquarium sterile. If the coral has encrusted over the plug then cut off the shaft of the frag plug with a pair of side cutters and scrape every piece of ceramic you can with a scalpel blade to remove any possible algae spores coming into your tank.

Then move on to dipping…

Diligent Coral Dipping

This is more to prevent the introduction of live pests into your aquarium, but as part of the coral introduction process, it is needed, especially with the step above.

Coral dipping is for another article that gives more in-depth information. You can find it here:

Quarantine The Frag

This is a great way to easily monitor any new coral and help keep it away from your rock to give you time to see if anything grows off it, other than the coral frag itself.

Using a magnetic frag rack like the one above, or even better, placing the frag in a frag tank will allow you to closely monitor each coral for 1-2 weeks to ensure nothing grows off it.

Keeping the new frags out of the way will help prevent any spread of algae and give you time to react and remove it if anything is found.

If you wish to know more about setting up a super simple Quarantine tank see here:

Quick Removal

Nipping the first signs of nuisance algae in the bud is the best defense you can employ to keep your aquarium in pristine order. Do some research into all the common types of algae you may come across in your aquarium so you can spot an intruder straight away.

Get it removed, get the area scraped/cleaned and monitor to ensure nothing else begins to grow.

To Finish

Unfortunately, even with the most diligent attention, Bubble Algae can make it into your aquarium. By far the best action to take is preventative measures, but if you do find some, get it out as soon as you can, failing that, get some animals to take care of it, or look at trying out Vibrant.

Darn, I wish I still had some Bubble Algae left as I would love to try it! I guess I’m going to have to find a fellow reefer who has some algae and do some tests!

Can Mollies Live In A Saltwater Aquarium? Yes!


You may have just heard about this myth or you have been in a local saltwater fish store and seen Mollies swimming alongside Nemo, and yes, it is true. Mollies can be adapted to living in saltwater aquariums!

Mollies naturally live in brackish waters where rivers and oceans meet. Sailfin Mollies can be easily transitioned to saltwater from freshwater by a slow, drip acclimation of a period of at least 3-4 hours. Mollies are livebearing fish that are easy to find, keep, inexpensive and small.

If you want to find out how to get Mollies acclimated to your aquarium please keep reading!

Why Put Mollies In A Saltwater Aquarium?

Mollies are very poplar in freshwater because they are colorful, can have nice patterns and they are cheap to purchase.

To a beginner to saltwater the high prices of saltwater fish, compared to the few dollars they may have been used to in the freshwater world, can be daunting.

A trial by using Mollies AFTER your aquarium has fully cycled could be the confidence boost you may be looking for. If you find it takes you 6 months to get all this water parameter stuff figured out and you lose a pair of mollies, then your bank balance takes less of a hit than if you lost a pair of Clownfish!

The other reason you may be wanting to add Mollies to your aquarium is for their beauty or as a talking point with visitors to your aquarium!

Hey, Bill! Is that a Molly in your saltwater aquarium?” You may find that as ‘Reef Nerds’, any chance you get to talk about your tank and fish is welcomed – I know my wife just rolls her eyes and walks away when I start talking ‘Nerd’ with our guests!

What Are The Best Type of Mollies For Saltwater Aquariums?

Over the years many people have tried and successfully kept Mollies in a saltwater aquarium but there is a pattern of two certain species that seem to survive the best.

The two species that you want to look for are:

1. Poecilia latipinna – Sailfin Molly

2. Poecilia velifera – Giant Sailfin Molly

Are There Benefits of Adding Mollies To Saltwater Aquariums?

Apart from the diversity Mollies bring to your aquarium there are several other benefits they have to offer:

Cost

As stated earlier for those of you on a tight budget but are dreaming of setting up just a small saltwater aquarium, then Mollies can make a perfect choice.

They can cost only several dollars each and can be housed in Nano aquariums without any trouble.

You can find a whole plethora of Mollies Here at LiveAquarium.com starting at only $1.99ea. By searching out your local fish store you will easily be able to find some nice specimens to acquire.

Color & Pattern

Generally speaking, the coloration and patterning of saltwater fish are one of the many reasons why aquarist makes the move to saltwater from freshwater.

But, some of the colors and patterns the Mollies have to offer can look incredible under the intense lighting we have in our reef tanks. The blue and UV spectrum can really turn a drab looking Mollie into one of the most spectacular fish you may have ever seen!

Great Algae Eaters

Mollies are awesome algae eaters and will spend the majority of their day cruising around the tank picking at algae. They are perfect for smaller aquariums or even frag tanks to help keep any nuisance algae at bay when the tank is too small for a Lawnmower Blenny or Tang.

This is the main reason why I first tried acclimating a pair of Mollies! It was to look after the algae in my 8 gallon frag tank. They did an awesome job and for $5 they were a bargain!

My Frag Tank

Easy Breeders – Free Food

Mollies breed really easy in the home aquarium and yours can be no different. Once they are happy and settled and you have a Male and a Female they almost aways become a mated pair and will regularly produce live fry.

When you are in the fish store the easiest was to tell is by looking at the anal fin as shown in the diagram above. By purchasing a Molly of each sex it should not be too long before they mate.

But why do you want them to mate? Two Words – Free Food!

Mollies are live-bearers and a female can give birth to anywhere from 6 -200 fry in any one go, and they can keep reproducing every 28 days. This means that free, live, nutritious food can be constantly given to your tank.

How Do You Acclimate Mollies To Saltwater Aquariums?

If you have been perusing the fish forums before finding this post you will have probably seen a dozen different ways to transition Mollies from freshwater to saltwater.

They probably range from just dumping them straight into a saltwater tank to very slowly acclimating them over a period of several weeks – All with varying degrees of success.

The Sailfin and Giant Sailfin Mollies have been recommended as these have seemed to be the hardiest and they are the only ones I have been able to successfully transition.

One of the most popular ways to acclimate your new mollies is as follows:

Step #1 Get All Your Supplies

You will need:

  • A clean 5 gallon bucket – Used salt buckets are great for this or head to your local hardware store and pick up a new one. Give it a good wash with warm water and white vinegar and rinse well. This will remove any of the mold release agents that were used during its manufacture
  • A length of airline hose
  • A small 5-10 Watt heater – set to the temperature of your aquarium – Usually 78°F
  • Some old towels
  • A fish net

Step #2 – Place Your Fish Into The Bucket

Empty the fish into the clean bucket with all the water from their bag. Then dispose of the transport bag.

Step #3 – Place Heater

Most acclimation procedures don’t usually require the use of a heater but because you are going to be very slowly acclimating these fish the water will soon drop to the surrounding ambient room temperature without a heater.

Step #4 – Secure the Airline

Insert one end of the airline under the water surface of your aquarium and secure it so that it will not fall out in a few hour’s time. Ensure the airline is not pinched or the water will not flow.

Step #5 – Set The Drip Rate

Suck on the other end of the airline and get the water moving. Be sure to remove the airline from your mouth before the saltwater reaches you 😉
Tie a not in the airline. The tighter the know the slower the drip rate.

You want to aim for 2 drips/second. Secure the end into the fish bucket.

Drip Accliamtion
A Typical Drip Acclimation Setup

Step #6 – Turn Off ATO System

Because you are removing water from the Aquarium it is important to turn off your Automatic Top-Off System if you have one fitted. This will prevent it from replacing the withdrawn saltwater with freshwater and messing up the salinity of the aquarium.

Step #7 – Prepare New Water

If your aquarium is only a small nano aquarium then removing 2-3 gallons of water from it could be a lot. Now is the time to make up some new saltwater to add to your aquarium once the acclimation is finished.

Ensure it is matched for temperature and salinity.

Step #8 – Remove Water

After the drip has been running for an hour remove half the water volume from the bucket and dispose. Repeat this process every 30 min until the water in the bucket is the same salinity as your aquarium.

This process should take 3-4 hours. Adjust the drip rate to suit.

Step #9 – Quarantine – If You Can!

As a beginner, you will probably not have a quarantine tank setup. I highly recommend you have a read of my Quarantine Tank Setup article in the ‘Further Reading’ section later in this post.

You can set up a simple quarantine tank for around $50 and it can save your aquarium from contracting a devastating illness or disease.

If you have a quarantine tank the following steps are adding to your QT tank, not your aquarium.

Step #10 – Prepare Your Aquarium

Now is a good time to turn off the aquarium lights to allow your new additions to be able to hide in the shadows if they wish.

Ensure the bucket temperature and salinity match your aquarium.

Maybe add a very small sprinkle of food at the opposite end of the aquarium to distract the fish already in the tank.

Use the net to scoop up each Molly and gently add them to your aquarium.

Step #11 – Replace Water

Now is the time to top your water back up in your aquarium for the water that was removed during the acclimation procedure. Remember this is where your prepared SALTWATER is used to bring the water level back up to normal running height.

DO NOT forget to turn your ATO System back on!

Step #12 – Monitor

It is best to leave the lights off for the rest of the day to allow your new fish to settle in their new home. They do not need to be fed as your tank has been fed and this could only cause distress as feeding time is always chaotic.

Keep an eye out for signs of distress and heavy breathing and if a fish dies be sure to remove it straight away and dispose of it.

Other than that, enjoy your new additions!

To Finish

Adding Mollies is a fun addition to your aquarium and they are great for being your ‘Childrens Fish’.
Depending on the quality of the Mollies you purchased it may require you to have a couple of tries before being successful.

Keep at it and your patience will pay off!

Further Reading

If you found this helpful may I suggest some of our other articles to help you:

Pods In A Saltwater Aquarium? What The Heck Are They?


Very early in my reef tank journey, I remember leaving very early one morning to go on vacation. My tank was only about 1 year old and as I put on the lights to the living room I noticed all these things scurrying around inside my aquarium.

Panic set-in! Here I was, just about to go on vacation and my aquarium was infested! Thank goodness for Google! It was at that point I leaned all about Microfauna and Pods!

Pods are a generic term for microscopic organisms that live in your saltwater aquarium. Mostly seen at night, they are Microfauna that are made up of species of Copepods, Amphipods, Rotifers, and Phytoplankton. They eat detritus, algae, keep the sandbed aerated and become food for livestock.

Having Pods in your aquarium is a great addition and they really benefit your tank in many ways. Read on to find out why…

What Are Pods?

Pods are microscopic animals that live in both freshwater and saltwater environments. The many types of Microfauna found in our hobby are great additions to your aquarium as they play a key role in several areas:

  1. They Feed On Algae – Even though these guys are microscopic, the numbers they can populate to can provide an army that feeds on your algae. They play a great role in helping keep algae to a minimum.
  2. They Feed On Detritus – All that uneaten food and fish poop that falls into the inaccessible nooks and crannies and gets stirred into your sandbed is a smorgasbord for Pods. Crawling around your rocks and sandbed these critters help keep Detritus under control.
  3. They Are Food For Your Inhabitants – Pods come in a range of sizes that all fit into varying mouth sizes. As your pods float around in the water column or are found by your fish, snails, and crabs they get eaten. Corals will also benefit from them and help keep them fat and colorful!

Are There Different Types Of Pods?

The majority of Pods found in our aquariums fall under a few common species. Ranging in size there is something for every mouth:

Copepods ( Click to find out more at Amazon.com ) – These critters are by far the most common in our aquariums. They range from 0.2mm up to 10mm and there are 1000’s of species.
Copepods are great for consuming plant matter, decaying fish waste and nuisance algae such as diatoms.

They also get eaten by your inhabitants and a healthy Pod population is an absolute must if you wish to keep Mandarin Dragonets. It is usually all they eat and they consume Pods at a rate of one every 5 seconds, if they can find them!

Copepod
Mandarin Dragonette

Amphipods ( Click to find out more at Amazon.com ) – Amphipods in your aquarium are the prawn-like creatures that grow up to about 10mm. These guys also feed on algae and detritus and help to reduce Nitrates. These are a good meaty meal for any passer-by, they breed fast and are a great addition to your Pod community!

Amphipod

Rotifers ( Click to find out more at Amazon.com ) – Rotifers are one of the tiniest critters you may find in your tank. At 0.5mm in length, they will appear as tiny specs of dust, but they are working! Their diet of dead and decaying matter makes them a super janitor in all those microscopic places in your aquarium system.

Rotifers

Phytoplankton (Click to find out more at Amazon.com ) – This species of Macrofauna is made up of simple celled plant life on a microscopic level. Because they are plant-based they photosynthesize so they consume Carbon Dioxide and expel Oxygen when subjected to light. They are fed on by the organisms listed above as well as filter-feeding corals within your aquarium.

Phytoplankton

How Did Pods Get Into My Reef Tank?

As your aquarium begins to mature after is Nitrogen Cycle you may begin to see Pods scurrying around, especially at night.

It takes Pods approximately 4-6 weeks to grow large enough to be seen by the naked eye and anywhere from 4-6 months to multiply to numbers where you can begin to notice them.

If you have never added any though, how did they get in your tank?

There are a few ways they can enter into your aquarium:

  • They were already in the sand if you purchase a Live Sand product like CaribSea Arag-Alive
  • They came in as hitchhikers on a coral frag
  • They were already populating the Live Rock you purchased
  • They were living on the Live Rock you used to seed your purchased Dry Rock.

No matter how they got there, you have a really good diverse, janitorial team that will keep multiplying and supplying your inhabitants with free food! Congratulations!

What Are Refugiums & Pod Condos?

What the heck are those?

Depending on the size of your aquarium and the livestock you have in it, or plan to put in it your Pod population can be decimated by a ‘Pod Every 5 Seconds Eating Machine’ like a Mandarin Dragonet!

The key is to find a balance between a constant supply of food being available to your inhabitants but keeping enough alive to look after the janitorial tasks in your aquarium.

This is where a Refugium or Pod Condo comes into play.

Refugiums

A refugium is just as it sounds – A Refuge. They are an area separated from the inhabitants of your aquarium that you can grow Macroalgae like Cheatomorpha (Cheato for short) that helps to consume algae causing compounds like Nitrates and Phosphates, but they also provide an area for safety for your pods to multiply.

In Sump Refugium
In Sump Refugium

As the water flows through the refugium the pods are picked up and transported into your main display tank where they will either stay hidden and survive or get eaten.

If you have a sump, you can section off an area to become a refugium or if you have an All-In-One aquarium then you can purchase a Hang-On type refugium.

Pod Hotel/Condo’s

These are similar to Refugiums but are exclusively used just to provide a safe haven for Pods to multiply in. They are a great alternative to those who are limited to space and do not want an ugly refugium hanging off the side of their stylish AIO aquarium.

You can find these Pod Hotels Here at Amazon.com

Another alternative if space is really at a premium is to make your own DIY Pod Condo. There are many results from a Google search and they are really simple.

Some plastic mesh, some dry rock rubble, and a few Zip-ties are all you need!

Do Livestock Eat Copepods?

For those of you looking to see if any of the fish you have will eat them or which fish predominantly feed on Pods here is a list:

Filter Feeding Corals – Clams, LPS, SPS
Sea Horses
Mandarin Dragonets – Pods are mostly the only thing they eat!
Blennies
Wrasse’s
Pretty much most fish that see one, will eat one!

Where Can You Buy Pods & Phytoplankton For Your Aquarium?

Now you have learned all about Pods you may want to seed your own aquarium, especially if it has just come out of its Nitrogen Cycle. Seeding in the early months of your aquarium’s life will give the Pods a chance to get established and begin to multiply into vast numbers before they begin to get picked off.

There are some really good Seeding Starter Kits available that include a variety of different Pods and in a variety of physical sizes. Here are two really popular ones:

There are many, many great places to buy live Pods and Phyto and your first option would be to ask at your local fish store. Failing that, one of the easiest places online is Amazon.com.

Click the link below to take you to a great selection, with lots of information and reviews:

Click Here for Pods at Amazon.com

To Finish

Pods of all species are a great asset to your saltwater aquarium and by establishing a healthy Pod population in your aquarium it will really be beneficial. Not only to your biological filter but also to your coral and livestock by providing them with free food!

No matter if your tank is new or if it is a few years old, if you cannot see any pods scurrying around when you shine in a flashlight at night I really recommend you get some and add them in!

Further Reading

If you found this helpful I really recommend you take a look at some of our other articles you may like to read: