RECENT ARTICLES

How To Cycle Your New Reef Tank: Your Step-By-Step Guide


Starting a new saltwater aquarium is a very exciting time however, the start of many saltwater aquariums is often rushed by new aquarists and this can lead to their favorite fish dying in a matter of days. Just like building a new home getting the foundation right is key and the Nitrogen Cycle is the foundation on which your new aquarium will build.

Allowing the aquarium to fully cycle is paramount to ensure that when livestock is added the eco-system is ready and able to deal with the waste the new additions will produce.

The Aquarium Cycle is a 4 step process where nitrifying bacteria multiply, consume & process harmful ammonia & nitrite toxins in the water, and convert them to less harmful nitrates. Most Reef Tank Cycles take 2 – 8 weeks depending on tank volume. Bacteria culture products can help reduce this time.

Patience is the key to first setting up an aquarium and the larger the aquarium the longer this cycle can take. By allowing mother nature to ‘Do Her Thing’ with your new aquarium it will ensure that the livestock you add in the future will be moving into a healthy home.


Imagine the Nitrogen Cycle like a new home you have just purchased but the paint that was used to paint the entire house was toxic. Would you move your family in right away and live in a toxic environment, or would you wait 2 months for the paint to become safe and then move in?


Why Do Aquariums Cycle?

An aquarium is a small enclosed ecosystem that needs to naturally balance to survive. Nature provides nitrifying bacteria to consume and process organic waste into harmless elements but these bacteria need to balance the waste produced. The bacteria multiply naturally to help provide this balance.

As soon as any livestock is added to an aquarium and begin to produce waste the nitrogen cycle begins. It is a natural process that automatically occurs and is constantly ongoing. The problems lie when people begin to add livestock before the aquarium has completed its first cycle to grow and establish its baseline population of nitrifying bacteria.

During the nitrogen cycle high levels of nitrite and ammonia will stress and kill any fish as these elements are toxic.

What Is The Aquarium Nitrogen Cycle?

The nitrogen cycle is a natural four-stage process that takes place both in nature and in your aquarium to prevent high levels of toxins from accumulating in the water. It is constantly taking place on a small scale each time you add food or livestock, but the main cycle takes place when the aquarium is first set up.

During the nitrogen cycle nitrifying bacteria consume organic waste and convert it into nitrite, then ammonia, then nitrate, and finally nitrogen. Nitrate and nitrogen are less toxic to fish and can be controlled via water changes, feeding, and stocking levels.

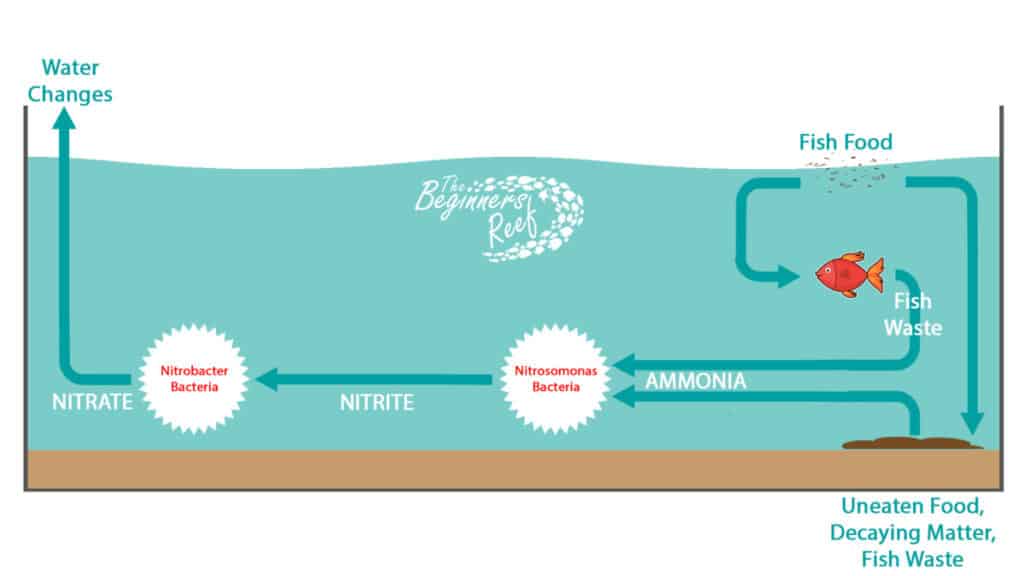
Stage 1 – Creating Ammonia

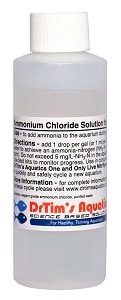
For the cycle to begin, a supply of Ammonia needs to be present. The main ways ammonia get produced in an aquarium are from:

  • Livestock going to the bathroom
  • Uneaten food breaking down & decaying
  • Fish waste breaking down & decaying
  • Dead animals and plants breaking down & decaying

Ammonia is the first stage in the nitrogen cycle and Ammonia is highly toxic to aquatic livestock and any amount is enough to kill your prized additions.

Stage 2 – Converting Ammonia to Nitrite

To rid the water of ammonia, mother nature has created a strain of bacteria called Nitrosomonas Bacteria that feed on ammonia. As this strain of bacteria consumes ammonia they convert it into Nitrite.

Nitrite though is still highly toxic to aquatic livestock.

Stage 3 – Converting Nitrite to Nitrate

The third stage of the Nitrogen Cycle is to deal with the toxic nitrite and a second strain of bacteria called Nitrobacter Bacteria automatically begin to multiply when nitrite starts to show up in the water.

Just like Stage Two, this bacteria consume nitrite and convert it to the safer compound of Nitrate.

Nitrite & Nitrate sound very similar – All you have to remember is that NITRITE is toxic and NITRATE is harmless, but only in low levels.

Stage 4 – Controlling Nitrate

Now that the water has been rid of toxic ammonia and nitrite, as the owner of the aquarium, we all need to control nitrates to keep the levels low enough that can be tolerated by the fish and livestock.

The best ways to control nitrate from reaching toxic levels is by regular maintenance:

  • Regular water changes using high quality source water
  • Using a Turkey Baster to blast trapped debris from the rocks
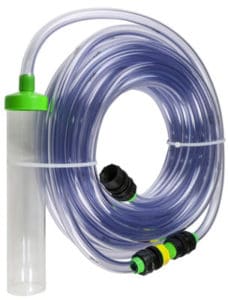
  • Cleaning all the sand bed using a gravel vacuum
  • Overfeeding prevention
  • Adequate fish stocking levels

Without you controlling and exporting nitrates the amount can slowly build over time which could begin to reach toxic levels to your fish.

Now that we understand (hopefully) the process that is about to begin in your new aquarium we need to be able to monitor each stage to track the progress to be able to see when the cycle is complete and it is safe to begin adding livestock.

How Do You Monitor An Aquarium Nitrogen Cycle?

Each stage in the cycle is easy to monitor and it can vary on how long it takes, but the process is the same in every aquarium cycle:

Ammonia

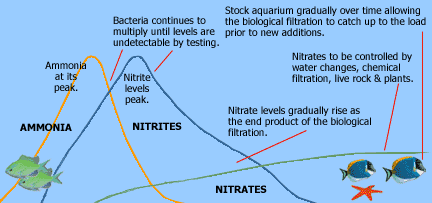
The first stage in the Nitrogen Cycle is the rise in ammonia. You can see in the diagram that the ammonia will rise then drop as the Nitrosomonas Bacteria multiply to sufficient levels and begin consuming and converting the ammonia to nitrite.

This stage can take from a few days to 2-3 weeks depending on the size of the aquarium and the amount of ammonia needing to be processed. It needs to be monitored every 2-3 days with a good quality Ammonia Test Kit.

The best kits I have been using for years and recommend are from Salifert. This Ammonia Test kit will give you easy, accurate results to allow you to test and track the rise and fall of the ammonia spike.

This test kit can be used for both Freshwater & Saltwater aquariums.

Salifert-Ammonia-Test-Kit

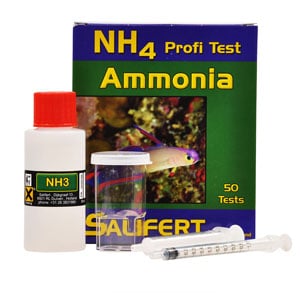
You can find Salifert the Ammonia Test Kit HERE at Amazon.com.

Nitrite

A few days after the ammonia begins to rise you will need to start testing for Nitrite. As the ammonia begins to get processed you will begin to see the nitrite level start to rise. Eventually, you will see the ammonia level fall to zero as the nitrite level begins to peak. This is the Nitrosomonas Bacteria converting all the ammonia into nitrite.

Just like ammonia, nitrite will need to be tested for every couple of days to track its progress too.

This Salifert Nitrite Test Kit can be used for both Freshwater & Saltwater aquariums.

Salifert-Nitrite-Test-Kit

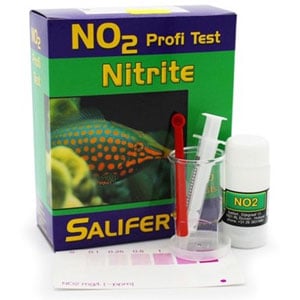
You can find Salifert the Nitrite Test Kit HERE at Amazon.com.

Nitrate

As the second strain of bacteria (Nitrobacter Bacteria) begin to multiply and consume the nitrites you will slowly start to see this level begin to rise. Once the nitrites drop to zero and you have some level of nitrate you can now begin to do regular water changes to help maintain nitrate at low levels.

Just as with other tests, the Salifert kit is the one I recommend and can be used to test both Freshwater and Saltwater Aquariums.

This test is able to test both low and high ranges of nitrate making it great for both the initial cycle and then regular monitoring of nitrate as your fish stocking levels increase.

Salifert-Nitrate-Test-Kit

You can find the Salifert Nitrate Test Kit HERE at Amazon.com.

When Is The Aquarium Cycle Complete?

The main question everyone wants to know is when is the cycle complete and when can you begin to add fish??

An aquarium cycle is complete once both ammonia and nitrite have risen, peaked, and then fallen to zero, and then nitrate has begun to rise. At this point, you can complete a 25% water change and begin to slowly add new fish to the aquarium. Testing with quality test kits is used to track the cycle.

Managing the Aquarium Bioload

The main thing every new aquarist needs to understand is that each time you add another fish to the aquarium both the Nitrosomonas and Nitrobacter bacteria needs time to multiply to numbers adequate enough to process the addition in bioload.

The bioload or Biological Load is the waste the bacteria have to process. The more waste, the more the bioload, and the more quantities of bacteria are needed to process the load.

Overstocked Marine Aquarium

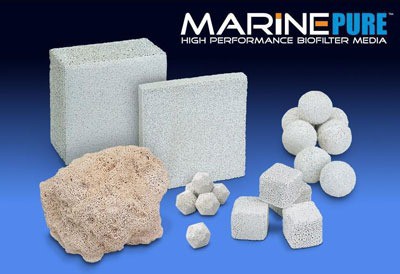
Your filter media, rock, and substrate that will house the majority of your bacteria are always trying to find an equilibrium. Bacteria need food and without food, they stop multiplying.

Think of it like going to a music festival. If 100,000 people show up and the organizers have only installed 20 portable toilets it is going to get messy!

But if the first day 10,000 people show up and the organizers bring in 200 toilets, then the next day another 10,000 join the party and another 200 toilets show up, the bioload of the music lovers will be matched.

This is what happens in your aquarium. This is why you hear many times to add livestock a few at a time and leave at least 1-2 weeks between each addition. Take it slow!

This gives your bacteria time to multiply to sufficient levels to match the bioload and reach the equilibrium. If you try and add too many fish in one go, the existing bacteria cannot cope and then you will being to see rises in ammonia, nitrite, and nitrate.

Remember all are toxic to fish when they reach the following thresholds:

ToxinFreshwater Saltwater
Ammonia>0 ppm>0 ppm
Nitrite
>0 ppm>0 ppm
Nitrate>50ppm>5ppm
ppm – Parts Per Million

As you can see any rise in ammonia or nitrite is going to instantly begin to distress your fish and death will shortly follow.

The best ways to manage the bioload is the following:

  • Regular water changes using high quality source water
  • Using a Turkey Baster to blast trapped debris from the rocks
  • Regular cleaning of the substrate using a gravel vacuum
  • Prevent overfeeding
  • Staggered introduction of fish
  • Adequate fish stocking levels

How To Cycle An Aquarium: Step-By-Step

Because the Nitrogen Cycle is one of the most important steps to a healthy, successful aquarium it goes without saying that getting it off to the right start is paramount. Below is my tried and tested, step-by-step method that I use myself whenever I set up a new aquarium or advise people when they are setting up theirs.

The steps are the same no matter if you have a freshwater aquarium or a saltwater aquarium, just make sure you have the salt in the water if its a marine tank!

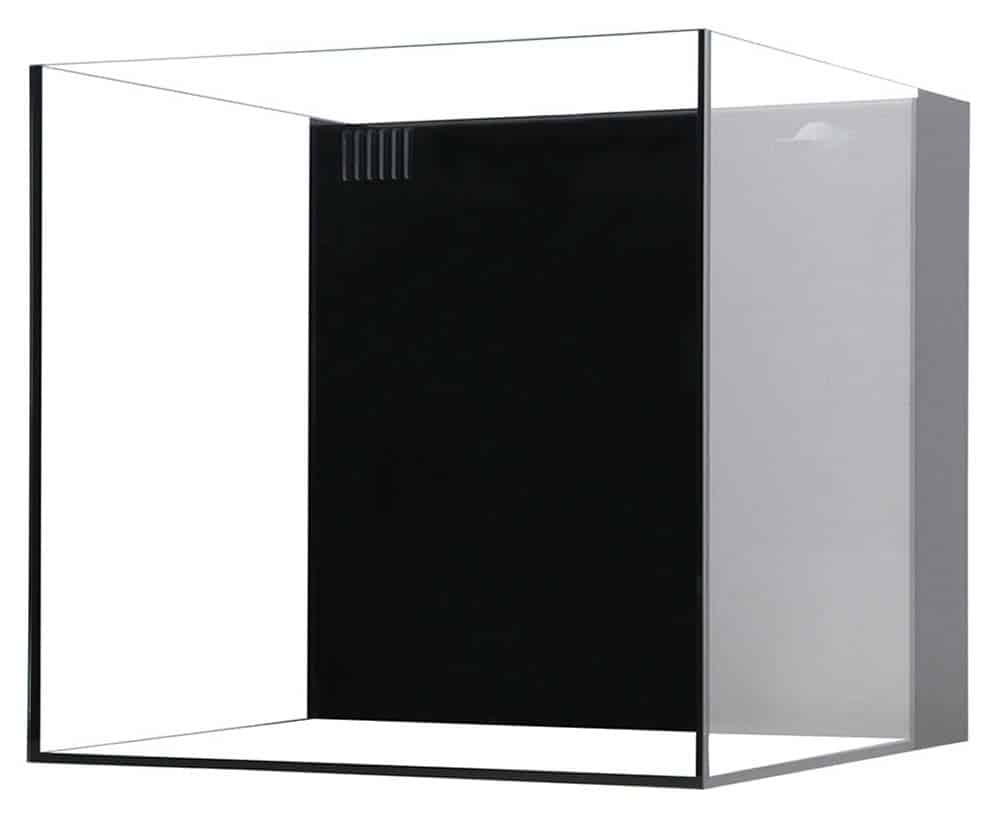
Step 1 – Install Aquarium

Get the aquarium installed, leveled and all the plumbing and lighting installed. After this step, there should be nothing you need to do to create a mess around the tank.

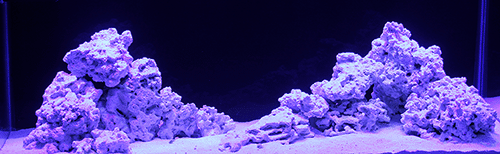
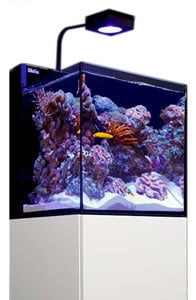
Step 2 – Install Aquascape

Depending on the type of aquarium you are setting up now is the time to get all the stuff into the tank that is going to create the habitat for your livestock.

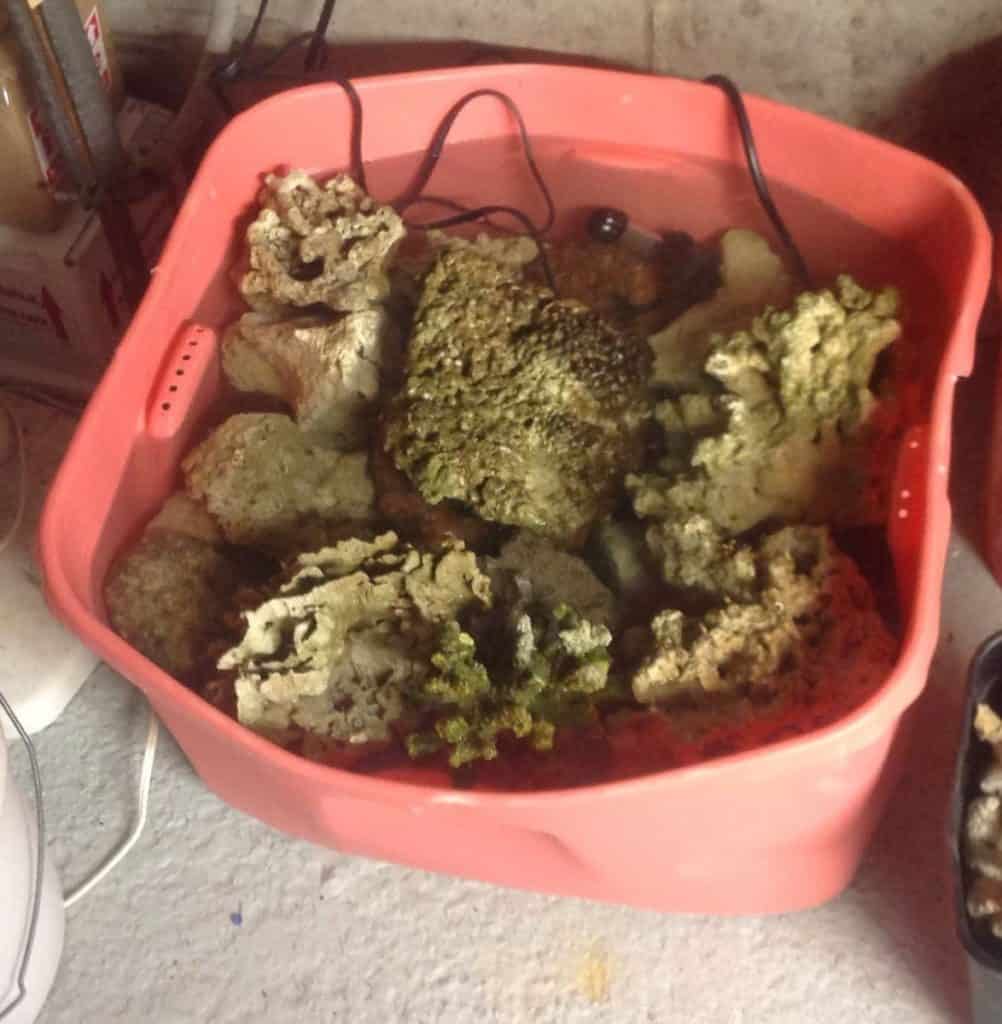
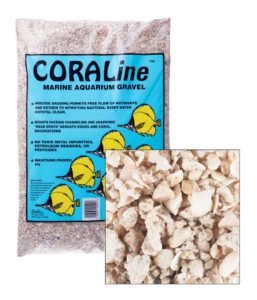
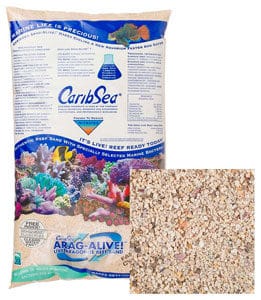
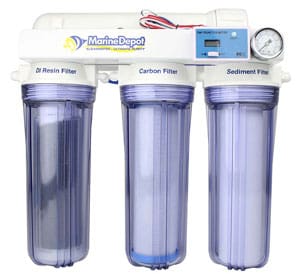
This will include your rock and sand if its a marine tank, your gravel, and ornaments if its a tropical freshwater. Whatever you put in just be sure to give it all a really good rinse in a bucket or bin of clean RO/DI (Reverse Osmosis/De-Ionised) water – See Further Reading section of this article for more info.

Step 3 – Prepare water

If you have a saltwater aquarium now is the time to get the salt mixed into the RO/DI water in separate bins and get it up to temperature and mixed with a powerhead.

Marine Depot 4 Stage Advanced RO/DI System
RO/DI Water Filter – One of your Best Investments!
Find Them Here at Amazon.com

NOTE – This may take a few hours to prepare your water depending on how many gallons you need. It is not advisable to put cold freshwater in the tank then add the salt because if you have used Live Rock & Live Sand then you will kill all the bacteria and goodness living in it!

If this a freshwater tank get the water ready in a bin or get your RO/DI unit hose attached to the tank to prepare for filling.

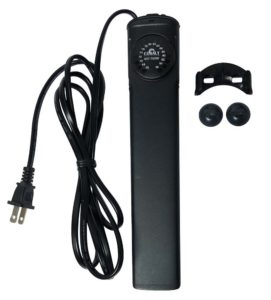
Step 5 – Install Heaters, Pumps & Filters

Now is the time to mount all the life support equipment into the aquarium and ensure they are secure and ready for when the water begins to get added. Get all the cables neatly tucked away and ensure Drip-Loops are added to protect you from any potential water running down the cords.

Do not turn on the equipment yet. If it runs without water around it the unit will fail!

Step 6 – Add Water & Start Life Support

Once your water is ready it is now time to begin adding it to the aquarium. Be careful to add it slowly, to begin with so you create less of a dust storm from the sediment that remains in the substrate – Your water will be cloudy for a few days no matter how well you pre-rinse it!

Adding a dinner plate to the substrate then aiming the house onto it will help evenly disperse the water.

Once the water has covered each life support unit (heater/powerhead etc), you can turn it on. The idea is to get the water moving and keep it heated during the fill. Get the filter pumps turned on to help remove the suspended debris in the water.

Here is where I recommend you let the filters clear the water of the debris and then move onto Step 7. Dr. Tim will explain why in the video you will come to shortly!

Once the mechanical filter has removed the debris, remove it, clean it, and place it back into the filter to get ready for the cycling process.


Beginner Tip

NEVER wash your filter media (sponges, ceramic pieces, carbon etc) under the faucet. This will kill the nitrifying bacterin colonized on them. When doing a water changer empty some old tank water into a bucket then wash/shake/rinse the filter media in this bucket to remove detritus and debris. Then place the media back into the filter system. This will ensure the bacteria remain alive to continue keeping your water pristine!


Step 7 – Add Starter Culture

Gone are the days when we use fish to start an aquarium off on its nitrogen cycle. It is cruel to the fish and if you add Damselfish to an empty aquarium because they are hardy, I can tell you know you WILL be ripping your aquarium apart in 6 months to try and remove those monsters! – Trust Me!

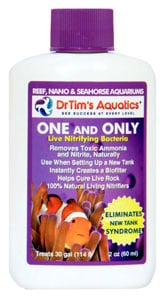
The easiest, fastest, and most beneficial way to start an aquarium cycle is by using a starter culture purposely designed to get the cycle done fast – although we are still talking weeks!

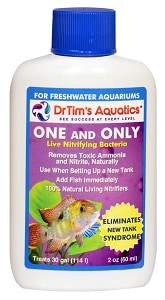
The best and most recommended product to use is Dr. Tims One & Only. This is available for both freshwater and saltwater aquariums and is an incredible product. It is simple to use and if you follow the instructions your aquarium will cycle in no time and you will have a healthy bacteria foundation on which your tank can grow.

Here is a video of Dr. Tim himself talking about it in a saltwater aquarium but the freshwater version is the same:

You can find both versions below at Amazon.com

Step 8 – Start Testing

The only way to track the progress of your aquariums cycle is to begin testing every day or two. Not only will this help you follow its progress but will also allow you to become familiar with how to test your water. Testing your water will be a weekly part of your aquarium maintenance and testing correctly to get accurate results is the only way to ensure your aquarium remains healthy.

For the first few weeks all I monitor is the following:

  • Temperature
  • Salinity – Saltwater Tanks Only
  • PH – Saltwater Tanks Only
  • Ammonia
  • Nitrite

Once you begin to see nitrite increasing I then also begin to track nitrate.

After ammonia and nitrite have dropped to zero and have remained there for a week there is no need to further test for them.

Step 9 – Results Tracking

My 75 gallon reef aquarium took around 7 weeks to cycle and after a few weeks, you can forget where you are in the cycle so it is really important to note every parameter you test for so you can see when the rise and falls are happening for each compound.

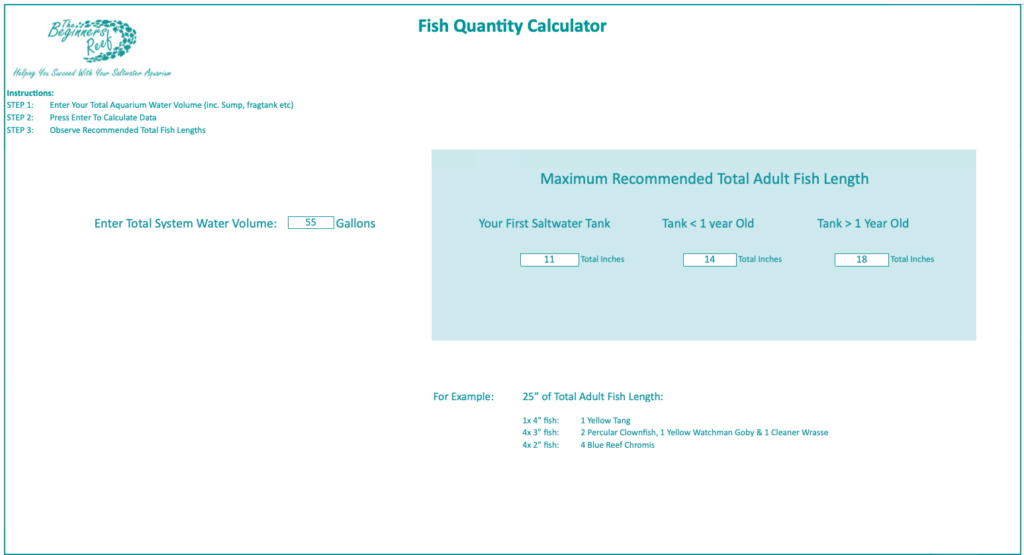
This way you can then see your cycle is progressing nicely and has not stalled or something went wrong. The best way to track these results is by using a journal or using this FREE tool I made for you.

Just enter the values you receive from your test kit into the respective column and then you can see the progress in the table or by using the handy graph!

Cycle-Tracker

Step 10 – Water Change

Once your tracking shows that you have had both the ammonia and nitrite rise and then fall to zero and your nitrates have started to rise, as explained earlier, its now time to do a 25% water change.

Monitor your levels for a further week and once ammonia and nitrite remain at zero and nitrate is <30ppm then its time to go and get your first fish!

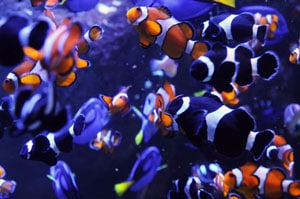
How To Add Your First Fish To An Aquarium?

This is by far THE most exciting time for a new aquarium owner and if you have followed my advice in the article your new additions will be feeling at home in no time.

Clownfish Are Popular First Additions

One of the best things you can do while your new aquarium is cycling is to create a fish stocking list. This is a list of which fish you CAN have in your size of the aquarium and prepare a list based on aggression. Least aggressive added first, most aggressive added last.

Start with the least aggressive and hardiest fish first and purchase no more than 2-3 fish at a time. Remember each time you add fish your bacteria has to multiply to handle the increased bioload.

After 1-2 weeks you can add another 1-2 fish. The slower and more patient you are in adding your livestock, them healthier your aquarium will be. Fish can become very expensive and then the last thing you need is to find it ‘Belly Up’ in the tank the next morning!

Additional Aquarium Cycling Methods

If you have owned an aquarium in the past you may remember a different way of cycling an aquarium and there are a few methods to get the cycle started. Here are some of the most popular ways to cycle an aquarium:
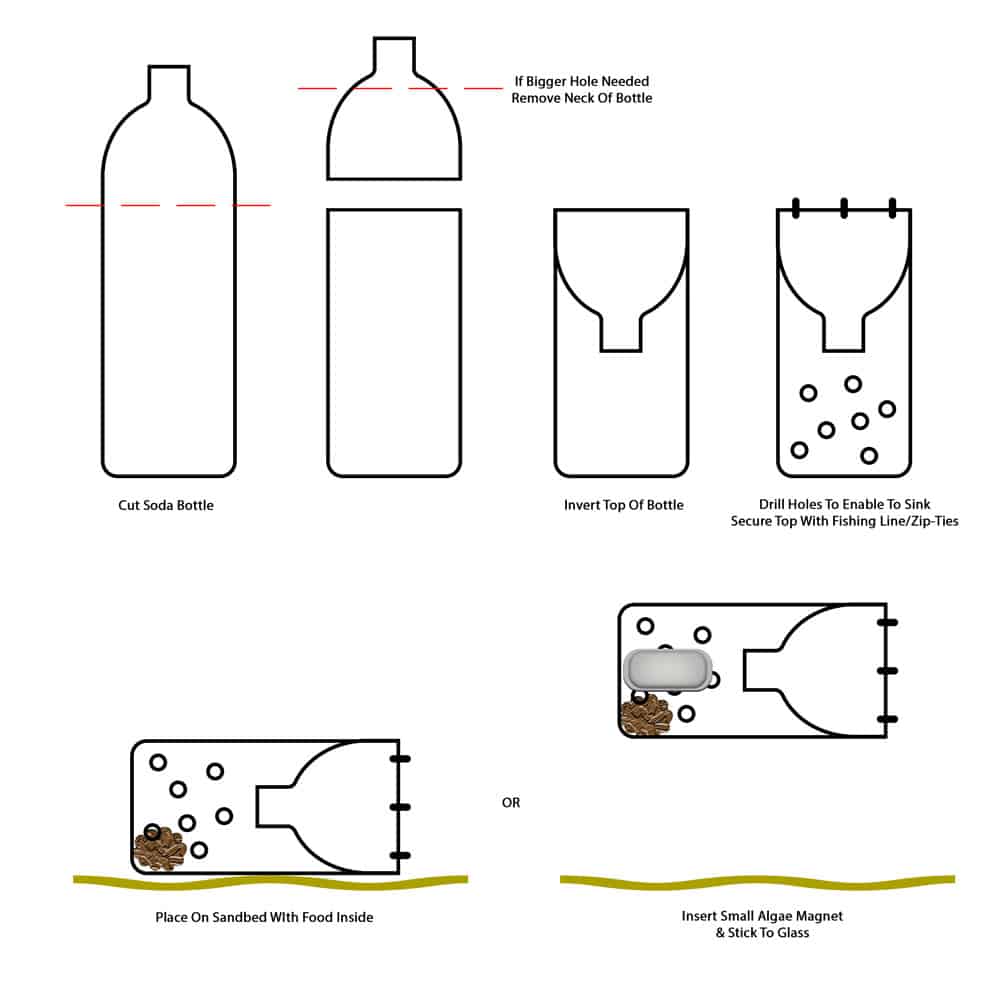
Fish Food Method

To get the first source of ammonia required to kick start the nitrogen cycle you begin to add food to the aquarium just like you had fish in there. I mentioned earlier that overfeeding allow uneaten food to accumulate on the substrate and begin to break down and release ammonia.

This is a simple way to begin the cycle but will require you to feed every day and monitor the progress. It can be slow but the main problem is that your aquarium will become covered in uneaten food before you even start adding fish!

Over time this sandbed can dramatically increase your nitrate levels because of the amount of decaying material in there.

Rotting Method

When I first set up my current 75 gallon reef it was way before I had even heard of Culture starter kits! I wanted my new reef to be as sterile and pest-free as it could be so I created the aquascape using Dry Rock and I dropped in a raw prawn from the grocery store and allowed it to rot and decay.

My Cycle at Day One

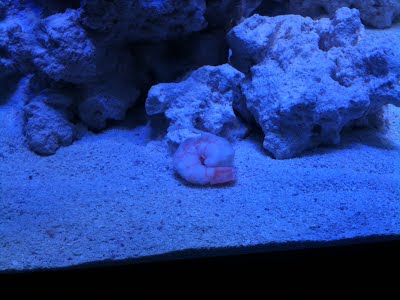
After a month I removed the remains of the prawn and allowed the bacteria to colonize naturally.

This worked well however it was a slow process (7 weeks). If I had used a starter culture like Dr. Tims One and Only that cycle time could have been halved, but way back then I had never heard of a ‘Starter Culture’!

Hardy Fish Method

This has been one of the Tried and True methods used for decades but as an advocate for animals, I have to advise against this method.

As mentioned earlier, ammonia and nitrite are highly toxic to fish and any amounts of this begin to attack the cells in an animal leading to a painful death.

This method of cycling involves adding 2-3 hardy fish straight after filling the tank with water. By feeding them they will add waste to the water and hence the ammonia will begin to build.

Not only is this cruel to the fish, it wastes money if they die and if do they survive they will not be healthy fish living in your aquarium. Fish that are not in peak condition can allow diseases and infections to run riot in an aquarium and affect other fish.

The other problem with this method is aggression. If you cycle using hardy fish like Damselfish or Oscars for example (depending on the water type) they will claim the entire tank as their territory. Any fish which you then try to add will most likely be bullied to death. I see this over and over again and trying to catch these fish can be very stressful!

To find out more on these little monsters please check out this article:

Damselfish: Are They Really That Aggressive?

Yellow Tail Damselfish – Hardy But Mean!

Cycling using fish is NOT recommended for many reasons!

Filter Seeding Method

Filter seeding is when you take filter media that has been on an established aquarium and set it to run in your new aquarium. The nitrifying bacteria that have colonized the filter media will then spread throughout your new aquarium but you need to provide them with an ammonia source.

Some people will add one or two hardy fish and use a culture starter.

With this method ensure your water matches the aquarium the filter media is coming from. PH, temperature, and salinity (If its a marine tank) all need to match to ensure the bacteria do not die from a dramatic difference in water parameters.

Another thing you have to ensure with this method is introducing pests and nuisance algae from the mature established tank. If the tank that is seeding your filter is full of algae and pests and the owner does not maintain pristine conditions then I would stay away from this method.

Battling nuisance algae because you did not want to spend $15 on a starter culture is a decision you will come to regret!

To Finish

The nitrogen cycle is one of the most important steps for any new aquarium and one that should not be overlooked. By allowing mother nature to build a solid foundation in your biological filtration your fish will be able to live a happy, healthy life for many years to come.

By skipping this essential process and adding fish right into the tank at day one is a sure-fire way to ensure many fish fatalities and a lot of wasted money – Not only that, the look on your child’s face when their new friend is lying dead in the tank!

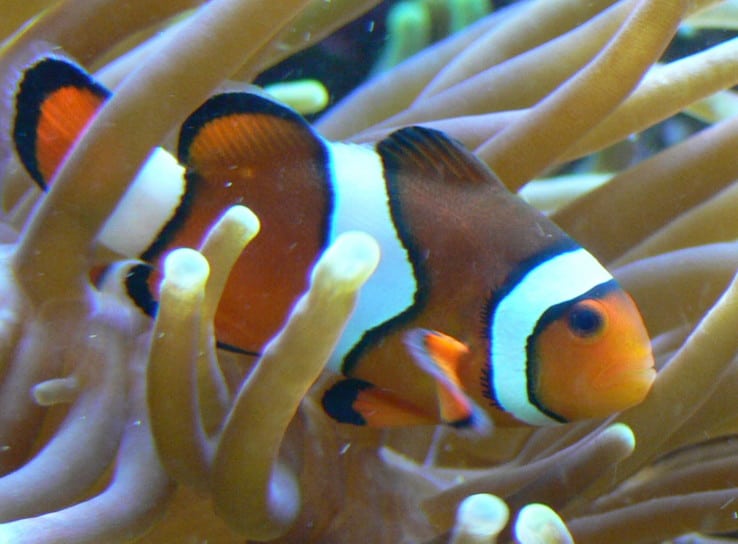
A few months of patience will allow the new additions to your family to do what they do best – Provide a stunning showpiece for your home!

Further Reading

If you would like more information to help you increase your knowledge in this area I highly recommend our following articles:

Live Rock For a Reef Tank – All You Need To Know!


Live Rock is something you will eventually come across as you begin your research into a saltwater aquarium, but what the heck is it? How can rock be alive?

Live Rock is a very beneficial addition to any reef aquarium. It provides large surface areas for Nitrifying Bacteria to colonize & multiply, allows natural food sources to grow and provides shelter for livestock. Using live rock also provides a natural framework for aquascaping and mounting coral.

What makes this stuff seem to be so important in a reef aquarium and why do so many tanks seem to use it? These are all valid questions that will be answered right here!

What Is Live Rock?

Live Rock, in its basic form, is ocean rock and dead coral skeletons that once formed part of a natural coral reef. During storms, these rocks, and dead coral skeletons were washed towards the shore where they begin to receive light from the sun in the shallow water.

This light then encouraged the natural growth of marine invertebrates, organisms, corals, sponges, algae, and bacteria. This ‘Live’ or ‘Rock With Living Things On It’, is then harvested and sent to the stores for use in our hobby.

Live Rock Header
Live Rock

So, in essence, the rock is covered in living organisms that essentially make the rock live. The skeleton of each piece is dead, but its crust is living.

What Is Live Rock Used For?

There are several main reasons why we use it in our reef tanks but by far the main purpose is to provide enormous surface area for Nitrifying Bacteria to colonize and mulitply.

This Nitrifying Bacteria is what forms the backbone of your aquarium’s natural biological filter. Without live rock, in your aquarium, you would have to provide different media for this bacteria to colonize. By using live rock we get the natural look of the reef, provide the aquascape to mount our corals to and give the beneficial bacteria a home.

As well as the main benefits just mentioned here are an abundance of benefits to using live rock in our tanks:

What Are The Benefits of Using Live Rock In A Reef Aquarium?

  • Live Rock was once part of a living coral reef. As it leaches into your water it will return the building blocks used by the coral skeletons back into your water to be consumed by your own coral. This also helps stabilize the Ph of your water.
  • Your live rock is full of diverse marine life, when added to your aquarium it will provide a solid foundation on the rest of your reef to build on.
  • The majority of live rock is very, very porous and this provides massive surface area for your beneficial Nitrosomonas and Nitrobacter Bacteria to colonize to process the harmful Nitrite and Ammonia in your water.
  • Using live rock greatly reduces the time it will take your aquarium to cycle as it is already full of Nitrifying bacteria.
  • Good quality, pre-cured live rock will ensure the minimal amount of pests will enter your aquarium.
  • The many types of rock, sizes, and shapes available give you endless flexibility to create the beautiful aquascape of your choice.
  • Live rock is a natural home to many fish in the wild and it instantly helps to settle new fish that have been wild-caught when they are introduced to your aquarium.
  • Clever use and positioning of live rock can create spaces of lower flow and lower light for corals that require this habitat – A bit of foresight and planning is all that is required.
  • Live rock can help to reduce many of the pest algae that will show up in the early months of a new aquarium. By containing marine algae and organisms they can outcompete any nuisance algae trying to get established.
  • Live rock is a far better biological filter than any product you can purchase for your aquarium.
  • Coralline algae will quickly spread from live rock to other parts of your aquarium giving it a natural look far quicker than a tank without it.
  • Small amounts of live rock can be used to quickly seed dead or dry rock if required.
  • Many facilities now culture their own live rock to reduce the amount removed from the oceans – We all have to do our part on conserving this beautiful planet of ours!
  • To go one step further, you can now purchase ‘Man-Made’ live rock where the rock is man-made but it’s then sat in the ocean or a mature holding facility to allow the marine organisms to colonize each piece.
  • Live rock is available in pretty much every saltwater fish store – Just research its quality before buying!

Even though there are many great benefits to using live rock there are some drawbacks you need to be aware of to help prevent some possible tough times in the future of your aquarium!

Are There Drawbacks of Using Live Rock In A Reef Tank?

  • Uncured live rock can introduce large amounts of ammonia, nitrite, and phosphate into your aquarium that can quickly kill all your livestock – More on curing later!
  • Live rock can introduce many pests hiding deep within it into your aquarium like:
    • Mantis Shrimp
    • Bobbit/Eunice Worms
    • Fireworms
    • Bristleworms
    • Nuisance Algae
    • Aiptasia/Mejanos
  • The quality of live rock is very wide – Use only reputable sources.
  • Wild-Cultured live rock is damaging to the natural eco-system.
  • Live rock is far more expensive compared to dry rock.
  • Live rock has to be kept wet, this increases its shipping weight, thus its shipping cost.
  • Adding un-cured liverock into an established aquarium can cause a tank crash due to the organism die-off that always occurs when live rock is moved from tank to tank. Any air exposure increases the die-off.

As you can see there are many benefits of using live rock compared to its drawbacks, and many of those can be avoided with a small amount of due diligence during your sourcing and purchase.

What is Uncured Live Rock?

This term un-cured refers to rock that has been moved from point A to point B without any form of acclimation.

As I briefly mentioned, when live rock is exposed to air or moved to a foreign body of water, organisms within and on the rock begin to die. As this death occurs they will naturally begin to decay and break down at which point they begin to release toxic ammonia, nitrite, and phosphates into the surrounding water.

Depending on the amount of die-off, the amount of the toxic elements released can be minimal to completely overwhelming. Allowing this die-off to occur in your aquarium will guarantee that you will begin to lose livestock!

How Do You Cure Your Own Live Rock?

This is a simple process and by doing this you are in effect ‘Acclimating’ your new rock to your aquarium. To begin you will need the following items:

  • Container or bin/s with lid’s large enough to house all your purchased rock
  • Small powerhead for each bin to keep the water circulating to prevent dead spots
  • Small heater for each bin set to the same temperature as your aquarium
  • Good quality Ammonia & Nitrite Test kits – I use Salifert
  • Good Quality Salt Mix Granules – I use Instant Ocean
  • Good Quality RO/DI water to fill the container/s
  • Toothbrush
  • Googles
  • Latex Gloves

The process to cure the live rock is really simple:

  • Don your safety glasses, and gloves
  • Inspect all your pieces of live rock, inspecting for pests, nuisance algae, or dead organisms. Black patches are usually a dead animal
  • Scrub the dead pieces and remove any pest you can find
  • Rinse in clean RO/DI water
  • Place each rock in the container/bin
  • Fill with clean, freshly mixed saltwater at 1.025 SG
  • Insert the powerhead and ensure good water circulation throughout
  • Insert the heater and set to 78-82°F
  • Cover with lids and leave for 1 week
  • Check ammonia and Nitrite readings after 1 week
  • If ammonia >5ppm do a 100% water change
  • Repeat until both your ammonia and nitrate are zero
  • This process can take between 1 week to several months to complete!
  • You can now add the rock to your aquarium

No matter what you have heard or read NEVER boil live rock to cure it! This could lead you to Palytoxin Poisoning which in rare circumstances can be fatal!

I suggest you have a read of my article of Palytoxin Poisoning so you are aware of it:
Palytoxin Poisoning – Click Here

How Do You Select Good Live Rock?

There are several things you can do to avoid having to cure your own rock and select the highest quality live rock to ensure your aquarium remains as pest free as possible:

  • Thoroughly inspect the holding facility you are purchasing your live rock from. If you can see pests and nuisance algae in the tanks – Walk Away!
  • If you are buying the live rock from an online supplier seek out reviews from previous customers via a google search
  • Look at prices per pound and shipping costs – driving to inspect and pick up your own rock may be a safer alternative.
  • If purchasing from a fellow reefer try and inspect the tank before it is sold to you – Again, any pests or nuisance algae – Walk Away.
  • If you are ever unsure about the rock, cure it and quarantine it before actually starting your tank – Running the rock in a bare tank for two months to see and remove any hitchhikers is far easier than tearing down a beautiful reef in 3 years to catch a Bobbit worm!
    • Click Here for a scary forum story on a Bobbit Worm!
Aiptasia Aquarium Pest Coral

To Finish

Live rock is the backbone of your aquarium’s biological filtration and no matter if you are planning a Fish-Only aquarium or a full-blown reef tank your aquascape should be using this rock!

With careful selection and a small amount of due diligence, you can soon have a stunning piece of the world’s coral reef in your home or office with minimal problems!

For those who wish to really begin their aquariums journey in a sterile manner then Dry Rock is an option. This is how I began mine, it just takes longer to cycle and mature!

Richards Reef Dry Rock
My Reef With Dry Rock – Day 1

Further Reading

To help you in your learning journey you may find the following articles helpful:

This is How Many Fish You Can Keep in a Reef Tank!


This is one of the most popular questions for a beginner in this hobby. We all want as many fish as we can put in our aquariums, but we know that if we have too many they will begin to die – So what’s the formula?

For a new saltwater aquarium, the general rule of thumb is 1″ of fully matured fish for every 3-5 gallons of tank volume. The bigger the aquarium, the more fish you can have due to the higher quantities of nitrifying bacteria processing the bio-load. A 50G tank can house 10-16″ of fully-grown fish.

A good Rule-of-Thumb for a new, unmatured reef tank is:

Aquarium Size Max Number of FishTypical Number of Fish
10 Gallons3″3x 1″ fish
15 Gallons5″4x 1″ fish
20 Gallons7″2x 2″ fish
30 Gallons10″4x 2″ fish
55 Gallons18″1x 4″ fish
4x 2″ fish
75 Gallons25″1x 6″ fish
8x 2″ fish
120 Gallons40″2x 6″ fish
2x 4″ fish
6x 2″ fish
150 Gallons50″3x 6″ fish
3x 4″ fish
7x 2″ fish
  • If this is your first saltwater aquarium:
    I would use 1″ of fully-grown fish per 5 gallons
  • If your aquarium is mature and you have some experience:
    I would use up to 1″ of fully-grown fish per 3 gallons

This ‘Total Inches’ rule of thumb can be split across many fish or you could have just one fish, but you have to consider the environment the fish will live in rather than how many you can put in there.

There are many factors that influence an aquarium’s stocking level and just because your friends seem to have a stocked aquarium does not mean you can – Yet!

For Example:
Would you be more comfortable being on a train when every person has a seat, the air conditioning is nice and it’s a pleasant ride home.
Or
Would you be more comfortable on the same train when it’s standing room only, the air conditioning has broken, it’s the end of the workday and its 100°F?

Let’s take a look at the many factors you have to consider when stocking your aquarium:

Reef Tank Fish Stocking Calculator

If you would like to use a super simple calculator to determine your exact fish stocking needs download your free copy here:

What Influences Fish Stocking Level in a Reef Tank?

The number of fish that can be placed into an aquarium and thrive is based on aquarium maturity, bio-load, water temperature, water flow, filtration, swimming space, hiding space, the types of fish you wish to keep, and the compatibility of the fish you wish to keep.

1. Aquarium Age

The maturity of your aquarium is going to play a huge factor in how many fish it can support. When your aquarium is new there are a few things to be aware of:

  • It has not grown the Nitrifying Bacteria to enough numbers to process the waste
  • It will go through algae blooms that will increase the waste load and consume oxygen
  • You as a new owner may not have the experience to keep your water parameters stable
  • You may not have had enough time to learn how your tank naturally operates and where its parameters settle
  • Your maintenance routine may not be regular enough yet
Richards Reef Dry Rock
A Very New Aquarium – Not Adequate For A High Bio-Load

Just like any job or situation in our lives, we get better the more we do it and the longer we do it. This is called experience. Your aquarium is no different and as your experience grows, your aquarium matures, and as you understand it better you will be able to keep more livestock in it.

By understanding it better you will be able to tell when the maintenance needs to be improved or when something is not quite right and needs attention.

2. Bio-Load

Bio-Load or Biological Load is the amount of waste created by every living organism in your aquarium. This waste has to be removed, treated, or converted by your 3 filtration types in your aquarium.

  1. Mechanical Filtration – This physically removes large particulate waste from the water – Protein Skimmers, filter socks, floss, and sponges do this.
  2. Chemical Filtration – This chemically absorbs or converts pollutants, elements or odors within the water – Activated carbon, GFO, Bio-Pellets do this.
  3. Biological Filtration – This is bacteria that consume and convert the toxic elements in the water into safer elements – This is the nitrifying bacteria that cover every surface in the aquarium (with time).

The more waste put into the water, the more the filtration has to process. Most of the waste is a culmination of uneaten food, dead and decaying matter, and animal excrement.

When your biological filtration is new it has not had time to grow enough bacteria to process the waste. It needs time to grow every time you add a new fish to your aquarium – Hence why you never add lots of fish in one go.

Your aquarium needs to reach a balance of bio-load and bacteria to process it. When your bio-load overwhelms your bacteria this is when you get high Ammonia, Nitrite & Nitrates usually leading to fish and or coral death.

3. Water Temperature

Although you may not realize this but water temperature plays a huge role in how much oxygen it can store. The warmer the temperature, the less oxygen it can hold.

Oxygen can be depleted rapidly if you have a high bio-load and then your water temperature is allowed to rise, especially in summer.

The dissolved oxygen capability of water at 78°F is 8.4mg/L
The dissolved oxygen capability of water at 82°F is 8.0mg/L

This may not seem very much but if your bio-load is already high and your Dissolved Oxygen is just enough to support your current inhabitants, any rise in temperature could begin to affect your fish and create a rapidly declining chain of events.

4. Water Flow

High, random, and chaotic water flow is paramount in a saltwater aquarium, even more so when you begin to add corals. Water flow is what keeps the detritus and waste suspended in the water and prevents it from settling on corals, in holes in the rock, on your sandbed etc.

Gyre Wavemaker Flow Patterns

When the waste is suspended in the water column it is able to pass through to the filtration to be processed. If it is left to settle in the aquarium it can do several things:

  1. Detritus settling on coral can burn the corals’ tissue
  2. Detritus left in holes or on the sandbed will begin to decay and break down. This will raise your Ammonia, Nitrate & Phosphate

Water flow in a reef tank needs to be at least 20x the total water volume.

What this means is the water moving around INSIDE your aquarium needs to be:

___Total Flow Rate of ALL Wavemakers & Powerheads___
Total Volume of Aquarium (& Sump, Refugium if fitted)

eg:
Total Water Volume = 60 Gallons
2 Wave Makers = 750 Gallons Per Hour each = 1500gph

1500 / 60 = 25x Water Flow Turnover – This is an adequate starting point for flow.

You may have noticed I have not included the return pump in this equation. That is because the flow through your filtration and/or sump needs to be alot slower. The flowrate through your sump needs to match the flowrate of your Protein Skimmer to allow it to work most efficiently.

To increase flow rate turnover in your aquarium you add powerheads and wavemakers, not increase the size of the return pump!

A high water flow inside the aquarium gets the waste TO the filtration.
A slow flow rate THROUGH the filtration allows the waste to be processed.

For Example:

You want the ‘Check-In’ line at the airport to move as fast as possible, but you want the check-in agent to be methodical and accurate in checking you in so you don’t get your luggage lost or you get given the wrong boarding passes 😉


If you would like more information on the various types of pumps for aquariums please read this article:

Aquarium Pumps – What To Use & Where


5. Adequate Filtration

Adequate of anything is important in life and your filtration is no different. Having enough Nitrifying Bacteria to constantly process waste is the point every aquarium needs to at to maintain equilibrium.

However, you can only fit so much bacteria in a given space. Bacteria live on surfaces in your aquarium, once all those surfaces are covered you can no longer grow any more bacteria. If you now add more fish, you need more bacteria, but there is nowhere for it to grow.

There are ways in which you can provide more space and they will be covered later in this article.

The main focus of this section is you need to be aware that there is a point where you cannot physically get any more cleaning power out of your aquarium.

You will notice when you have reached this point if, with regular maintenance, water changes and testing your Ammonia, Nitrate, and Phosphate continue to rise. At this point, you are overstocked with fish or you need to increase your filtration media.

6. Swimming Space

Researching your intended fish purchases is something that I cannot stress enough! Spending 10 minutes looking into the requirements, and compatibility of your new fish is paramount to its health.

Swimming space can be an important factor in the fish you have or want. Many fish are natural long-distance swimmers in the wild and require open water to be able to flex their muscles.

This is one of the reasons why Tangs, especially Hippo Tangs become stressed in small aquariums. Tangs, Butterflies, Angels, Triggers, and Anthias all require open space to inhabit the water column where they would naturally. Remember you are trying to create a natural part of the world’s coral reefs in your home.

Designing an open aquascape can be done, but you need to have a plan of the type of fish you want to keep before you even set your tank up. I knew I wanted a Yellow Tang in my 75 gallon reef so I created an aquascape to allow him to swim in the strong current.

My Reef Aquarium
My Reef Aquarium

Allowing a fish to become stressed is a surefire way to get an illness like Ich to show its head and spread to every fish in your tank! If you have a small tank, you need small fish that sit more than swim!

7. Hiding Space

Every fish you add to your tank needs a home. When a fish is startled or threatened you can see it will bolt to a secure spot. Every fish needs to have a safe spot.

The way you craft your Live Rock aquascape needs to provide hidey holes for every sized fish. Small tanks with small fish are easy, but as your aquarium gets bigger, so do your fish. Again, a plan of what fish you want to add will help create the perfect environment for them.

8. Types of Fish

As a beginner, there are many fish that you cannot have, especially if you have a small aquarium. Many fish require very specific feeding or habitat needs, and many will just grow too large for your aquarium.

The best way to find great fish for a beginner is to have a look at the two articles listed in the ‘Further Reading’ section at the end of this article.

The second way to check if a fish is right for you is to look at an online fish supplier like Saltwaterfish.com. Each fish listing shows the requirements you need to meet as well as the minimum tank size to hold each fish.

9. Fish Compatibility

When enclosed in a small environment it is important to ensure all your inhabitants will peacefully co-exist. Many fish species can be very territorial and if allowed will make the entire aquarium their territory. Any fish added after will be chased and possibly killed.

To ensure harmony I highly advise you to check your intended fish purchases with the fish you already own to ensure no compatibility problems.

Saltwater 
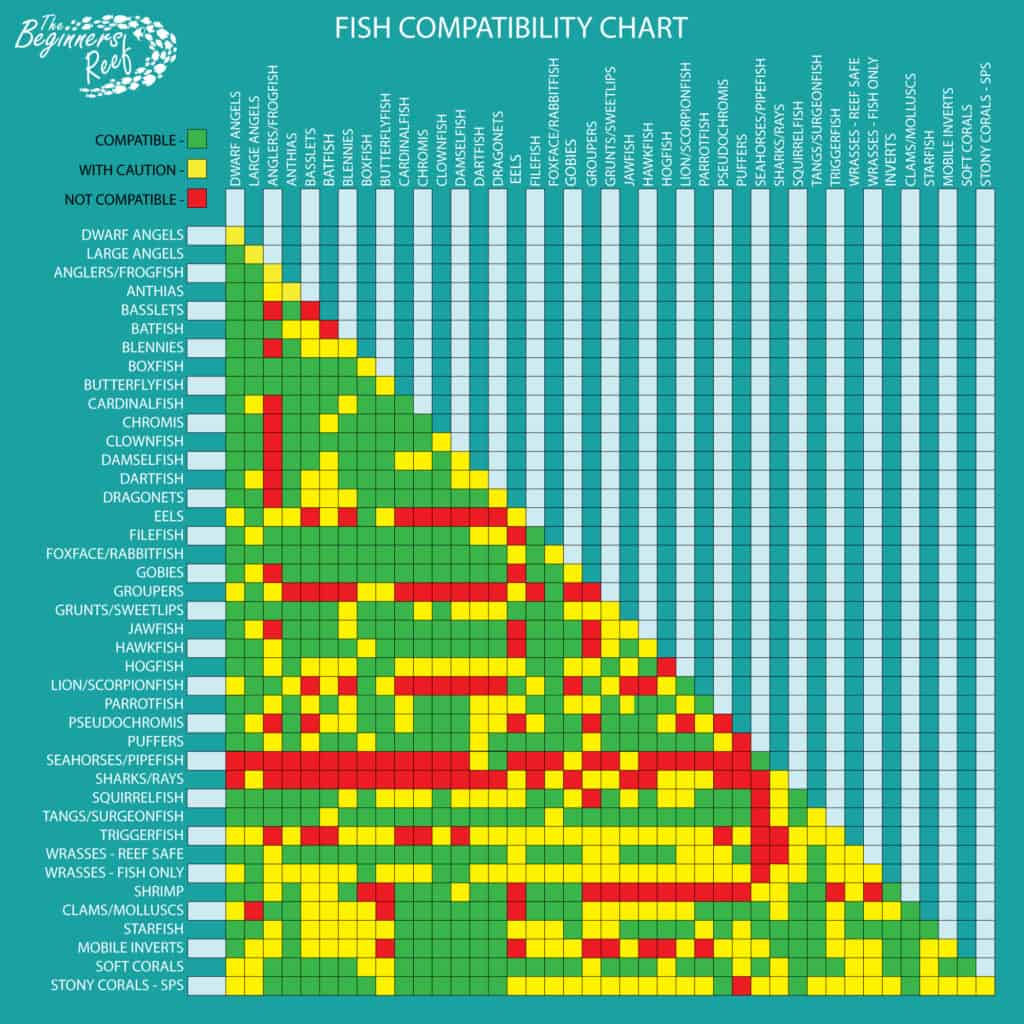
Fish Compatibility Chart

How to Keep More Fish in an Aquarium?

More fish can be kept in an aquairum that is cleaned regulary and has regular water changes. Aquariums with sumps that add more water volume, have additional filter media to colonize nitrifying bacteria, fed sparingly and have a good diversity of janitorial inhabitants will all help increase stock.

Remember these are all guidelines and testing your water parameters will be the only definitive way to see how your tank is doing with the bio-load.

Time

Patience is the true foundation in this hobby and the longer you hold off adding fish, the better your aquarium’s overall health will be. By learning to walk before you can run you will find that in time you will be able to add another fish, or pair or shoal (Depending on the size of tank).

Let your biological filter grow, your routine refine and your parameters stabilize then you will have a far better success rate than trying to get all your aquarium up and running and stocked to the brim in the first 3 months.

Sump

Adding a sump is a great way to increase water volume and provide space for adding more live rock to increase the surface area on which Nitrifying Bacteria can colonize.

Increasing water volume will also help to smooth out any fluctuations in water parameters as there is more water volume for that influence to work on.

If you want to find out more about how beneficial a sump is to an aquarium system please check out this article:

Aquarium Sumps: This Is Everything You Need To Know!

MarinePure Blocks

If you have room in your aquarium filter compartment or in your sump I highly recommend adding some MarinePure. These come in a range of plates, blocks, spheres and small gems and they are products to provide immense surface area for your Nitrifying Bacteria to colonize.

MarinePure Aquarium Media
You can find MarinePure Products, Information, Reviews & Prices
Here at Amazon.com

They are a super porous material that have an insane square footage of surface area due to the pores, holes, tunnels, and tubes throughout each piece.

More Nitrifying Bacteria = Higher Bio-Load

Maintenance

Regular maintenance is one of the best ways to ensure the maximum bio-load for your aquarium can be reached.

Weekly vacuuming of the sand bed, blasting settled detritus from your rocks with a turkey baster, regular changing of the filter socks/floss and timely changing of chemical filter media will ensure your aquarium remains clean and healthy.

If your aquarium is healthy, your livestock will remain healthy.

Water Changes

The quickest and fastest way to keep Ammonia and Nitrate low is weekly water changes with high-quality RO/DI water and a good salt mix from a reputable brand.

If your water changes are only once a month then that allows time for these toxins to build and stress your fish. With a regular supply of new saltwater, your parameters will remain stable and your water quality will be higher.

Higher Water Quality = Higher Bio-load

If you wish to find out more about how important a good RO/DI water filter is then please check out this article:

RO/DI Water Filters For Saltwater Aquariums

Smaller Feeding

Many aquarists think they need to feed more than they should, your fish are pigs and they will eat all the time if they could, but large or lots of feedings can really overload your biological filter.

Not all food gets eaten and if it is allowed to settle it will break down and raise your water parameters. To also add to the problem is the more you feed your fish, the more they go to the bathroom.

Fish waste allowed to settle will also break down and raise your water parameters.

This where I find blasting your rocks with a turkey baster can really help get this junk into the water column to be removed by your filtration and water changes.

Feeding small amounts twice a day and watching to ensure it ALL gets eaten is better than dumping in a load ful once a day.

Clean-Up-Crew (CUC)

The final part of a healthy aquarium – The janitors. Shrimp, crabs, snails, and worms are all scavengers and they really do a great job of helping to keep detritus and fish waste to a minimum.

Cleaner Shrimp
Cleaner Shrimp

By constantly scouring the aquarium for food they keep your tank clean and help to offload some of the work of your biological filtration.

To Finish

The maximum amount of fish you can have in your aquarium will all depend on many of the factors listed above. Waste management, ecological balance, fish habitat, stress, health, compatibility & maintenance all play their part in maximizing the amount of fish you can stock.

With patience and some careful fish selection, you will have a beautiful reef tank with enough fish to create a wonderful addition to your home or office.

By starting out with 1″ of fish for every 5 gallons you will be on track for success.

How To Catch Nuisance Fish In An Aquarium? 13 Top Methods!


There may become a time in your aquarium journey when you have to remove a fish for multiple reasons – Maybe that new fish you should not have bought is a serial killer, a fish has just taken a liking to coral, a fish has got too big or you have a fish that is just a monster!

If you cycled your saltwater aquarium with Damselfish, then I suggest you bookmark this article because one day you WILL have to remove them and they are one of the hardest fish to catch!

Not only do the ways discussed in this article work for saltwater, but any aquarium type – Freshwater, Cichlid, Discus, Brackish. Basically, ANY fish can be caught using any of the methods.

The best way to remove an unwanted fish from an aquarium is by using 1-2 nets. Herd the fish towards a net using a second net, then trap it against the glass as you raise the net out of the tank. Other alternatives are store-bought & DIY fish traps, distraction using food, or lowering the water level.

Many aquarists have tried all the methods listed below to varying degrees of success. I myself needed to go through 5-6 methods before I finally captured a beautiful Bi-Color Angel that one day decided to like the taste of my Clam’s Mantle!

Removing all the rock and water from an aquarium can be a very long and stressful process (Unless you have a 10 gallon Nano Aquarium) and should be listed as the absolute last resort. With patience, you should be able to trap not only fish, but shrimp and crabs using one of these methods.

How To Catch Fish In Aquariums Using a Net?

1. Using Two Nets

For this method, you will need at least one net of a large size. Place the large net in your dominant hand and hold it steady with one vertical edge resting against the glass inside the tank. Use your other hand with a second net to herd the target fish towards the waiting net.

With some skill and patience, you should be able to drive them in without too much issue. Once the fish is in the net, close the net entrance against the glass of the tank. Keep the net entrance against the glas as you move the net up and out of the tank.

2. Use a Large Net While Feeding

This one may require a few nights of pre-prep for it to work. Get a large net and place it in the aquarium but near the edge of the glass. Use a turkey baster to squirt food between the net and the glass.

Do this each day for 2-3 days so the fish see the net is no danger to them. Once your fish is used to eating between the net and the glass, it is just a case of the last day, move the net to the glass while they are distracted by eating and trap your target fish.

3. Mirror Distraction

This approach is very similar to food distraction but it is really useful if you have a very aggressive fish and the food doesn’t work!

Place a mirror (A hairdresser mirror with a handle makes this easy) against the outside of the glass near the top of the aquarium and wait for your target fish to begin harassing its reflection.

While it is harassing itself, move in with a large net and trap the fish between the glass. This one actually works really well!

For a nice selection of suitable nets see Here at Amazon.com

How To Catch Fish In Aquariums Using a Trap?

There are some really good fish traps that have been used to great success in both the saltwater and freshwater hobbies. Fish traps take some patience as it takes a while for the fish to get used to this foreign object being in their tank.

Fish traps need a little acclimation in the tank to work well. Place the trap in the tank empty and leave it there for 24 hours. Next day place some food at the very back of the trap and let the fish enter and eat it. Next day wait for the target fish to enter and begin eating before activating.

This is how the fish will become used to the trap and not see it as a threat. Once you have your target fish easily swimming in and out of the trap it is then time to operate it and trap them.

4. Store Bought Fish Traps

There are two fish traps that seem to get the best reviews from aquarists:

IceCap Fish Trap

The IceCap Fish Trap is a trap door-style fish trap. Food can be inserted into the feeding tube in the center of the trap and when the target fish is inside, the pull of a line removes the pin holding the door allowing the door to fall.

Trap Dimensions:

Sm Trap 150 : 8.1″ x 7.8″ x 2.9″
Md Trap 200: 9.3″ x 7.6″ x 2.2″
Lg Trap 250: 13.9″ x 9.9″ x 2.1″

It can be placed on the sand to catch invertebrates Like shrimp and Crabs or stuck to the glass using the included suction cups.

Available Here at Amazon.com

Tankmatez Bubble Fish Trap

The Tankmatez Bubble Fish Trap is the new kid on the block. Using a simple spherical trap and a magnet allows the fish to swim in and once the magnet is pulled off, the floatation device causes the trap to rapidly rise to the surface with the fish trapped inside – Super Simple!

Trap Dimension: 4″, 6″ & 8″ Diameters
Max Glass Thickness: 1″

From $45.00
Available Here at Amazon.com

5. How to Make a DIY Soda Bottle Fish Trap

This has been one of the go-to fish traps for decades and is usually the first trap many people will craft because it is the easiest and cheapest.

This trap works similar to crab and lobster traps. It’s easy for the fish to swim in but more difficult for the fish to swim out. Once the target fish is in the trap it is just a case of removing the trap from the tank and getting the fish.

The main problem with this trap is that it may not catch the intended fish. You may have to be patient and release a few fish before you get the target monster. Catching a few in there and then returning the wanted fish back to the aquarium is also a way to do it.

Be sure to make it easy to remove the top half of the bottle to ease returning the wrong fish back to the tank!

6. How to Make a DIY Fish Bag Trap

When you buy a fish from the store always keep the transport bags as they come in handy as they can make a good fish trap. Similar to the bottle trick, this one requires some patience, and the water flow in the tank turned down for it to work.

When the fish enters the bag you can pull up on the fishing line and the top of the bag will close up. Don’t be too quick to do this as it could tear the bag.

If you find the bag is not staying open you could secure the bag to the glass using an algae magnet with the flow going into the bag to keep it open.

7. How to Make a DIY Egg Crate Fish Trap

This was the trap I used to catch my Bi-Color Angel. Crafting this trap allows you to make a trap to suit any size fish.

Grab yourself a sheet of Egg-Crate from the hardware store – It’s usually in the Suspended Ceiling section. Using side cutters, cut 4 rectangular pieces the same size and secure together with Zip-Ties to make a tube.

Cut 2 end squares and secure one to one end of the Egg-Crate Tube. Secure the other square to the opposite end of the tube using 2 loosely tightened zip-ties to make a door.

Egg Crate Usually Comes In Black or White

Secure fishing line to the door and run it through one of the squares so when you pull it, it closes the door towards the egg crate tube.

Lay the egg-crate trap on the sand with the door open and resting on the sand. Once the fish swims in, pull on the fishing line, it closes the door like a medieval drawbridge and you have your fish.

8. Glass Jar

This one is more for catching that elusive crab that is destroying your Zoa population or taken a liking to snail meat!

Crabs are unable to climb up glass so by placing a mason jar into the sand with the opening angled upward, with some food in the bottom just before lights out, you may well find your critter in the bottom of the jar by morning.

If your sand is not that deep, it’s a good option to lean the mason jar against your rock so the crab has a way to get into the jar, but then is unable to get enough grip to climb back out.

By doing this at lights out chances are the food will stay in there without the fish taking it or It may be a method you have to try an hour after lights out so all your fish are sleeping/hiding.

How To Catch Fish In Aquariums at Night?

These are going to require pulling some later nighters if your tank lights do not shut off until 11pm! Usually within 1 hour of your tank lights going off and the room has been dark, these will be quite effective methods!

9. Scooping With a Net While Sleeping

It is well known among divers that night dive in the ocean that the reef is a very quiet place. Many fish sleep in their favorite spots and are very lethargic when you come wandering around with your flashlight.

If your target fish likes to sleep out in an accessible place it is as simple as shining a flashlight on them and they freeze. Get your net and scoop them up. It is that simple!

Fish are very easy to catch when they have been asleep! This is of course if they sleep out in the open – If they sleep in a hole, now what…

10. Startle From Sleeping Hole

This method is going to require a few nights of investigation with a red flashlight. The red light does not seem to be seen by fish so it allows you to watch where everyone goes when the lights go off.

If your target fish sleeps in a hole and it’s one you can access then here is what to do:

  • Fill a syringe with aquarium water
  • Place a length of airline hose on the end of the syringe
  • Place the other end of the hose into the fishes’ hiding hole
  • Place a large net over the hole
  • Squirt the water quickly into the hole – Fish should come darting out straight into the net
  • Your fish should still be lethargic allowing you to capture them
  • For the rest of the evening you could just keep them in an isolated fish container like this one below, then deal with them the next day:

Other Methods of Catching Fish in Aquariums

These last few methods don’t really fall into any of the categories above but could be the one trick left for you to try before you completely lose your mind!

11. Fishing Line & Hook

Yep, it’s time to get fishin’! By using a small barbless hook some fishing line and some meaty portions of your monster’s favorite food you can catch them just like you were on the lake pulling out Bass!

It can take a little bit of jigging around to keep the other fish from the meaty morsel, but a bit of food in a turkey baster can help to draw the crowd while you focus on placing the hooked bait right in front of your target fish.

Many an aquarist have tried for weeks to get a fish and then within 15 seconds of the hook hitting the water, their elusive fish is on the end!

Be sure to match the size of the hook to the fish’s mouth. You will be able to find a vast selection at any outdoor store, Walmart or even the gas station!

12. Egg Crate Tank Divider

When you are starting to run out of ideas there is one last thing to try before we hit method #12 and that is to try and reduce the amount of space your target fish has to swim in.

Using the egg crate we mentioned earlier, you can easily cut out a piece that will fit in your tank with a cutout to fit over your rock, thus creating a wall.

Get the fish feeding at one end of the tank then slide in your egg crate wall and have a helper hold it in place while you now try and capture the fish using two nets. Having less space to swim will help incredibly!

Using a small net to drive the fish toward a larger net usually works too, but this method can be tough with limited space. If you need to build a second egg crate wall to half off the area you have already segregated, then this may help too.

13. Removing Water

And finally, the worst method of them all and one that I hope none of you have to go through, especially if you have a large aquarium with hundreds of pounds of rock, but hopefully no corals yet!

By removing your rock and draining 3/4 of your water into some Rubbermaid Brute trashcans you now have an open playing field to chase and catch that monster.

Once caught, be sure to put your rock back in and then add your water back as soon as you can. It is a good idea to place a heater in the trashcans to keep your water warm, also place a heater flat on the sandbed to keep the water in your aquarium warm too. Make sure the rock stays damp to avoid the bacteria on that drying out and dying too.

The last thing you need after going through all this is the bacteria on your rock or sand to die, then you have to go through a miniature cycle again.

To Finish

I really hope that you never need some of these methods because trying to catch a fish can be one of the most frustrating things you can do in your entire life!

To hopefully avoid this hassle though the best defense is to research every fish you intend to buy. See what they may be prone to doing, what species of fish they may fight with, if they are aggressive and when you should add them in your stocking plan.

10 minutes of simple research can save you hours of hair-pulling torture!

Further Reading

If you found this article helpful please be sure to check out some of our others listed here:

How To Keep Sand Clean In A Saltwater Aquarium?


You have been to the fish store or have been perusing the online photos and drolling at some of those incredible aquariums and there is one thing they all have in common, a pristine sandbed.

You look over at your aquarium and its a dull, algae-covered mess! You want that pristine sandbed! I know I did when I first started!

Suggested Ways To Keep a Reef Tank Sandbed Clean:

  • Algae Nutrient Control
  • Stirring
  • Sand Vacuuming
  • Increased Water Flow
  • Snails
  • Starfish
  • Conch’s
  • Diamond Spot Gobies

Each one of these has its caveats so let’s look into each one and also a few other things to consider.

Visually Clean Vs Biologically Clean

Sandbeds need to be clean on two fronts:

  1. Visually clean to enhance the beauty of your aquarium. A grotty looking sandbed can really make a dent on the impressiveness of your aquarium
  2. Biologically clean to ensure you do not have problems with high Ammonia, Nitrate, and Phosphate

The methods mentioned soon will be able to take care of both these situations but it is important to know that both types of clean play a major role in the overall health of your aquarium and how much work it may create for you.

Algae Blooms

If your aquarium is under 6 months old and you are having algae growing all over your sand then don’t worry, it is just part of the ecosystem trying to establish equilibrium.

Algae blooms appear when there is an abundance of food FOR the algae to feed on. Phosphates and Silicates are two of the major foods for Diatom Algae, CyanoBacteria, and Dinoflagellates. these will pass with time but during their presence, they can make your tank look really bad!

Slowly adding a CUC (Clean-Up-Crew) after your aquarium has cycled will help to keep your tank clean – Be sure not to add a huge amount of critters to clean up your algae blooms as once the algae has gone, they will starve!

For more information on Algae please see the ‘Further Reading’ section at the end.

What Type of Sand Can Be Used in Aquariums?

The type of sand or substrate you have in your aquarium can also play a role in how clean it looks. Larger particulate substrate like CaribSea’s Crushed Coral has grains 2.0-5.0mm in diameter which can leave larger pockets for uneaten food and detritus to settle in.

Larger particle sands can also be too large for some of the livestock we are going to talk about to effectively move through and clean.

Crushed Coral by CaribSea
CaribSea Arag-Alive Fiji Pink Sand
Fiji Pink by CaribSea

Smaller particulate sands like CaribSea’s Fiji Pink and Special Grade Reef sand have grains 0.5-2.0mm in diameter which tends to allow junk to settle on the top rather than get trapped. The smaller grain sizes also allow critters to clean it easier.

CaribSea’s Fiji Pink is one of the most popular sands in the hobby and it is the sand I select for many clients aquariums and my own – It’s very easy to keep clean.

Depth of Sand

Although not as popular nowadays, but Deep Sandbeds was the norm 20 years ago as this was the main area to colonize aerobic and anaerobic nitrifying bacteria.

Deep Sandbeds were never to be touched as Hydrogen Sulphide gas could be present in the very lower parts of the sandbed. Disturbing the sand and releasing this gas almost always leads to the death of your inhabitants.

Today, however, the evolution in technology has made the need for a Deep Sandbed not required. A shallow sandbed of 1″-3″ of sand depth is now the norm and this is not deep enough to provide areas for anaerobic bacteria to colonize and produce Hydrogen Sulphide gas.

The regular stirring up and vacuuming of today’s sandbeds can be done without risk.

What Are Ways to Keep Aquarium Sand Clean?

Like most aspects of this hobby, a multi-angled approach will work far better than relying just on one animal or maintenance task. Here are some of the best ways to keep your sandbed clean:

Flow

Increasing the flow in your aquarium is usually one of the simplest things to do. You can either adjust the powerheads and wavemakers you currently own or add another. The trick is to keep the water moving over the sandbed and not allowing any dead spots. This will help to keep detritus, uneaten food, and fish excrement from settling on the sand.

If it settles on the sand it can be left to break down and raise your Ammonia, Nitrate, and Phosphate levels. Keeping the waste in suspension will allow it to be passed to your mechanical filtration for removal.

Increasing flow around your sandbed can take some playing with as using smaller grain sand can cause it to blow around like a sandstorm, but with patience, you can find the right positions and settings.

One thing to be aware of as your tank matures and your corals grow is that they can prevent flow and cause dead spots. If you notice you are having detritus settle in one spot or you get algae growing in a certain area, you can be sure the coral’s growth has impeded flow.

More powerheads or an alternate type of flow creator may be required.

Gyre Flow Patterns

Gyre Wavemakers are great for helping to reduce flow dead spots due to the laminar flow they create throughout your entire tank.

For more information on the different types of powerheads, wavemakers and pumps that are available see the ‘Further Reading’ section at the end.

Stirring & Vacuuming

Moving the sandbed around allows any trapped particulate matter the chance to be picked up by the flow and sent to your mechanical filtration.

A good habit to get into from day one and a habit that I religiously practice is to stir up my sandbed and vacuum it with every water change.

A simple vacuum like the Python Gravel Vac will remove so much junk each week, it’s just like vacuuming your carpets at home.

With regular vacuuming, you will be able to keep any waste from settling and breaking down. It does not take long to do but your sand will be cleaner and your aquarium will be far healthier for it.

This is one process I highly recommend you do every time you change your water! Blasting your rocks with a turkey baster just before you vacuum your sandbed will help to get the junk out of them too 😉

Snails

By far the best snail for keeping your sandbed clean is the Nassarius Snail. These guys spend most of the day in the sandbed with the snout poking out of the sand waiting to smell food.

Once they smell food they all seem to appear out the sand like a scene from Michael Jackson’s ‘Thriller‘ video – Showing my age now!!

They are mainly nocturnal and plow through and on top of the sandbed searching out detritus and waste.

They are a great snail for stirring up the sandbed and the best thing about these guys is that they can use their snout to rite themselves if they get knocked over.

Nassarius Snail

These are not a snail to add straight after your aquarium has finished cycling as they will have no food, but once you have some fish and you are around the 6 month mark, having 1 for every 10 gallons is a great starting point!

I love mine!

Conch’s

Conch’s are a funny-looking character that brings an interesting conversation starter to your aquarium. They are fantastic sandbed janitors spend all their time cruising through and over your sandbed, just like the Nassarius Snails.

They are an easy herbivore to keep and can disappear for weeks on end if you have a large enough and deep enough sand bed. Just as you start to worry, they pop out to say “Hello”!

The Tiger Conch is the most popular in our hobby and you should be able to find them in most reputable fish stores or online retailers.

Also, like the Nassarius snail, do not go and introduce these until your aquarium is mature enough for them to have food in the sandbed or they will starve.

Starfish

As a beginner, I have to advise you AGAINST buying a Starfish or SeaStar for keeping your sandbed clean. The most common Starfish sold to clean sandbeds is the Sand-Sifting Starfish.

These poor guys have such a high mortality rate in home aquariums because they have a ravenous appetite. To be able to meet the needs of these Starfish the owner needs to have a large aquarium with ALOT of food within it.

These Starfish spend most of their life buried in the sand and once their food source depletes they will starve and die somewhere in your sand where you may not find them. They are also a big organism so once it dies it is going to cause your parameters to rise.

Even though they may look cool, just stay away from them.

Diamond Spot Goby

The last one of the sandbed janitors and aquarists have a Love/Hate relationship with this fish! The Diamond Spot or Orange Spot Goby is one of the hardest working fish in your tank!

This is all they do – sifting your sand through their gills. This is where the substrate size I mentioned earlier comes into play. Too big a grain size and he will not munch it.

The reason why they create a Love/Hate relationship is they can be a great tank mate or a royal pain in the butt. Mine is a model citizen, my friends fish drives him nuts and here is why:

  • They can swim up into the water column and eject the sand grains – Covering your coral
  • They are prolific jumpers if startled – Keep close-fitting lids on your tank
  • They can terrorize other sand-dwelling inhabitants

If you can find one that behaves, your sand will never be cleaner! They are by far the best sandbed cleaner in our hobby, but just be prepared to get out the turkey baster or find them dried up on the floor!

To Finish

Keeping your sandbed clean is an easy process once you have the right maintenance habits and a few aquatic helpers to do their part! A clean sandbed really does help your aquarium to sparkle and these few tips will really help you achieve it.

Further Reading

If you found this article helpful please have a read of some of the topics mentioned above but in more depth and detail:

Nano Reef Aquariums: What Are They?


Nano Reef Aquarium – What’s that? From looking at the wording you may have come to the conclusion that small has something to do with it. You may have even seen one of these small aquariums at a local fish store and been curious!

A Nano Reef Aquarium is a saltwater aquarium usually under 30 gallons volume with filtration and aquarium equipment on a smaller scale. With careful coral, invertebrate, and fish selection, a miniature coral reef can thrive in a small aquarium.

Nano aquariums can make a great entry-level reef tanks or as a nice addition to a child’s bedroom if you wish to get them started with the responsibility of pet ownership.

Just because you have a small aquarium does not mean it has to be a boring aquarium!

Are There Different Types of Nano Aquarium?

Just like the larger aquariums, nano aquariums can come in all sorts of designs and setups to cater to not only budget, but the style the consumer is looking for.

Some of the most popular types of nano aquarium are:

Glass Only Aquariums

This is the simplest form of aquarium. It can be with or without a stand and canopy and is usually the cheapest of them all.

These types of aquarium can be easy and cheap to set up but all the equipment will be on display.

All-In-One Aquariums (AIO)

Fluval Sea Evo XII Large

By far the most popular of nano aquariums. The AIO aquarium comes with an integrated filtration area built into the rear of the aquarium.

This allows for all the equipment to be hidden to allow the beauty of the inhabitants to shine.

Drilled Aquariums

A Drilled Aquarium is an aquarium that has an overflow system in it and the tank has holes drilled in its base or rear panels to allow pipes to be run out of sight to a sump.

This type of system allows the equipment to be hidden in the sump which usually sits in the stand. This provides for more variety in equipment selection, more equipment to be used and hidden and increased water volume to allow for higher stocking levels.

Rimless Aquariums

Rimless Aquariums are a style of aquarium that has become popular in recent years due to the minimalist look they provide.

Rimless refers to the top of the aquarium being nothing but glass. There is no canopy or any trim around the top edges. All rimless aquariums are open to the room.

Rimless aquariums can be Glass Only, AIO or a Drilled Aquarium

Designer Aquariums

RedSea Max Nano

The aesthetic look of today’s aquariums can play a hugely important role in someone’s home. Today’s modern society is wanting a piece of art in their home so why should the aquarium be any different.

Featuring stylish aquariums with modern stands and light arrays can really make an aquarium a showpiece of anyone’s home.

These types of aquariums will demand the higher price tags but they are worth it!


Red Sea does a great stunning selection of Nano Aquariums that are perfect for the beginner.
You can find out more about them Here at AquariumSpecialty.com


Are Nano Aquariums Easy Or Hard?

Nano aquariums are no different than a larger aquarium, but they do have their own nuances that you need to be aware of.

In some respects, they can be a little easier and cheaper to set up as the equipment can be cheaper, the number of consumables you use will be less and the time it takes to maintain it can be less.

Because of their size, it costs less to stock it with corals and you are very limited to the species and number of fish you can have in it.

But, even though they may cost you less, they can be just as much work as a larger aquarium and if things go wrong, the tolerance for recovery is much less due to the volume of water in a nano aquarium.

Are There Any Cautions With Nano Aquariums?

Here are a few things you need to be aware of with small nano aquariums:

  • The smaller the volume of water, the more susceptible the water is to instability due to external influences
  • They heat up and cool down faster, causing larger temperature fluctuations
  • They will evaporate water and if not looked after, the salinity can quickly skyrocket
  • Direct sunlight can quickly heat up a nano aquarium
  • Incompatible fish can fight and kill or cause illness
  • Fish that are too large will become stressed and die or cause illness
  • You have to stock less fish than you would like
  • A mistake by you could easily and quickly crash the aquarium

How Do You Ensure Water Stability In A Nano Aquarium?

The larger the aquarium, the slower changes occur because there is more water volume to dilute a problem. As mentioned above, temperature and salinity fluctuations can be very large, and happen quickly in a nano aquarium, but there are devices purposely made for a nano aquarium to help combat them:

ATO – Automatic Top-Off System

An ATO is a must on any saltwater aquarium. It is a simple device that monitors the water level in your aquarium and when water evaporates and the water level drops, the device turns on and replaces the lost water.

A Typical ATO System

With an ATO it is important to remember that the water lost to evaporation is only FRESHWATER as salt does not evaporate! As the aquarium water evaporates away, it leaves behind the salt. If no more water is added to the tank the ratio of water would get less, while the amount of salt would stay the same. Therefore, the more water that evaporates = The ‘Saltier’ your aquarium water will become.

By replacing the same amount of water that evaporated with freshwater, your aquarium salinity will always stay constant.

With a Nano aquarium, you are very limited to space and to keep your already small aquatic real estate to a maximum, you need an ATO System that is discreet.

Here are the top 3 ATO systems purposely designed for a nano aquarium. All are linked to Amazon.com for further information, pricing and reviews:

  1. AutoAqua Smart ATO Micro – Automatic Top Off System
  2. Tunze Osmolator Nano 3152 ATO System
  3. XP Aqua Duetto Dual Sensor Nano ATO System
Sensor
Type
Pump Head
Height
Timed
Cut-Off
Price
Auto Aqua Smart ATO MicroOptical6.5ftYes$139.95
Tunze Osmolator Nano ATOFloat7.5ftYes$139.99
XP Aqua Duetto Nano ATOOptical8.2ftYes$119.99

Heaters

Heaters play a key role in keeping your aquarium water in the desired 78°F-80°F temperature range. A device that is never really given much thought in the larger aquariums but in a nano aquarium, it is very important!

To enable stable temperature control in such a small aquarium you need a reliable, small, digitally controlled heater and in my mind, there is only one type that I would trust in a nano:

Cobalt Aquatics Neo-Therm

These heaters have several great selling features that are perfect for nano aquariums:

  • Can maintain set temperature to +/-0.2°F!
  • They are flat and black – Helps to make them invisible
  • Digital control for reliability
  • Run-Dry protection
  • Very reliable with a great pedigree.
  • Range of wattages to suit every aquarium size

They are a little bit more in price than most of the common heaters but they are worth the cost! Most heaters can only maintain their set temperature of +/-2°F and this is far too much of a swing for a Nano-Reef Aquarium!

Spending a little more here could save you hundreds in lost coral and fish in the future!

For More Information, Wattages, Reviews, and Prices
Click Here to find them at Amazon.com

Mini Chiller

A mini chiller is the exact opposite of the aquarium heater. This device prevents your aquarium from overheating. Working in conjunction with your heater it can provide rock-solid temperature control of your water.

Perfect for those locations where there is no air conditioning in your home/office or the only location to place the aquarium results in direct sunlight.

There is only one Mini Chiller I would recommend for a nano aquarium:

Chill Solutions CSXC-1 Thermoelectric Aquarium Chiller

  • Maintains set temperature to +/-0.1°F!
  • Small and discreet to be easily hidden
  • Digital temperature control
  • Simple temperature setting
  • Fully automatic
  • Suitable for tanks up to 30 Gal

This device may seem excessive to a beginner but working in conjunction with your heater the two will be able to maintain your water to within 0.2°F of your chosen setpoint. That will really help the stability of the water in your nano aquarium!

This may be a device to keep in mind and see how your first summer with your nano aquarium goes. If the tank temperature starts to get too high then this will be one of the best investments you can make for your nano aquarium.

It is easy to install, hide out of sight and if your Nano aquarium is an All-In-One type, the chiller can just connect into your existing return pump!

For More Information, Reviews, and Prices
Click Here to go to Chillsolutions.com

Example Nano Reef Setups

If a nano aquarium is something you may be interested I put together a Setup Guide to help you look at the different styles of aquarium with everything you need to get you up and running with pricing:

To Finish

A Nano Aquarium can be a great aquarium to start with but you will get the bug and it will not be long before you are planning to move up to a larger aquarium. With some careful planning and nice livestock selection, you can have a beautiful showpiece that all your friends will want to see!

Further Reading

To help you further in your quest you may find these other articles of ours helpful: