RECENT ARTICLES

What Type Of Filter Do You Need For A Reef Tank?


Owning an aquarium means cleaning out the filtration regularly. I used to service an aquarium at a restaurant and when I cleaned the filters it could stink out the whole place! The filter media was working well, but not to the delight of the dinner guests!!

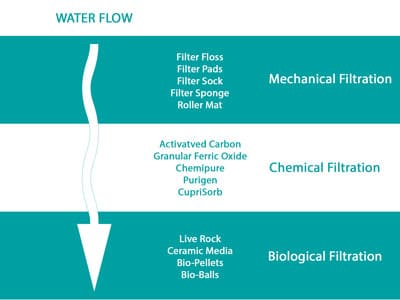
Every aquarium needs filtration to allow it to control and convert toxic compounds so that the livestock does not become poisoned. Filtration is made up of a 3 pronged attack.

Biological Filtration, Mechanical Filtration & Chemical Filtration all make up the main methods of reef tank filtration. Floss, Activated Carbon, GFO, Bio Pellets, and Ceramic Pieces are the most common media materials used to create these three methods of aquarium filtration.

This article is aimed at introducing you to the various forms of aquarium filtration media that are available and how each one is to be used and what it is to be used for.

Aquarium Filter Media Order

What Are Aquarium Filter Floss, Filter Socks & Roller Mats?

Filter Floss, Filter Socks, and Roller Mats are mainly used as the primary means of mechanical filtration. What this means is that they physically trap large particles of debris and detritus and as time goes by they will become clogged until they are fully blocked.

To keep this type of filter media working at its most efficient, you need to frequently change or clean the media.

  • Filter floss can just be removed, discarded and a new piece put in place.
  • Filter socks will need to be removed and replaced with a clean sock. Most people will keep several and rotate them through the washing machine on a water-only cycle.
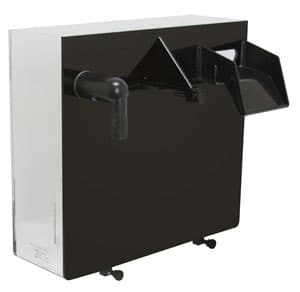
  • Roller Mats are a relatively new product in the hobby and automatically replace the filter media as it becomes clogged. The media comes on a roll and goes through the device, which slowly turns until all the roll has been used. You then replace the roll and dispose or clean the old one. These devices can allow you weeks of maintenance-free filter changes.

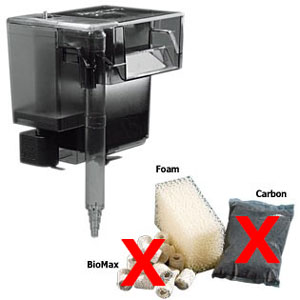
What Are Aquarium Filter Sponges?

There are several types of sponges available and they are all designed to do a specific purpose.

Aquaclear Replacement Sponges

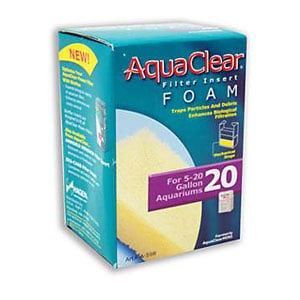
Sponges Designed as Mechanical Filters

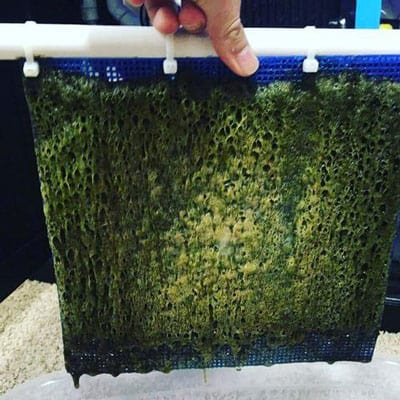
These are created using a fine web of inert plastic material designed for physically trapping particles, just like the floss and socks above. They must be removed and thoroughly washed to ensure all the detritus is removed from them.

Sponges Designed as Biological Filters

These are designed to create maximum surface area. The surface area is used to grow the beneficial bacteria that convert Ammonia and Nitrites into Nitrates and Nitrogen gas. It will also trap detritus and must be cleaned thoroughly too. Usually, this type of sponge will sit behind some form of mechanical filter/sponge so that most of the detritus has been collected before it reaches this sponge.

Sponges Designed as Chemical filters

These are sponges that are either made of or coated in a chemical filter media like Activated Carbon. They are used to remove organic pollutants and heavy metals from the water and once all their pores are full you will need to dispose of and replace this type of sponge.

These sponge arrangements are most commonly found in canister filters and small HOB (Hang-On-Back) filters.

When you wash ANY filter media, especially sponges, and plan to return them back to the aquarium, you need to rinse them out in a bucket of aquarium water! This will keep the bacteria alive. You must then dispose of the dirty water in the bucket.

NEVER wash any filter media under a running tap or faucet! You Will Kill The Bacteria

What Are Aquarium Ceramic Pieces?

These types of filter media are designed to house beneficial bacteria. They are created just like the sponges to provide the most amount of surface area per piece to get as much bacteria growing as possible. These are great for use in HOB and canister filters but are generally not used in saltwater aquariums as Live Rock does the same job.
These ceramic pieces must be washed frequently as not to allow detritus to collect and begin breaking down and cause high Nitrates.

To find out more about Live Rock Check out my ‘What Is Live Rock?’ article.

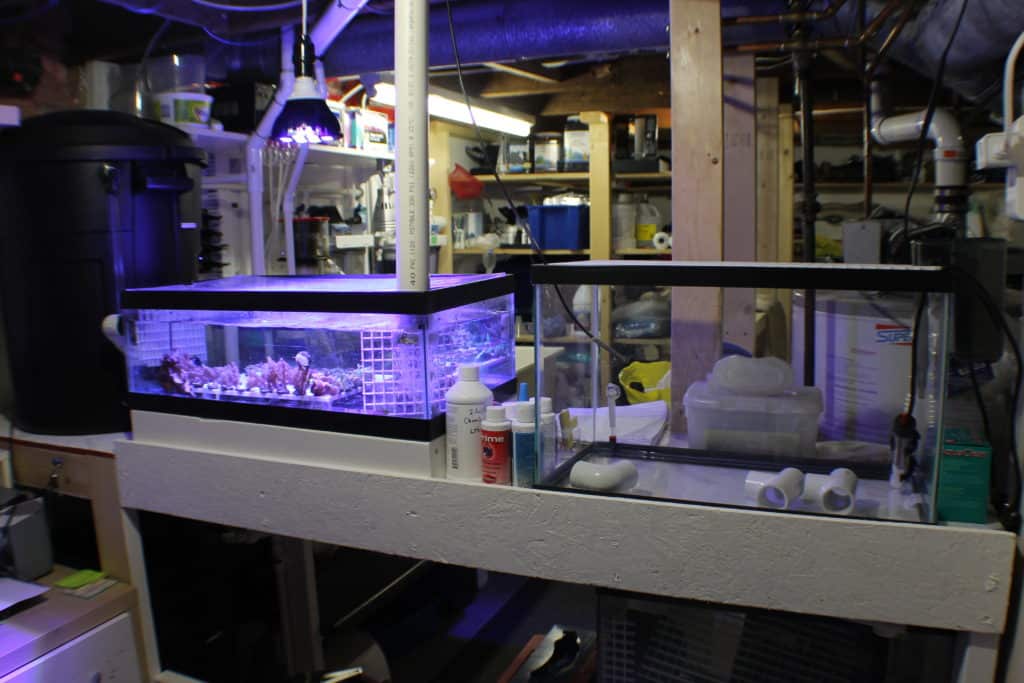
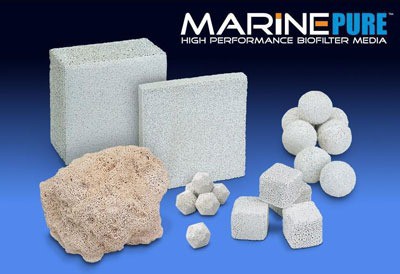
A relatively new form of ceramic media are ‘Blocks, Plates, and Spheres’. These are being installed in many aquarium sumps to provide more surface area for bacteria to colonize. The benefit of these new products is that they are extremely porous and hardly trap detritus. You will have to rinse them one in a while but that is all. Most aquarium owners will be able to find one of the products to fit in that ‘Unused space’ in their sump.

MarinePure is one of the most popular products available and you can click the link to see them at Amazon.com.

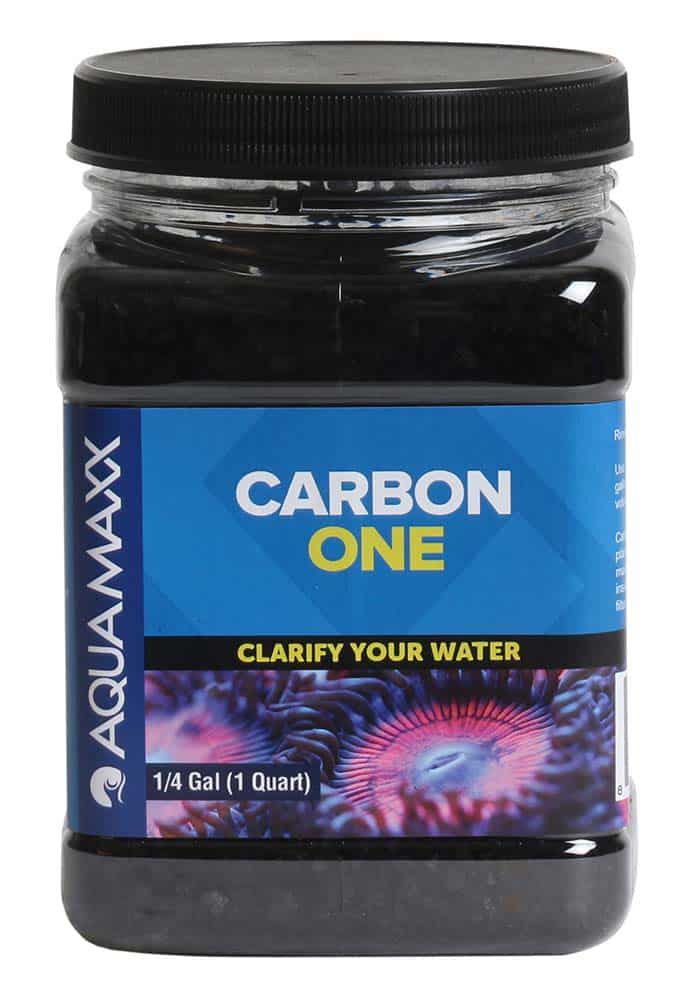
What Is Aquarium Activated Carbon?

Carbon or Activated Carbon are sticks or granules made from high quality, high porosity Bituminous Coal.

The main purpose of Activated Carbon is to absorb organic pollutants and heavy metals from the water.

The other benefit of using Carbon is that it will polish your water and make it sparkle. If you look at your tank and you see the water has a yellow tinge to it, then its time to replace the Carbon.

An easy way to test this is to take two white buckets or containers. Fill one with a small amount of aquarium water and one with new water. You will be able to see the color difference immediately when all the Carbon has been used.

Running Carbon will also be very important when you start to get a lot of coral in your tank. When corals grow into close proximity to one another they begin a chemical attack on their neighbors if they do not ‘Get Along’.

These chemical pollutants are released into the water column and its the Carbon’s job to remove them. Without Carbon, you could have slow coral growth, coral death or possibly muted colors on the unhappy coral.

Activated Carbon Granules
Available at Amazon.com

Depending on your system there are 3 ways to install and run Carbon on your aquarium:

1. As a sponge mentioned earlier if you have a Canister or HOB filter
2. Placed in a mesh bag, secured and added to your sump area
3. Ran in a media reactor that prevents the Carbon from clogging together and ensures the all the Carbon pieces get used. – This is the most efficient way to run Carbon.

Your aquarium will dictate how fast the Carbon exhausts, but typically it would require changing every 3-6 weeks in most aquariums.

There are several types of Activated Carbon on the market, each with differing capacities:

ROX Carbon:

BEST

Recommended usage is 1 TBSP for every 10 gallons

Lignite Carbon

BETTER

Recommended usage is 1 TBSP for every 8 gallons

Bituminous Carbon

GOOD

Recommended usage is 1 TBSP for every 4 gallons

What Is Aquarium GFO? – Granular Ferric Oxide

This granular filter media is specifically aimed at removing Phosphates from the water. Phosphates are one of the building blocks needed for algae to grow. The others are light and Nitrates.

By running GFO you will help to reduce the amount of Phosphate in your water and reduce the possibility of an algae outbreak. GFO is used more of a prevention than a cure but it will help if you add it to an algae-covered aquarium, it will just take time.

Phosphates also reduce coral growth as it inhibits the coral skeleton from absorbing the Calcium and Carbonate (Alkalinity) ions they need to build their skeletons.

GFO can be installed the same as Carbon, either in a mesh bag or in a reactor. Again, the reactor installation keeps the granules tumbling and allow them all to be used. GFO will need to be replaced once it is consumed and depending on how much Phosphate your water contains, will depend on how quickly it becomes exhausted.

GFO will typically last 4-6 weeks in most aquariums.

There are many different Phosphate removal products on the market, each with its own recommended dosing instructions.
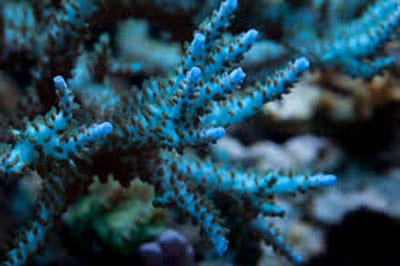
What Is Purigen?

This is a synthetic filter media that is designed to absorb Ammonia, Nitrite and Nitrate compounds. It also has an added benefit of polishing the water similar to what Activated Carbon does.
As the Purigen becomes exhausted it changes its color to dark blue and eventually black. The great benefit to this product is that you can recharge the media by removing it and washing it in a bleach and water solution.

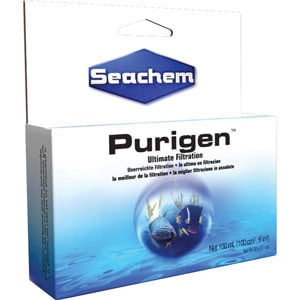
Purigen can also be run in a mesh bag or a media reactor.

Recommended usage is 1ml for every gallon

What Is Chemipure?

This is a manufactured mix of Activated Carbon and a ‘Purigen’ type of ion removing compound that helps to remove organic waste and absorb the harmful Ammonia, Nitrate and Nitrate compounds. It comes in a bag which can be placed in the sump and will have to be disposed of off once it is exhausted.

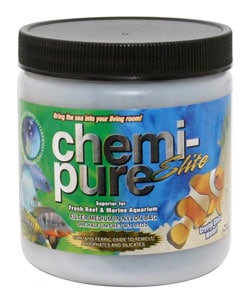
The manufacturer recommends you change this out every 4-6 months providing you have sized the amount of Chemipure correctly. Once your aquarium begins to get cloudy, it’s time to change the media.

You can now also get Chemipure Elite which adds a Ferric Oxide material to the media to help reduce Phosphates and Silicates at the same time, but only lasts 4 months.

Recommended usage is 1 unit for every 5 – 40 gallons

What Is CupriSorb?

This is a type of filter media that is used more in emergency situations. It is a synthetic ion absorbing style media that removes Copper from the water. Copper is toxic to invertebrates and coral and this is an effective media to help do that.

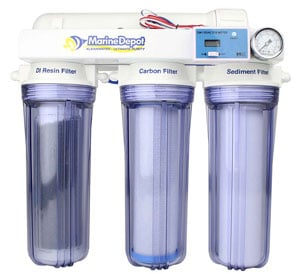
Some aquarists run Cuprisorb constantly if they have high levels of Copper in their city water supply that the RO/DI unit is unable to completely remove.
CupriSorb will turn a dark blue as it begins to exhaust and it can be removed and recharging by soaking in a water/muriatic acid solution.

CupriSorb works best when placed in a mesh bag in a high flow area of your filter/sump.

Recommended usage is 0.6ml for every gallon to remove 12ppm of Copper

You can find it Here at Amazon.com

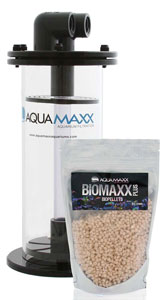
What Are Aquarium Bio-Pellets?

These are synthetic pellet made of PHA (Polyhydroxyalkanoates) that are like steroids to Nitrate consuming bacteria! The bio-pellets create a large surface area to live on and feed the bacteria, thus growing the number of bacteria that feed purely on Nitrates within your water.

As the bacteria multiply and consume the bio-pellets, the quantity you see decreases. To replenish the supply, open the lid of the reactor and pour in some more pellets. Easy!

It takes approximately 2 months for the bacteria to multiply and begin consuming the pellets, so leaving this media to do its thing is key.

Bio-pellets are best utilized in a reactor that allows the pellets to tumble and give the maximum surface area contact to the water.

Recommended usage is 1 cup for every 50 gallons

You can find them Here at Amazon.com

What Are Aquarium Bio Balls?

Bio balls are an older technology media that are usually made of an inert, high-density plastic that provides a very large surface area for beneficial bacteria to colonize on.

The main problem with bio balls is that they also trap detritus very well, which leads to high Nitrate problems. New technology such as the MarinePure Ceramic Media range provides a much bigger surface area and does not trap detritus.

Aquarium Bio Balls
Bio Balls

For more information please see my article
Can Bio Balls Be Used In A Saltwater Aquarium?

To Finish

The filtration required in a saltwater aquarium is a multi-pronged attack on the pollutants that are constantly trying to poison your inhabitants. The mix of filtration equipment running various types of media covering the three types of filtration is a must.

Each aquarium system is different and research into the types of media that will fit and run on your system will be required to ensure you are providing the best filtration possible.

On my system, I run Filter Socks, Filter Floss, Activated Carbon and Bio-Pellets and my Nitrates and Phosphates are as close to zero as I can get without getting silly, and my water sparkles. I may look to add in some MarinePure Ceramic Media in the near future just to provide more surface area for bacteria to colonize.

Another great addition to add to your filtration army is a Refugium to grow Macro-Fauna and Macro-Algae.

You can find all of these filter materials and more with their prices, reviews and where to purchase them in my
Recommended Essential Products For On-Going Maintenance Page.

Further Reading

You may find these articles helpful too:

Reef Tank Water Change – Your First Time Guide!


You may have been doing water changes on your freshwater aquariums for years, or this is your first ever aquarium, but now its getting time to think about your first saltwater change and you have so many questions!

Your first reef tank water change requires high-quality source water that is heated to 78°F & mixed with synthetic salt crystals designed for saltwater aquariums. After the water has mixed for at least 1 hour, the temperature and salinity match that of the aquarium, it is ready for changing.

Some of the question you may have before your first saltwater water change are:

  • How Much Salt Do I Use?
  • What Kind of Salt Do I Use ?
  • What Kind of Water Do I Use ?
  • Do I Vaccum The Sandbed?
  • Do I Do Water Changes During The Cycle?
  • and many more…

This article will guide you through everything you need to know and how to do your first water change on your saltwater aquarium.

Let’s get those questions answered!

How To Change Aquarium Water

The one thing you must do is:

NEVER ADD SALT GRANULES DIRECTLY TO THE AQUARIUM WATER!

This will burn any fish, invertebrates or corals that the granule lands on, fish can eat the granules then die and you will create very high areas of salinity in the local area of the salt pile.

You are going to need the following items:

  • Vessel of water with the correct volume in it. Eg if you are removing 10% of a 55 gal aquarium, you need 5.5 – 6 gal of water in the vessel
  • Another Identical vessel – Only for the first time doing a water change!
  • Bag/Bucket of selected salt mix
  • Sandbed/gravel Vacuum – Like this Python at Amazon.com
  • Turkey Baster
  • Measuring cups/spoons for use with baking
  • Thermometer
  • Refractometer
  • Small Powerhead
  • 6-10ft length of hose to fit on the powerhead output nozzle
  • Small Heater
  • Glass brush/scraper – Like this Magnetic Scraper at Amazon.com
  • Toothbrush
  • Old Towels – 2 Minimum
  • Permanent Marker Pen

STEP 1 – Protect The Floor

Place down an old towel on the floor in front of your aquarium to protect the floor. You will spill and splash one day! Keep the other towel close by for drying your hands and wiping up drips.

STEP 2 – Place Your Water Change Vessels

Place your two vessels next to one another at the side of the tank or close by. You need the hose to reach, but you need access to each glass panel on your aquarium.

STEP 3 – Prepare The Saltwater Container

Fill one of the vessels with the required volume of filtered water and in it place the small powerhead and the heater. No hose on the powerhead required yet. Set your heater to the same temperature as your aquarium water. Turn on the pump and heater.

STEP 4 – Add The Salt

Read the instructions on your salt container and measure out the required amount of salt using your measuring cups/spoons.
Instant Ocean is 1 cup for every 2 US Gallons, so a 6 gal water change requires 3 cups of salt granules. Sprinkle the salt into the vessel with the water in it and leave to thoroughly mix and heat. Allow mixing for at least 1 hour if possible. A few hours is recommended.

STEP 5 – Clean The Aquarium

While your salt is mixing this is when I get my aquarium all dirty! Clean all your glass with the scraper and brush. I use the toothbrush to clean all the seams and corners. Scrub all your wavemakers and overflow/s too to keep them sparkling.
Take your turkey baster and blast all your rocks to disturb any trapped detritus and get it into the water column.

STEP 6 – Check The Saltwater

Now is time to check your salt mix. Is it up to temperature? Has all the salt dissolved?. Check the temperature with your thermometer and your salinity level with a Refractometer.

==> Read My Article Here On Measuring Your Salinity Level <==

If your salt is not ready, go and have a beer/wine/coffee and let it mix some more.

STEP 7 – Make Any Adjustments

Make any adjustments to the new saltwater mix.
If your salinity reading is too low add a little bit more salt granules.
If your salinity reading is too high add a little bit more freshwater.

Leave to mix and repeat until your new mix water exactly matches your aquarium water.

STEP 8 – Prepare To Change The Water

Once your water mix is ready its time to change the water. Turn off any powerhead/wavemaker in your aquarium that may be left out of the water when you drain some of the tanks water.

STEP 9 – Vacuum The Sandbed

Take your sand vacuum and place the end of the hose into the other, empty vessel you have sat next to the new saltwater mix. Start the siphon and vacuum the sand. Water will start to fill the empty vessel. Keep draining the aquarium water until the water in both vessels is the same height.

Here is a quick video on how to use a Gravel/Sand Vacuum:

STEP 10 – Mark The Water Level

You have now removed the same amount of water as what you will place back in. Take your Permanent Marker and in a hidden place (usually at the back corner), mark a line on the outside glass where the water level is in the aquarium. This is now where you will drain your water to for each water change. You will no longer need to drain into a vessel, you can drain straight into the sink after today!

STEP 11 – Fill With New Saltwater

Turn off the powerhead and heater in the mixing vessel and remove the heater.
Place the 6-10ft hose onto the outlet of the powerhead and place the other end into the aquarium.
Turn on the powerhead and fill the aquarium with the new saltwater mix.
Be sure not to direct it into the sandbed and create a dust cloud!

STEP 12 – Get Every Last Drop

Fill the aquarium until the powerhead is unable to pump anymore. Use a cup or jug to pour the remaining new saltwater mix into the aquarium. You have now just completed your first Saltwater Aquarium Water Change!

STEP 13 – Turn Back On Equipment

Be sure to turn on all wavemakers and equipment on the aquarium that you turned off before removing the water.

STEP 14 – Replace Canopy

Clean and replace all your canopy and clean the outside glass with a soft cloth.
Pack away all your equipment and dispose of the old aquarium water.

STEP 15 – Sit Back & Relax!

Sit back and relax while watching your aquarium. Your water may be a little cloudy for a couple of hours but then it will be crystal clear until next time!
Be sure to clean or change your filter floss/socks the next day after they have collected all the suspended detritus that was in your water.

Why Do You Need To Do An Aquarium Water Changes?

You may have seen people on the forums and social media telling everyone they don’t do water changes and have not done one for years and they have had no trouble! So why am I telling you to do one? One word, HEALTH.

How many times have you been stuck indoors all day in a room full of people and the air is just stuffy, full of germs and you are just dying to get outside and into the fresh air? Is it harming you to be in that room? Probably not, but would you like to live like that all day, every day? Heck No! So why would your fish?

Your aquarium is a closed ecosystem that tries to reach an equilibrium between maintaining health and being poisoned.
As your livestock do their day to day activities, they go to the bathroom, exhaust Carbon Dioxide, and Nitrogen is produced by the beneficial bacteria in your biological filter.

If your bacteria are unable to cope with converting these toxins they will eventually build up to levels which will poison every living thing in your tank.

When you begin to purchase corals they will also be consuming ions which they use to build their skeletons and grow. Calcium, Carbonate (Alkalinity) and Magnesium are the 3 major ones. Once they have consumed all of these elements from the water they stop growing and can even begin to die.

The main reasons for changing your water in a saltwater aquarium are these:

  • Help remove Ammonia and Nitrates that build up from the ongoing Nitrogen Cycle
  • Help remove Phosphates that Algae use to thrive and overrun your beautiful Aquarium
  • Help remove rotting material and detritus before they begin to break down
  • Replenish nutrients and minerals used by your invertebrates and coral to survive and grow
  • Prevent small chemical imbalances from becoming large imbalances over time
  • Help maintain oxygen levels if you don’t have much water movement and surface agitation
  • Help maintain crystal clear water

So now I’ve informed you on the major reasons why you need to establish a regular water change schedule, let’s get into the nitty-gritty on how to carry it out!

How Often Do You Need To Do An Aquarium Water Change?

Water changes, in my opinion, are one of the most important parts to maintaining a healthy and successful aquarium. To me, figuring out how much time I could dedicate to my aquarium each week and when I can dedicate that time was one of the first things I sorted out.

You want to try and find an evening in the week you can dedicate to your aquarium maintenance. Ideally, you should want to change the water every week. But your schedule may dictate that you can only find the time to change water every 2 weeks or even only once per month.

Finding the schedule that works for you and sticking to it will provide the stability and consistency your tank needs to be able to thrive.

My Aquarium maintenance evening is Tuesday night and I try to do this without fail! Yes, life gets in the way but I try and keep it to Tuesdays as much as I can.

The more often you can change water, the less volume you have to change, which takes less time.
Little and often or Large and Seldom.

Blue Acropora

How Much Water Do You Change In An Aquarium?

How often are you able to change water?
If you change water every week a volume of 10-15% is recommended.
If you change water every 2 weeks a volume of 15-20% is recommended.
If you change water once per month a volume of 25-30% is recommended.

These are just guidelines from years of experience from aquarists all over the world. If you have a heavy bio-load you may need to change more often than if you have a light bio-load.

If your corals are consuming faster than you can replenish with water changes then you can look at supplementing but that’s for another article.

You don’t want to change too much water in one go because this could shock your tank and cause lots of problems. Slow and subtle is how you change ANYTHING in a saltwater aquarium.
The only time you would do a large water change is if you need to save your tank from a serious problem, eg: Someone spills a drink into your water

Which Kind Of Salt Do You Use In Aquariums?

Table salt right?! Nope. But it’s salt! Yes, it is but the salt mixes designed for use in your saltwater aquarium are a blend of some 30+ minerals and ions to ensure your inhabitants thrive in their home.

You can find out more on aquarium salt mixes in my ‘How To Measure Salinity In An Aquarium’ article.

By using salt made for your aquarium you will ensure your tank will flourish.
Amazon.com stocks the most popular brands and has great shipping considering its weight:

They all come in a range of quantities so you can purchase the best size for your aquarium. A 200 gallon box of Instant Ocean would be silly for a 15 gallon nano-tank!
Your salt is susceptible to moisture once the bag or bucket is opened, so you don’t want to keep it sitting around for months on end. It will end up like concrete!

What Type Of Water Do You Use In Reef Tanks?

Just like the salt mix, the type of water you use can really affect the long term health of your aquarium. Using water that is full of Chlorine, Phosphates, Nitrates and more are asking for algae blooms and a sickness.

Which would you rather live in? Crisp, clean mountain air or a highly polluted, dusty city? I know which one I would choose! The water you add is just the same as this analogy. The better the water quality, the better your aquarium will be.

There are 4 types of water that you can use in your water change mix:

  1. Water straight from the tap/faucet
  2. Water from the tap then treated with water conditioner
  3. Bottled water bought from a store
  4. RO/DI filtered water

Tap/Faucet Water

BAD OPTION

Do you know what your city injects into your water to help keep it clean? Do you know the cleanliness of your pipes coming into your home?

These are some of the questions you have to ask yourself when you are thinking about adding tap water to your salt mix. There are dozens and dozens of pollutants allowed to be used by the water companies to keep your water clean and some of these will cause you trouble over time.

==> Here is a great article by Scientific American on the pollutants found within city water in 45 States <==

Adding city tap water or even untreated well water to your tank is not recommended as there are many inexpensive options to help turn that water into a cleaner alternative. See Below.

Water Treated With Water Conditioner

GOOD OPTION

Aquarium water conditioners are a chemical solution that you add to your bucket of water and it converts many of the pollutants into safe compounds that can be removed by your filtration systems.

These solutions are great for someone new to the hobby and for those who have not yet purchased on RO/DI filtration unit for use at home. More on that later.

By far the most popular water conditioner on the market is Prime by Seachem (Amazon.com link). It is inexpensive and will treat huge quantities of water with just one bottle.

Seachem Prime Aquarium Water Conditioner

It is always a good idea to have a bottle of Prime on the shelf in case you have make a lot of water quickly for an emergency water change. I always have 20 gals of fresh water and salt mix made up but I still have a bottle ready!

Bottled Water

BETTER OPTION

Bottled water is a far better alternative to city/well water. Many people who own Pico and Nano tanks will buy ‘Flats’ of bottled drinking water to use for water changes and top off because they are using small quantities.

If you are going to be using larger quantities you can purchase the large 5 gal water bottles used for drinking fountains, then reuse and refill the bottle. Many grocery stores have machines which allow you to refill them and most towns have a water supplier that looks after all the business drinking stations, they will be able to refill your bottles too.

Be aware that the grocery store filters may not be kept up to date and your water may not be as clean as you think, but it is a better alternative. You should also be able to buy bottles of fresh water and ready-made salt mix at your local fish store. But this will get expensive!

RO/DI Filtered Water

BEST OPTION

Every experienced aquarium owner will have their own RO/DI water filter in their home. For a few hundred dollars it will give you perfectly clean water and you have control over when the filters are changed!

Most owners will have at least a 4-Stage system similar to This One from Amazon.com:

Marine Depot 4 Stage Advanced RO/DI System

The 4 stages of filtration consist of:

  1. Sediment Block Filter
  2. Carbon Block Filter
  3. RO ( Reverse Osmosis ) Membrane Filter
  4. DI ( De-Ionised Resin ) Filter

These will give you water with 0 TDS ( Total Dissolved Solids ) and because of this, your water will be the cleanest it can be to ensure your inhabitants are happy and healthy.

==>To learn all you need to know about selecting the right RO/DI unit for you, please read my article HERE…<==

Mixing Issues & How To Fix Them

Mixing Water Cloudy:

Always add salt granules to cool water, not warm.
Ensure the mixing vessel is clean and rinsed thoroughly before mixing.
Salt granules added in one go, try and sprinkle into the vessel.

Undissolved Salt Granules:

Needs more time to mix.
Water not at the correct temperature and too cold. Leave to warm up

Hard Salt In Bag/Bucket:

The granules have been exposed to moisture. Dispose of all hard packed salt.

To Finish

Changing your water is one of the most laborious jobs of maintaining any aquarium, but it is one of the most important jobs. Try and find a routine to make it as simplified as you can to ensure that it does not become a hateful task that will get put off longer and longer.

Having a clean and pristine aquarium will enhance its beauty and make the tank become a new member of your family in no time. Ensuring good water quality is a sure fire way to fend off major algae outbreaks & sickness and, not only will your aquarium sparkle, but your inhabitants will be enjoying a beautiful and healthy life.

Further Reading

If you found this article helpful, may I suggest some of our other posts that you may like:

Setting Up A Fish Quarantine Tank For Beginners


You have just noticed a funny growth on one of your fish or two of your fish have been in a fight and one is badly injured. This is the time you wish you had a Quarantine Tank ready to go!

A small aquarium, filter, heater, thermometer & PVC pipe fittings make great fish quarantine tanks. A filter sponge seeding in the sump makes for quick set up of the quarantine tank when required. Hikari Prazipro, Seachem Cupramine, Methelyne Blue & Erythromycin are great medications for quarantine.

This article will show you how you can set up your own QT tank for little cost and have it ready to go at a moment’s notice base on my own system that I have used for years with great success and very little cost.

Read on to see how…

What Is A Fish Quarantine Tank?

A Quarantine Tank or QT for short is a small, simple tank that is used to treat, monitor or rehabilitate a fish away from the stress of your main display tank.

A QT setup can be super cheap and really simple to set up, especially if you troll the second-hand classified ads or yard sales! I set mine up for $20! It has certainly saved me that 20x over!

Quarantine Aquarium
A Simple Quarantine Aquarium Setup

A Simple Fish Quarantine Tank Consists of:

  • Small 10-20 gallon aquarium. Pick the size for the fish. ’20g Long’ tanks work well for swimmers!
  • Lid, mesh top, or eggcrate to prevent jumping
  • Heater to suit tank size
  • Small hang-on-back filter to suit tank size
  • Replacement sponges for filter
  • Thermometer
  • Ammonia Alert Badge
  • Large PVC fitting or two for hiding
  • Separate QT Tools – Nets, Turkey Baster, Cups, Measuring Jug

All quarantine tanks should be bare bottom to prevent harboring bacteria or parasites and sand is not needed. Your QT and all its equipment need to be easily cleaned at the end of the quarantine period so it’s ready to go for your next purchase or emergency.

Why Should You Quarantine New Aquarium Fish?

This has been a debate in the hobby for decades and will continue for decades! There are some that say you need to quarantine and those that say it is a waste of time!

I’m in the Pro QT side because I have seen many a tank wiped out by the addition of one new fish! For the sake of a few bucks and a little of your time, it is worth the prevention!

How many Dollars worth of livestock do you have? How much hassle would it be if all your fish got a disease and died? How devastated would your daughter be if her favorite fish was lying on the sand, half-eaten when she came down in the morning? You get the picture!?

The stresses involved in being moved from ocean/growing facility to distributer, to the local fish store, to your home is immense and this could of all happened in the last few days. Many fish gets purchased as soon as it hits the store.
Some very good stores will have their own QT/rest period, but most do not!

Stress can quickly allow an invisible parasite like Ich to take hold. Your new purchase could have internal parasites. How do you know your new guy is clean? You don’t, this is why a little bit of time for your new fish or a group of new purchases is essential!

How Do You Quarantine Aquarium Fish?

My method of fish quarantine is just the same as many of the other experienced aquarists. Nothing goes in my display tank unless it has been quarantined. This is the same for corals, but that’s for a different article.

When I know I’m heading to the fish store will take about 6 gallons of water from my sump and then top off another 2 gallons of new salt mix into my QT.

I remove the filter sponge I have seeding in my sump and place it in the HOB filter, turn on the heater, add the thermometer and Ammonia Alert Badge and get the tank running and stable.

Aquaclear Filter
My Aquaclear Filter – Only Sponges Used
Aquaclear Replacement Sponges
Aquaclear Replacement Sponge 3-Pack

This is the way I have done it for years and it takes me 5 minutes because everything is cleaned and ready to go from the last QT period. I always have 2 filter sponges sitting in my sump seeding with bacteria for use at a moments notice.

Every two to four days I will do a 10% water change to keep on top of the Ammonia. Having a small quarantine tank makes this a super simple job. I have 20 gallons of new salt mix always ready at my home which really helps.

Just be sure to top up the medication you take out with the water change. A bit of math is required but should be straight forward. 10% makes the numbers easy.

eg: Cupramine in my quarantine tank requires 2 drops per gallon for the first and 3rd day, then left at that dose for 14 days. When I do a water change this would get diluted.

I use the Seachem MultiTest Copper Test Kit that I get from Amazon.com to re-dose to the recommended amount of Cupramine to maintain the optimum level. This is what Seachem advises to do so I do it and I’ve never had a problem.

How Long To Quarantine Aquarium Fish For?

Most recommendations say a minimum of 4-6 weeks. The most common tank destroying disease we worry about is Ich or Velvet. Ich has an incubation period of 30 days and is commonly activated by stress. It is a high communicable disease which is why it can wipe out your tank.

The majority of medications used to treat the most common illnesses are copper-based and copper is toxic to invertebrates, hence why we need a separate place to be able to medicate.

I always quarantine new arrivals for 30 days if there are no obvious signs of illness. If I find anything, then it takes as long as the medication regimen dictates.

Do You Need To Medicate Fish In Quarantine?

Many hobbyists use the new fish quarantine as a fallow period and only treat if they notice any symptoms. I like to treat all my new additions regardless because I cannot see what they may be carrying.

I treat the following medications during the 4 weeks in quarantine:

  • Methylene Blue (About $8 at Amazon.com) – Helps treat external fungal infections

Tools Require For A Fish Quarantine Tank

This may surprise some of you but keep a separate set of tools for use ONLY in your quarantine tank. Bacteria can live on unsterilized tools and when you place that tool in your display tank you have now possibly created a problem!

The main tools I recommend you to get for your QT are these:

  • Nets – Varying sizes for the fish being caught
  • Measuring jugs and spoons for medications
  • Glass scrubber
  • Cleaning scrubbers and toothbrushes for post QT cleaning
  • Tupperware’s for transferring livestock
  • Fish bags for acclimation
  • Airline tubing for acclimation
  • Spare heater and filter
My QT Setup Next To My Frag Tank

How To Sanitize Your Quarantine Aquarium

The important point to remember is to have your quarantine tank ready to go for when you need it, and this means it needs to be properly cleaned after each use.

The way I do this is by giving EVERYTHING a bath in warm water and white vinegar. I have a deep laundry sink so I fill it and place everything to soak. Tools, nets, PVC fittings, filter, heater, you name it it’s in there.

A good scrub, lots of rinsing then drying keeps everything pristine and ready to go for the next time.

I find the vinegar works well and kills everything we need to care about in this hobby. Some people will use bleach instead, which is good too, but I find it makes me nauseous and the splashing damages clothing, towels, flooring, etc. I also worry less about making sure the vinegar is well rinsed off everything.

Things To Be Aware Of With Fish Quarantine Tanks

Be sure to buy medications suitable for saltwater. Some are made just for freshwater and you could kill your livestock if added.

Follow manufacturer’s instructions to the letter. If they say treat for 8 weeks, treat for 8 weeks! Let the meds do their work!

When I move my fish to my QT I don’t acclimate as they are going into the water just taken from my main system. BUT, when I add them back to the display tank I always acclimate.

NEVER ADD ANY WATER FROM YOUR QUARANTINE TANK TO YOUR DISPLAY TANK WHILE ACCLIMATING!!

The whole point on the quarantine tank is to isolate an animal and its potential problems. Do not add those problems to your display tank when you acclimate!

Keep your fish bags from the store and sanitize them for use in acclimating your fish back to the display tank.

To Finish

Setting up a quarantine tank is simple and cheap to do. You can set it up in a room away from your main display and let the fish get ready.

Whether you are quarantining a new purchase or treating a sick fish, the little bit of time and effort you put in will pay off. Yes, there are times when fish do not survive the quarantine period, but that was just meant to be.

If a fish couldn’t survive the QT period then there is a reason. I want that reason to die in the quarantine tank than to find out the reason after all the rest of my fish are infected!

I always try and make my quarantine period as stress-free as possible and I find that by the end they are excited to see the person that feeds them, which then continues once in my display tank. My aquarium inhabitants are a member of my family and seeing them happy and thriving is what gives me joy.

High Nitrate In A Reef Tank: 14 Easy Ways to Reduce it!


At some point in the life of your aquarium journey, you are going to start getting your nitrate level rising to a point when you are becoming concerned. It happens to all of us, especially on our first tank when we have put in too much livestock for what it can handle.

Yes, we all buy too many fish because we want an absolutely stunning reef tank, but we never really paid any attention to the biological filtration side. Now that it has our attention, the question is how do we get the nitrates back to what they should be and keep them there?

Nitrate in a saltwater aquarium can be lowered by regular water changes, reducing the amount of food given, reducing the number of fish, vacuuming sandbed, installing a refugium or turf scrubber, or using liquid nitrate remover. Ideally, nitrate should be kept under 15ppm for a saltwater aquarium.

Nitrates are part of the Nitrogen Cycle. You may have heard about ‘Cycling Your Aquarium’ and nitrate is the last part. In fact, your tank is in a constant state of cycle every time you feed your fish, your fish goes poop or you add a new member.

Our goal is to try and let mother nature balance the Nitrogen Cycle however, for most of us, life can get busy at times, we just can’t resist that bargain at the fish store or we just want to feed that little bit more! This is when we can start to see your nitrate level begin to creep up and step needs to be taken to prevent it from poisoning your livestock.

Ways To Reduce Saltwater Aquarium Nitrate:

  • Remove Detritus
  • Reduce Food Quantity
  • Regular Water Changes
  • Rinse Frozen Food
  • Reduce Fish Quantity
  • Get a Clean-Up-Crew
  • Increase Nitrification Bacteria Habitat
  • Install a Refugium or Algae Scrubber
  • Install a Bio Pellet Reactor
  • Install a Nitrate Reactor
  • and many more…

High nitrate is ALWAYS because of your actions! If you have one fish in a 200 gallon tank, your nitrate would always be zero! But who wants just one fish!

Overstocked Aquarium

The Main Causes of High Saltwater Aquarium Nitrate are:

  • The aquarium is too young for the number livestock within it
  • Overstocked. Too many fish
  • Not enough Live Rock/Live Sand/Beneficial Bacteria habitat
  • Overfeeding
  • Little or no water changes
  • Small water change volumes
  • Too much detritus
  • No protein skimmer or protein skimmer is too small

How To Safely Reduce Nitrate in Saltwater Aquariums

Depending on how high you have let your nitrate get will depend on how much work you have ahead of you to reduce them. The main thing to remember with everything in this hobby is to:

MAKE ANY CHANGES GRADUALLY!

Doing a big 50% water change on a 200 gallon tank is just going to cause more trouble. If you have a major pollution incident, that is a different matter, but for nitrate reduction, it is just silly.

The main thing most people are recommended to start by doing is a multi-angle approach to reducing nitrate. What I mean by this is adjusting a few of the easy steps first and see how your nitrate drop.
If nothing is happening after a few more weeks, then we try the next step.

Patience is key here. You need to make a change or some changes, then give your aquarium some time to adjust before you see the result.

The ideal nitrate level you should be aiming for in a saltwater aquarium is:

Type of AquariumMax Nitrate Level
Fish Only Tank< 20ppm
Mixed Reef Tank< 15ppm
SPS Dominant Tank< 5ppm

Ways To Reduce Aquarium Nitrate:

1. Reduce Feeding Quantity

This is the easiest to fix, and leads to one of the biggest causes of high nitrates because we all love to keep our fish Fat & Happy! However, what we don’t see is all the tiny particles of food that don’t get eaten. They fall into the holes and begin to break down.

Your fish will survive with a smaller quantity of food. You may be surprised that most Reefers will slowly increase the feeding quantity over time without realizing it.

Try feeding half your normal quantity and watch your nitrate drop, and remember to only feed enough that can be consumed in one minute! The more food you feed, the more the fish poop. The more food you feed, the more doesn’t get eaten. These two alone lead to more detritus.

2. Remove Detritus

Detritus and muck left to decay is one of the biggest causes of rising nitrate.

Before each water change get a Turkey Baster and blast all your rockwork, you will be surprised how much crud will come out of all those tiny holes and pockets. Next vacuum the sandbed to help remove detritus trapped within it.

Remove any animal/coral as soon as you see it dying or dead. A rotting corpse will always skyrocket your nitrate.

Ensure you have an open aquascape that allows for good water flow throughout your entire tank. Install more powerheads or more wave makers to ensure no ‘Flow Dead Spots’.
Having a ‘Rock Wall’ and not being able to access behind your rock is an instant way to have high nitrate.

3. Increase Water Change Volume & Frequency

Manually removing the water that is laden with nitrate and replacing it with nitrate-free water will slowly reduce your nitrate level. If you are doing water changes every two weeks try changing to every week.

If you are already doing weekly water changes, try increasing the volume you change. If you are changing 20%, try upping the volume to 25%.
Every little helps! The quality of the water you use also makes a huge impact – More on this later.

4. Rinse Store-Bought Frozen Food

Commercially produced frozen food is full of nitrate-rich ingredients. Always ensure you rinse your frozen food in a mesh sock, or a fish net to rinse as much of the juice away, this will remove a lot of nitrate.

Smell the food too once it has defrosted, if it smells really bad do not use it. The food may have been accidentally thawed, re-frozen, and spoiled in the process.

I create my own frozen food using good quality grocery store-bought seafood with a mix of flakes, pellets, coral food, liquid supplements, nori, and concentrated garlic extract.

It is then blended (which stinks!) then frozen flat in a zip-loc bag. I can then cut off the desired amount, defrost and feed every night. It is much cheaper and contains far fewer Nitrates!

Kent Garlic Extreme Here at Amazon.com

Kent Garlic Extreme

5. Reduce the Bio Load

This is the second biggest cause of high nitrate: Too Many Fish!!!!
We are all guilty of it and it always creates more problems for us. How many times have we been at the store and found that fish at the top of the ‘Want List’ sitting right there in the show tank?

Freshwater seems to give a length of fish per total gallons but that does not work for saltwater. There are too many factors that can make two identical tanks have completely different Nitrate readings. Filtration, bacteria, flow, rock, sand, and Clean-Up-Crew, all play a part.

If your aquarium is just packed with fish then this is most likely the cause of your high nitrate issue. Remove some fish and see if you can swap some fish for store credit at your local fish store.

6. Add a Clean-Up-Crew

Having an army of tank janitors to tackle every part of your aquarium is essential to help you and mother nature keep your biological load in equilibrium. A good mix of snails, crabs, shrimp & microfauna will help to keep the detritus at bay, especially the detritus that is hiding in the hard-to-reach parts of the aquarium.

Research into the types of crew available and what each critter will do is essential for you to build your army. Having the right amount of each species of animal is also important because if you have too many, the food supply will eventually run out for many of them, at which time they die and add to your Nitrate problem.

Stay away from the store-prepared Clean-Up-Crew Packages as they are all about making money. Do your research, see what’s available locally and purchase your own crew. Also, be sure not to add them all in one go!

For more information on clean-up-crews, please check out his article:

Saltwater Invertebrates – Best For Beginners!

7. Increase Nitrifying Bacteria

When your aquarium initially cycled you were actually growing huge colonies of Nitrobacter and Nitrosomonas bacteria that consume and converts toxic ammonia and nitrite, which then convert it to nitrate which is far less toxic – until it begins to rise over 20ppm.

The final part of the Nitrogen Cycle is the release of nitrogen gas, therefore the more bacteria you can grow, the more ammonia, nitrite, and then nitrate get converted and removed from the tank with water changes and small amounts converted to gas, which releases from the water column.

There are several ways to increase the surface area on which more bacteria can grow:

8. Install a Refugium

Installing a Refugium is a great way to grow Macroalgae and Microfauna without being eaten by your aquariums fish. These both help to reduce nitrate in the following ways:

Macroalgae are a form of saltwater plant. Plants consume nitrate as they grow. You allow the algae to grow in the Refugium and then you dispose of half the ‘Algae Ball’, physically removing the nitrate that is bound within the algae ball.

Microfauna are small and microscopic critters that work on consuming detritus and organic waste within your aquarium. They release tiny parcels of ammonia as they excrete their waste, which is then dealt with by the beneficial bacteria as part of the ongoing Nitrogen Cycle.

They safely grow within your refugium without being eaten.

For more information on Refugiums and Microfauna please check out these articles:

9. Install an Algae Turf Scrubber

Algae Turf Scrubber
Algea Mat from an Algae Turf Scrubber

An algea turf scrubber is like a refugium on steroids. They grow algae at a rapid rate in a sealed, light-filled filter out of sight of the main aquarium. As the algae grows it consumes nitrate and phosphate from the water. Each week/month the algea is removed from the scrubber and disposed of, thus removing the bound up nitrate and phosphate form the aquarium system.

For more information on them and suggestions on sizing one to suit your aquarium please read:

Reef Tank Algae Turf Scrubbers – What Are They?

10. Install a Bio Pellet Reactor

Bio Pellets are pellets made from a bio-degradable polymer that provides a carbon-based food source for the beneficial bacteria that consume nitrate. By keeping the Bio Pellets circulating in the reactor they provide a massive surface area for the bacteria to grow and feed on.

BioPellet Reactor
BioPellet Reactor

As the bacteria feed on and consume the Bio Pellets you just open the reactor lid and add more pellets. Bio Pellets work very, very well at helping to reduce nitrate and are relatively cheap and simple to add to any system.

If you would like to setup a Bio Pellet Reactor please check out this article for more information:

Aquarium Media Reactors – What Are They & How To Use Them

11. Install Nitrate Removal Granuals

Nitrate removal granuals use beads of sulfur to convert nitrate into nitrogen gas, which is then vented.
The sulfur beads encourage the growth of Anaerobic Bacteria which oxidize the nitrate to convert them into nitrogen gas.

The most common way to use this is by adding the granuals to a mesh bag and placing it into the sump or filter compartment of your reef tank.

12. Use a Liquid Nitrate Reducer

Solutions like Red Sea’s NO3:PO4-X and Prodibio’s Bio-Digest are liquid solutions you add to your water to give your nitrate feeding bacteria a good meal to help grow and multiply. The more you grow, the more nitrates are converted to gas and the lower your nitrates will be.

These work in a similar way to the granuals but in a liquid form, which can be dosed to the tank by hand or automatically via a dosing pump as and when required.

13. Vodka/Sugar Dosing

Vodka and sugar dosing are also referred to as ‘Carbon Dosing’. Carbon dosing is providing your bacteria with a Carbon-Rich food source for them to grow, multiply and consume nitrate.

These bacteria are then removed via your protein skimmer, which is then emptied by you, thus reducing your nitrate within the system.

Both sugar and vodka are a means to provide the carbon source and there is lots of information with good results online on how to begin carbon dosing.

This carbon is not the same activated carbon you would use to remove dissolved organic material from your water. This form of carbon for the bacteria is the ‘Building Blocks of Life’ type of carbon terminology.

Here is an article from Red Sea Aquatics Chief Scientist on Carbon Dosing

14. Use Only RO/DI Water

This is one of the most beneficial things you can do to ensure a healthy aquarium, especially if you purchase this before initially filling your aquarium for the first time. The amount of junk the city water departments add to your town’s water supply is unbelievable. High nitrate are usually in there!

RO/DI Water Filter
RO/DI Water Filter

Investing in a good 4+ stage Reverse Osmosis & De-Ionised (RO/DI) filter system will be one of the best investments for your aquarium. Not only do you need to use RO/DI water for your water changes but also for your Top Off water.

These filters remove the nitrate, and many other pollutants before it goes into your aquarium. This one thing can solve 90% of your algea, and chemical issues!

You can find a great selection of RO/DI water filters specifically for aquariums Here at Amazon.com

To Finish

One of these solutions by itself may not lower your nitrate enough, but combining as many of these fixes as you can will show a marked reduction in your nitrate overall.
Start with the free and cheaper options, and then if you are still testing high levels of nitrate, begin research into one of the more costly options.

I personally run Bio Pellets in a reactor and I have zero nitrates, but I also pay close attention to all the free solutions and all my water is running through a 3 stage RO/DI system like you see above.

Prevention is better than cure!

Further Reading

For more information on learning about and selecting the perfect RO/DI unit for your system, you can read my article:
How To Select An RO/DI System For Your Aquarium.

If you are unsure what ‘Top Off Water’ is please read my article and see how you ever managed without one!:
What Is An Aquarium Auto Top Off?

Aquarium ATO Automatic Top-Off System – What Is It?


Have you ever looked at an aquarium and the water level is 3/4 full or have been looking online or cruising the forums and keep coming across this ATO acronym? Have you decided you need to stop manually topping up your aquarium water?

Then the answer to all these is an Automatic Top Off System. I remember the first time I saw this system and I wondered how I had gone so long without one of these. ‘Game Changer’ is two words to describe these little guys!

Aquarium Automatic Top Off Systems (ATO’s) are a device that monitors and automatically adds freshwater to an aquarium to replace the lost water that the aquarium evaporates. Because of heat from lights, pumps, & the water temperature aquariums can evaporate up to several gallons of water each day.

An Automatic Top-Off System is one of the cheapest, yet best investments you can make to your aquarium and for not that much money they really save you a lot of work on a daily basis!

Read on to find out all about getting and setting up your own…


To help you follow and understand what an ATO system is you can check out a huge selection of ATO systems for all aquarium sizes Here at Amazon.com.


What Is An Aquarium Automatic Top Off System?

In any aquarium, whether it is a freshwater or a saltwater tank, your water will evaporate. Any time the surrounding air temperature is above 0°C/32°F water will begin to evaporate. The warmer the water gets, the faster it will evaporate. Add a breeze over the water surface, and it will evaporate even faster.

As water evaporates in an aquarium, the elements that don’t evaporate get left behind. This makes the concentration of these elements left in the water to become stronger.

For those of us with a saltwater aquarium, the evaporation causes our salinity to increase the more water we lose.

SALT DOES NOT EVAPORATE! ONLY THE WATER EVAPORATES!

Because the volume of salt remains the same, the salt-to-water ratio will rise, which if left unattended will cause distress and eventually death to the aquarium inhabitants.

To prevent this salt-to-water imbalance we must replace the water lost to evaporation with FRESH WATER.
This can be done by manually adding new water each day or install an Automatic Top Off system or ‘ATO’ as it’s commonly abbreviated to.

How Does An Aquarium ATO System Work?

In its basic form, an ATO works by sensing a drop in the aquarium water level and then inserts fresh water back into the tank until it is full again.

Basic Aquarium ATO Operation

There are several ways that this can be accomplished:

  • Electronic device with sensors and pumps
  • Mechanical device with valves and timers
  • A mixture of both devices

Let’s look at each type of system to help you understand the type of ATO you may wish to install on your aquarium and Trust Me, you will be installing one after you have manually topped up your tank every day for 2 weeks!

Electronic Aquarium Auto Top-Off Systems

There are some very, very good electronic ATO systems on the market today. They are manufactured by some other the most reputable aquarium manufacturers in the world and their reliability rate is incredibly good. This is good as an improperly working ATO will crash your tank and could flood your house, depending on how you have it set up.

The majority of the electronic systems available today monitor the water level using at least 2 sensors of some kind.

There will be an UPPER LIMIT sensor which will tell the unit to stop filling as the aquarium is now back to full.

There will be a LOWER LIMIT sensor that senses the water drop from evaporation, which then tells the device to start filling.

Additional items can be added to the units like a timer to ensure the unit will run for no longer than 10 minutes. A backup Upper Limit sensor to ensure your aquarium does not get overfilled and then flood your floor. An alarm to warn you of a fault.

Each manufacturer has its own unique system with pros and cons to both. There is also a large price range between the manufacturers so the choice really comes down to which system suits you better.

My Top Electronic ATO System Recommendations:

(Links to Amazon.com)

  1. XP Aqua Duetto – Dual Sensor and no moving parts
  2. Auto Aqua Smart ATO Micro – This unit is tiny and has no moving parts!
  3. JBJ Automatic Top Off – Use any pump you wish
  4. Tunze Osmolator Nano – Perfectly suited to Nano-Reefs with the pedigree of its older brother

Mechanical ATO Devices with Valves & Timers

This is a solution that appeals to the many, many DIY savvy reefers out there. The simple act of moving water from one vessel to another can be accomplished in many ways and the cost of doing so can vary over a huge range.

The mechanical devices and timers are a cheaper way of installing an ATO system and there are some kits available, or you can source the parts yourself and create your own DIY ATO.

The mechanical systems can be:-

  • Gravity-fed to a float valve from a reservoir mounted higher up
  • Pressure-fed straight from your RO/DI unit to a float valve
  • Mechanical float switches connected to electrical relay and pump

These systems are by far the cheapest but you have to design in fail-safes to prevent failure and causing too much top off water to be put into your aquarium. A well-designed mechanical system can work very well, but for a beginner, I would stick to the Electronic Devices!

Some Mechanical Kits Available Are:

(Links to Amazon.com)

  1. Malida ATO Float Valve – As basic a device as you can buy
  2. Float Switch & Pump– Connect to a plug-in timer and you have a basic, but reliable ATO

Electronic & Mechanical Systems

This is the best for the DIY Reefer. This allows you the flexibility of cost with safety and reliability, BUT YOU HAVE TO KNOW WHAT YOU ARE DOING!

I created my own ATO built into my own Aquarium Controller. I used a mix of float switches, Electronic timers, and electronic solenoid valves to ensure my ATO works flawlessly every time.

Some people connect their ATO float valve to their RO/DI unit with a solenoid valve in between. This solenoid valve is then turned on by a plug-in timer to operate for 5 minutes, twice a day.
You could even place two solenoid valves inline in case one fails open!

The list is endless to a mix of electronic and mechanical ATO systems but as I said before if you are new to this just spend the few extra dollars and get a simple unit to install and setup from one of the recognized manufacturers.

This excellent video from MarineDepot will help you understand more…

Can I Use An Aquarium Automatic Top-Off Without A Sump?

You certainly can! In fact, some of the manufacturers have seen that customers are wanting to install ATO’s on sumpless tanks but they don’t want to see the huge sensor array slapped on the side of the glass.

The AutoAqua Smart ATO Micro (at Amazon.com) is a great example of that. Just look at the size of the sensor that sits on the side of the glass, it’s tiny!

AutoAqua ATO Sensor
AutoAqua ATO Sensor

The other great benefit to many, many of the ATO systems is you can install a 5 gallon bucket in the aquarium stand and feed the ATO. You would never know the system was installed! A 5 gallon bucket could last nano-tank weeks!

Precautions With Automatic Top-Off Systems

As with everything on an aquarium, you have to be careful and mindful of certain pitfalls. This entire website is dedicated to try and help prevent as many of them as possible.

If you watched the video you may have noticed some of the common installation pitfalls that can creep into a system. Below is a list of some of the more common things to watch out for with ATO’s:

Siphoning

This is when the ATO reservoir or water source is mounted higher than the aquarium or sump. Once the pump stops topping off, gravity will continue to pull the water through the pipe and into your system.
Install the reservoir lower or at the same height as the ATO dispensing pipe.

Loosely Installed Pipes and Sensors

A pipe falling out of the aquarium or sump will only lead to a wet floor, however, a sensor that falls off and activates could see a huge amount of freshwater dumped into your aquarium. Make sure ALL pipes, fittings, and sensors are securely installed.

Critters

Snails, shrimp, and crabs can play havoc on your float switches if they are in the same location as each other and the sensors are not guarded. A rogue critter can accidentally start or fail to shut off an ATO system and again, excess water gets dumped in!
Most kits now come with critter guards but keep them clean and working!

Stuck Float Switches

As with critters, a stuck float switch can crash your system. Get in the habit of each week give your float switches a clean and check for full travel and operation. I’ve had mine stick and only because of my regular maintenance did I find the problem before it was too late!

Empty Freshwater Reservoir

This is not as bad as dumping too much water in the aquarium, but make sure you check it often and keep it filled. Be very mindful to check it just before you leave to go on vacation. While you are away you could get an even bigger reservoir and stick it next to your stand so you know your ATO will not run out and burn the pump out from running dry!

Unlimited Water Supply

If you plumb your ATO into your RO/DI unit be aware that if it fails your water will not stop running. Not only will it crash your tank but it could also flood your house! If you do plumb it directly, make sure you have multiple levels of fail-safes in place to ensure your system is reliable and safe!

To Finish

ATO’s are one of the first jobs every person with an aquarium should automate. It is such an easy task to do and the $100 or so will be money well spent. There are many options to provide a solution to every budget and DIY skill level, and you will not regret setting up a system to keep your water volume and/or salinity bang on!

Further Reading

You may find the following articles helpful:

How To Easily & Accurately Measure Aquarium Salinity


Salinity is one of the most important parameters to monitor in your aquarium because without salt, you have a Freshwater Aquarium!
Salinity is the measure of how much salt is dissolved within a body of water, and keeping it as constant as you can is one of your main jobs with a saltwater aquarium.

I remember making the jump from fresh to saltwater and was nervous about all the salt mixing stuff, but once you have done it once or twice it is no big deal. If the salt content is reading low, add more salt. If the salt is reading high, add more water.

Refractometers are the most common tool used by aquarists. Place a few drops of aquarium water on the viewing prism, close the lid and look through the eyepiece. Where the blue and white areas meet is the salinity reading of the aquarium water – 1.024 SG or 30% is the ideal salinity.

Find out why most people start with a hydrometer but soon realize they are not accurate enough for today’s aquarists and why getting accurate salinity readings are so important.

Read On…

How Do You Measure Aquarium Salt Concentration?

There are 3 types of device that are available to measure the Salinity or Specific Gravity (SG) of your aquarium saltwater:

  1. Hydrometers
  2. Refractometers
  3. Electronic Sensors

Hydrometers:

Hydrometers come in two types:

Glass Hydrometer & Thermometer
Plastic Hydrometer
Plastic Hydrometer

Glass – These types of hydrometers are floated in the tube which is filled with aquarium water. The hydrometer bobs until it finds its level then the reading is taken from where the water surface meets the numbered line.

These hydrometers often incorporate a thermometer which makes them a handy tool. However, these are not used too often anymore.

Plastic – These are more popular due to their cheap price however they are notoriously inaccurate. Aquarium water is poured into the device then the needle will move until it settles, the reading is then taken from the number the needle tip points to. Air bubbles, dried salt, and crud on the needle can lead to an inaccurate reading. These devices are unable to be calibrated.

Refractometers:

These also come in two types:

Optical – These are by far the most popular tool in the hobby and one that needs to be in your toolbox. They are very accurate, easy and quick to use, Can be calibrated and are reasonably priced. Several drops of aquarium water are placed on the glass screen, the lid closed and then you look through the eyepiece to read off exactly where the color change line is. Simple.

Refractometer Reading
This reading would be 1.030

Digital – These are super easy to read, especially for aquarists who find reading the optical refractometer difficult. They are expensive compared to the optical version, but not a silly price.
A water sample is dropped into the sample port and then the reading is displayed on the screen. These can be also be calibrated.

Electronic Sensors:

Get your wallet out!

Electronic salinity testers are awesome, but you pay for it. If you already have an aquarium controller, like the Neptune Apex, then buying the Salinity Module is a great addition for not that much money. For most aquarists, the high cost makes it a want rather and a need. They can also be calibrated and are super simple to use.

What Reading Should You Keep Your Aquarium Salinity At?

Because salinity is the measure of dissolved salt in the water of your aquarium, you cannot see it, so we need to use a device to measure the water and tell us what the current level is.

Dissolved salt content is usually expressed in PPT ( Parts Per Thousand ) and by SG ( Specific Gravity ).
As aquarium owners, we do not use PPT as to get a true reading, you would have to take a known amount of water from the aquarium, evaporate off the water, leaving just the salt and then measure the weight of said salt. This process is known as ‘Mass Solids Analysis’ and is way above everyone’s heads!

Luckily there are some really simple products that measure the SG of the water and provide us with a simple reading!

Salt Values:

There are two number ranges that apply to us fish keepers:

Fish Only Aquariums:

SG: 1.017 – 1.025

For FO aquariums you can get away with having a lower salt concentration in the water, as fish have a higher tolerance to lower SG levels compared to corals. Many owners like to keep their Specific Gravity lower for 2 reasons:

  1. Less salt used = Lower running costs
  2. Lower SG levels are not tolerated by a lot of fish parasites, thus enabling healthier fish

Reef Aquariums:

SG: 1.023 – 1.028

When you delve into the awesome world of corals, your salinity concentration will need to be higher and kept constant. Corals are very picky when it comes to their water and if it is not maintained well, they are going to die pretty quick! Maintaining a rock-solid salinity level is achieved in two ways:

  1. Replacing evaporated water – Usually with a device called an ATO (Automatic Top-Off System)
  2. Regular water changes with identical water parameters

What Salt Do You Need For Your Aquarium?

Salt is salt, right! Well, yes it is and adding salt to water will make saltwater, but you need the right stuff to allow your aquarium to thrive.

Salt is the common man’s or woman’s term for Sodium Chloride. This means it is made up of Sodium ions and Chlorine ions, however, depending on the type of salt, you can have other ions in there too.

Table Salt Shaker
Table Salt

Table Salt, for instance, is high in iodine ions. Adding this to your saltwater aquarium will raise the SG but it will also raise the iodine level too, eventually poisoning your livestock.

What we need is a blend of ions that are perfectly matched to not only provide the right ion balance within the water but to also provide the beneficial ions and elements that fish, invertebrates, and corals use to grow.

In addition to Sodium and Chlorine there are some 20+ more elements that you will find in many of the popular aquarium salt mixes:

  • Calcium
  • Magnesium
  • Potassium
  • Strontium
  • Sulfate
  • Aluminum
  • and on and on…

Each piece of the salt mix blend is expertly added in the correct ratios so all you have to do is measure out the salt, dump it in the mixing vessel, mix, heat and then add to the aquarium.

There are also different salt blends to suit the aquarist. You can get mixes there are aimed for fish and minimal corals and you can get mixes aimed at heavily stocked coral tanks. The ratio of elements in each of these mixes are tailored to help meet the element consumption rates of fast-growing LPS and SPS Corals.

There are many blends of aquarium salt on the market all with varying mix ingredients and varying prices. You can buy salt in bags for mixing 25 gallons of water – good for Nano-Reefs, and you can buy the buckets and boxes for mixing 150 & 200 gallons respectively. The more you buy, the cheaper it is.

I began with regular Instant Ocean but as my corals began to grow I found the added quantities of Carbonate, Calcium, and Magnesium that Reef Crystals provided was worth the extra $8. Reef Crystals is all I use.

How To Maintain Steady Aquarium Salt Concentration?

Firstly, is to make sure your refractometer or sensor is calibrated regularly. I always keep mine in its box, on a shelf above my sump so it doesn’t get knocked. I also calibrate it every 3-4 weeks. Regular calibration is important!

What are the main reasons why your salt level will fluctuate?

  1. You prepare a new salt mix and the salinity level of that mix is off
  2. Evaporation of water from your tank.

Evaporation

This is the biggest reason for fluctuating salinity levels in your aquarium! My 90 gallon system evaporates around 2 gallons of water every day!

The one thing to remember is that Salt Does Not Evaporate!!! When replacing water lost to evaporation, you only ever ADD FRESHWATER!!!
Many people have crashed their tanks by adding more saltwater and all this does is increase your salinity level to a crazy high value that is too much for the livestock.

Myself and probably every other Reefer will have installed an ATO ( Automatic Top Off ) system to their aquarium and let that keep the aquarium topped up with fresh water every day. They are a lifesaver!

==> Click Here To Read My Article On Automatic Top Off Systems <==

How Do You Calibrate An Aquarium Salinity Testing Device?

Refractometer Calibration

Ensuring your testing device is reading accurately is essential otherwise there is no real point in testing! If your testing device is off by a couple of 1/1000’s then you could end up seriously harming your livestock.

Luckily for us, there is a cheap product on the market called Calibration Solution. Its a chemically made to read 35ppt/1.026.

You may notice on the calibration bottle the solution is set to be read at 25°C however when you look at the scale below on your refractometer you may see the values circled as either 20 or 25. These represent the number the refractometer scale was calibrated to, so now what do you do if your solution says 25 and your refractometer says 20?

Refractometer Scale 1

Refractometer Scale 2

When I found this problem I did quite a lot of research to make sure I was getting the test correct and many of the scientific papers I found referred to concentrate on the refractometer being the correct temperature and not worry too much about the solution. So long as the solution was room temperature you were OK for an aquarium.

Why? The small drops of solution you place on the glass of a refractometer will rapidly cool down to the temperature of your refractometer. The difference in readings is minimal so this satisfied me.

To Calibrate You Follow This Sequence:

  1. Ensure your refractometer has been stored at 20°C/roughly room temperature for at least 30 minutes
  2. Ensure the glass screen is clean
  3. Place enough drops of calibration fluid to fill the glass screen
  4. Close the clear lid
  5. Look through the eyepiece and see what reading you get
  6. If you are not getting 35ppt or 1.026 then you need to adjust the refractometer
  7. Using the supplied screwdriver adjust the screw until the reading is 35ppt/1.026
  8. Clean the glass screen and retry with new fluid to confirm reading is correct
  9. Calibration now complete
Refractometer Calibration Adjustment
Refractometer Calibration Adjustment Screw

Electronic Salinity Sensor Calibration

Each manufacturer will have a different process for calibrating their probes. You may require some of the calibration fluid above or you may just need some RO water. Be sure to read the instructions provided by the manufacturer to ensure your sensor is properly calibrated.

How Do You Remedy Incorrect Aquarium Salt Concentration?

If you measure your salinity and you find it is way off, the first thing to do is not panic! A rapid change in any parameter in a saltwater aquarium will always lead to trouble. Your tank has slowly got out of whack, so now you have to slowly bring it back to perfect!

If your reading is higher than 1.025 then you have Too Much salt in your water.

If your reading is lower than 1.025 then you Don’t Have Enough salt in your water.

To remedy this you will need to adjust the salt content on your next water change batch. You need to adjust this level slowly over the next few water changes. A little change at each water change!

If your current aquarium salt level is, for instance, 1.028, then you mix your salt batch to 1.027, then the next batch to 1.026 and so on until your aquarium water finally reaches your desired setpoint. Mine is 1.025 on my reef.

Once you have reached your target setpoint ALWAYS measure your aquarium salt level before mixing your new batch, then you can adjust the salt content in the new batch to suit.

Further Reading

if you found this article helpful you might also like these too: