RECENT ARTICLES

Can Canister Filters Be Used On Saltwater Aquariums?


A canister is the ‘Go-To’ filter in the freshwater world but as many aquarists move over to a saltwater aquarium one of the first questions they have is if they can reuse their existing equipment – The canister filter being one of them.

Canister filters can be used on a saltwater aquarium as the main filter or a supplemental filter that is used when required. They can provide mechanical, biological, and chemical filtration but must be cleaned regularly to prevent the build-up of detritus leading to high nitrate and ammonia.

So the short answer is Yes, but there are better alternatives available. The main reason why people use a canister filter on their new saltwater aquarium could be for the following reasons:-

  • They had one from their previous freshwater setup
  • They are a cheaper filter to buy
  • Many first saltwater tanks are not drilled for a drain to a sump
  • They are usually stocked at many local fish stores and can be easily pushed onto an unsuspecting buyer

In this article I want to show you the pros, cons, and alternatives…

How Does a Canister Filter Work?

Aquarium canister filters work by sucking in aquarium water through an intake pipe placed in the aquarium. The water is then pumped through several containers of various filter media before being returned back to the aquarium via an outlet nozzle or a spray bar consisting of a line of drilled holes.

Aquarium Canister Filter

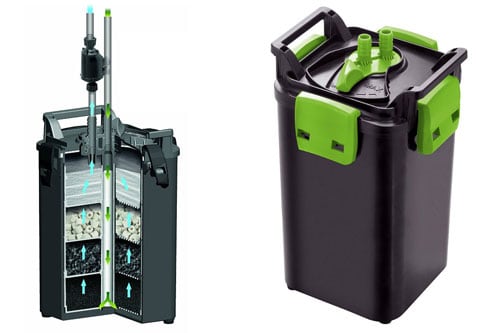
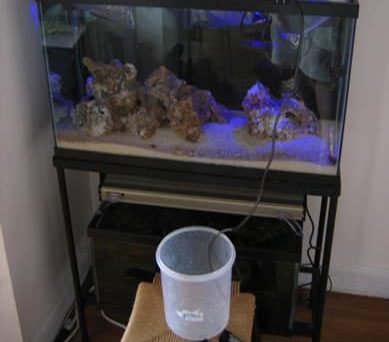
The nice feature that appeals to many aquarists is the main filter body (The Canister) sits outside of the aquarium so it can be easily hidden in the aquarium stand for example. Flexible hoses are then run to and from the aquarium allowing for a very discreet installation.

The modular design of the media containers allows the user to house 3-4 different types of filter media to mechanically, biologically, and chemically filter the water.

The filter can be filled with just one media and used as required or can be filled with multiple media and run as the main water filter for the aquarium.

What Saltwater Media Can You Use In A Canister Filter?

Canister filters are designed to run a combination of mechanical filtration in the form of floss or sponges, chemical filtration in the form of bags of activated carbon, and biological filtration in the form of ceramic tubes to produce a large surface area for nitrifying bacteria to colonize.

When a canister filter is used on a saltwater setup careful selection of media and the order in which it is stacked in the canister will allow you to successfully run a canister filter on smaller aquariums.

The two main problems with the canister filter are that you are usually unable to clearly see what is going on in the filter, and their size limits the amount of filter media you can place in each canister.

To successfully filter a saltwater aquarium you need 3 types of filtration in your system:-

  1. Mechanical Filtration
  2. Biological Filtration
  3. Chemical Filtration

To find out lots more information on each of these types of filtration,
I have a great article all about it called:

Types of Aquarium Filter Media & What They Do‘.

The main types of filtration you can easily accomplish with a canister filter on a saltwater aquarium is Mechanical Filtration & Chemical filtration.

The Live Rock/Dry Rock you have in your aquarium will eventually take care of the Biological Filtration as your aquarium cycles and matures so leaving that part out of the canister allows you to either:

  1. Purchase a smaller and cheaper canister filter, or
  2. have more room for adding more mechanical & chemical media

NOTE: When using a canister filter you have to establish which way the water flows through the filter to ensure the mechanical media is placed first to remove all the solids to prevent the solids from collecting and plugging the chemical and biological media containers.


What Type of Mechanical Filtration Media to Use in a Canister Filter?

Sponges and filter floss are the best way to accomplish the mechanical removal of solid matter from your water. Most canisters come with purposely shaped pads to perfectly fit inside. They can be regularly rinsed under the tap and replacements are available for purchase as they wear out.

Canister Filter Sponges
Typical Canister Filter Sponges

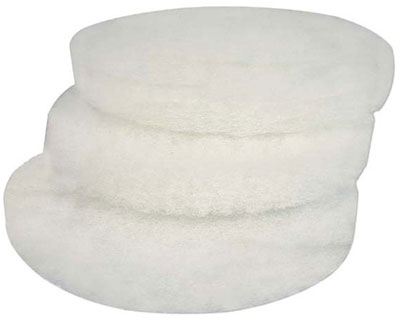
Filter floss in a chamber is a cheaper way to filter out the solids. You can just remove it and replace with new floss each week and a bag of aquarium floss lasts so much longer for a lower purchase cost.

You Can Find aquarium Filter Floss Here at Amazon.com

What Type of Chemical Filtration Media to Use In A Canister Filter?

Activated Carbon is the most common chemical filter media used in canister filters however, products like Purigen and Chemi-Pure combine activated carbon with other chemical media to filter more pollutants from the water by using just one product. They are popular in both fresh and saltwater aquariums.

This is where you can really improve the efficiency of a canister filter with ease because of some great products that are available. Most seasoned canister users will place the following two products into the two chambers following the filter floss:

1. Purigen

Purigen

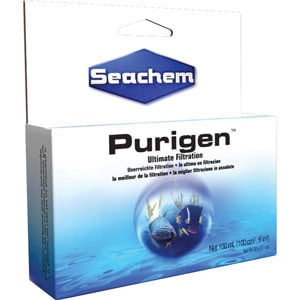
This is a synthetic filter media that is designed to absorb Ammonia, Nitrite, and Nitrate compounds. It also has the added benefit of polishing the water, similar to what Activated Carbon does.
As the Purigen becomes exhausted it changes its color to dark blue and eventually black. The great benefit of this product is that you can recharge the media by removing it and washing it in a bleach and water solution.

The recommended usage is 1ml for every gallon

Find Purigen HERE at Amazon.com

2. Chemi-Pure

Chemi-Pure Elite

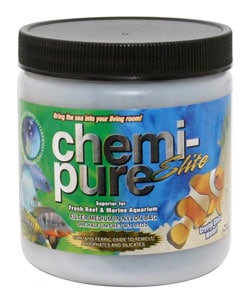
This is a manufactured mix of Activated Carbon and a ‘Purigen’ type of ion-removing compound that helps to remove organic waste and absorb the harmful Ammonia, Nitrate, and Nitrate compounds. It comes in a bag which can be placed in a media container and will have to be disposed of once it is exhausted.

The manufacturer recommends you change this out every 4-6 months providing you have sized the amount of Chemi-Pure correctly. Once your aquarium begins to get cloudy, it’s time to change the media.

You can now also get Chemi-Pure Elite which adds a Ferric Oxide material to the media to help reduce Phosphates and Silicates at the same time, but only lasts 4 months.

The recommended usage is 1 unit for every 5 – 40 gallons

Find Chemi-Pure HERE at Amazon.com

What Type of Biological Filtration Media to Use In A Canister Filter?

Most aquarists recommend you add in a manufactured ceramic filter media to provide a large surface area for nitrifying bacteria to colonize. The most popular product is MarinePure by CerMedia as it is manufactured with one of the highest surface areas for its size providing maximum colonizing space.

I highly recommend you add in a little of this media to help significantly with Biological Filtration. I mentioned that your rock will be your main biological filter, but if you have space left in your canister of wish to replace the supplied ceramic media with something better then I highly recommend MarinePure Biofilter Gems!

MarinePure is a manufactured form of biological filter media. They are available in ‘Blocks, Plates, Spheres, and smaller ‘Gems’. These are being installed in many aquarium sumps and canister filters to provide incredibly more surface area for bacteria to colonize.

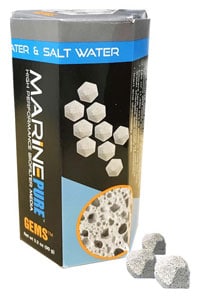
The benefit of these products is that they are extremely porous and hardly trap detritus! By providing more space for bacteria to colonize allows for higher feeding and stocking levels as there are more bacteria to process waste.

I recommend the Gems as they are simple to fit into any canister tray size. The blocks, plates, and spheres will be too big and you will have to ‘Saw’ them to fit, thus wasting money.

1 box of gems supports up to 70 gallons

Find the MarinePure products Here at Amazon.com

How Often Do You Need To Clean An Aquarium Canister Filter?

Canister filters should be cleaned weekly. This will ensure the detritus trapped within the mechanical filter floss or sponges is removed before it has a chance to break down into nitrate and ammonia. The flushing of the medical and biological media will also help remove any trapped detritus particles.

You have probably heard of canister filters becoming ‘Nitrate Traps’ on many forums, and this is why.

The second reason to keep them clean is that as the filter becomes clogged, the flow rate though it will decrease and less water will pass through the media to be filtered. Like any piece of equipment on your aquarium, keeping it regularly cleaned, and maintained and the media replaced will see many years of successful use and a pristine aquarium.

How Do You Clean a Canister Filter?

Canister filters can be cleaned by removing the canister from the aquarium hoses and removed to a sink where the filter media should be rinsed using water from the aquarium. Never rinse filter media under a faucet as this will kill any nitrifying bacteria colonized within it.

All canister filters will come with specific instructions from the manufacturer on how to remove and install both the canister and filter media, however:

The usual canister filter cleaning process is as follows:

  1. Turn off the electrical power to the filter and let it finish draining
  2. Close the isolating valves on the hoses to prevent the water from siphoning out of the aquarium
  3. Remove the hoses from the canister body. Some canisters have a quick-release system
  4. Take the canister to a sink
  5. Grab a bucket or container of water from the aquarium
  6. Open the canister and remove the filter media compartments
  7. Rinse each compartment of filter media in the bucket of tank water

Never rinse filter media under a sink faucet as this will kill any nitrifying bacteria colonized within it!

  1. Replace used media as required
  2. Re-install the cleaned media back into the canister and close the canister
  3. Discard the bucket of now dirty tank water down the sink
  4. Reinstall the canister and the hoses back onto the filter
  5. Top the aquarium up with new water to its operating level (Good to clean this during a water change!)
  6. Have some filter floss ready
  7. Turn on the electrical power to the filter
  8. Place the filter floss over the outlet nozzle for the first few seconds to collect any dirt or lose filter media being ejected from the filter
  9. Remove and clean/dispose of the piece of filter floss

Can I Use a Canister Filter For a Fish-Only Saltwater Aquarium?

Canister filters work well on fish-only aquariums to help remove detritus via mechanical filtration. They can be used as a supplemental filter or can be installed with mechanical, chemical, and biological media and run as the primary filter on the aquarium. Several can be installed on a large aquarium.

Most canister filters installed on a fish-only aquarium typically use lots of filter floss and Purigen or Activated Carbon to help remove soluble fish waste and polish the water.

What are the Pro’s & Con’s of Canister Filters in Saltwater Aquariums?

Every piece of equipment you intend to use on your aquarium should have some thought into how it will work on your setup. Everyone has a different setup and while one item may not work for them, it could work perfectly for you.

Here are some things to consider when setting up a canister filter on a saltwater aquarium:

Canister Filter Pro’s

  • Relatively inexpensive
  • Many aquarium owners may already own one
  • Easy to maintain
  • Spare parts are easily accessible
  • Does not require a drilled aquarium
  • Multiple trays to allow various filter media types

Canister Filter Con’s

  • Need regular maintenance
  • Limited to the amount of media in each basket
  • Unable to place additional equipment inside it
  • As they clog, all the filter media becomes affected
  • Have to open and inspect the canister to check media usage
  • Multiple are needed on larger aquariums, doubling the maintenance

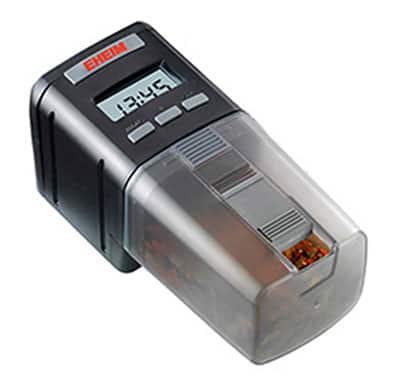
Which is a Good Canister Filter For a Saltwater Aquarium?

The most used and trusted canister filters are from brands like Eheim, Fluval, Marineland. They have multiple sizes to accommodate every aquarium size and when used on large or heavily stocked aquariums multiple canister filters can be used. Each product has replacement media available for purchase.

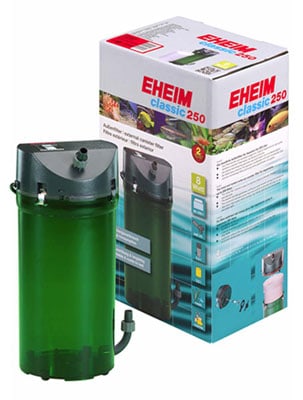
I have worked on many successful aquariums that use canister filters and by far the most popular and easy to work on are the ‘Eheim Classic’ Range of canisters. They have been around for decades and you may already own one!

In my eyes, if this was the route I was to take, then I would be buying an Eheim!

You can see more information, read the great reviews, and find the latest prices on the large range of the most popular Canister Filters HERE at Amazon.com

Are There Other Alternatives to Using a Canister Filter?

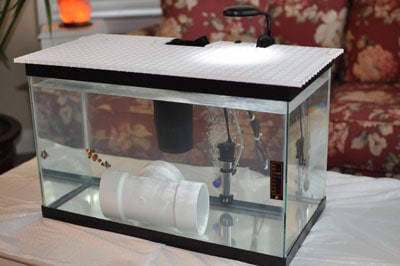
A sump is the most common alternative to using a canister filter, especially on a saltwater aquarium. A sump is also commonly installed within the aquarium stand but its open form factor allows for the installation of more equipment, easy to see, and access for rapid, regular maintenance.

There are many reasons why most saltwater aquariums utilize a sump and the benefits are worth the extra cost it takes to have one on your system. If this is your first saltwater aquarium then I can tell you now that it won’t be long before you are planning your next tank that has a sump.

Use this tank to learn and then make the jump to a drilled aquarium and sump for your next if you are just upgrading from your freshwater aquarium using the tank and existing equipment.

If nothing else, a sump allows you to hide all the equipment so all you see is the raw beauty of the fish and corals without the distraction of pipes, cables, and equipment all over the place!

If you would like more information on how sumps work and what you need, you can find all the information in my article:

Aquarium Sumps: This Is Everything You Need To Know!

Further Reading:

If you found this helpful and would like more information about saltwater aquariums please take a read of:

Aquarium Tank Crash – What Is It & Can it Be Avoided?


Most of us have been lucky enough to catch any errors or problems with our aquarium to prevent a catastrophic ending to our pride and joy. But for those who have been away, or not paying attention, a total loss of corals, fish, or both is completely devastating!

A tank crash is when a rapidly occurring event happens within an aquarium. They often happen without warning and are commonly caused by a biological imbalance. It is usually too late to do anything to prevent it by the time od discovery and is usually followed by a complete restart of the aquarium.

Tank crashes force many people to leave this hobby mainly due to their lack of experience or attention and causing the crash. For the rest of us, however, it is a great opportunity to pick up some great bargains on the second-hand market!

Many people do re-start their aquarium again, hopefully learning from their mistakes and proper research and education is key.

Let’s look at some of the most common things that can lead to a tank crash so you can now avoid them…

What Causes Tank Crashes?

Every aquarium crash can usually be attributed to one of the following areas:

  • Human Error
  • Contamination
  • Equipment Failure
  • Chemical Imbalance
  • Lack of Maintenance
  • Mother Nature

Each of these categories contains some of the simplest errors, but they can have terrible consequences.

Tank Crash from Human Error:

Too Much, Too Soon

You have tried to add too many fish or corals too soon in the life of your aquarium. The Beneficial Nitrifying Bacteria are not in the quantities to cope with the bio-load and you have a huge Ammonia spike killing your inhabitants.

Intoxicated

We are all bad for this! Having a beer or wine while doing maintenance and forgetting or miscalculating something. When do you normally catch the error? The day after when it can be too late! Save the booze until after the work is complete!

No Alcohol Sign

Dosing A Chemical You Shouldn’t

There is an old saying that if you can’t test for it, then don’t put it in. This is sound advice. However, there are times when you need to dose a medication like Chemiclean or similar.

Make sure you follow the instructions to the letter and research it as much as you can before using it. Many people before you will have used it and they will have published their results on the forums. Take a generic view and see what the most common answers seem to be.

Over Dosing

This causes more tank crashes than anything, especially mis-dosing Alkalinity. Before you change anything on your dosing regimen, be sure your test result is accurate.

Make any changes in small increments to prevent a rapid change in a water parameter. Test often to ensure what you want is what is happening!

Tank Sitter

An inexperienced tank sitter can cause you more harm than good while you are away on vacation. Try and find a fellow aquarist who you can train on your system to look after your tank. Lack of experience or not being able to spot a problem can easily lead to a tank crash.

For more information and great tips on preparing your aquarium for a vacation, you can read my article HERE…

Trying Something New

Fiddling when you don’t know what you are doing is a sure way to begin a chain of events that can lead to a tank crash. This hobby relies so much on knowledge and there is a tremendous amount of information out there.

Before you try anything new, research, research & research. This entire website is created to help you with that. Just read, learn and then try!

Bad Advice

There is so much of this around, especially on the internet, and to be honest a lot of fish stores. Many fish stores can have inexperienced staff or staff that just want you to part with your cash.

The best advice I can give to any newcomer is to ask questions to as many people as you can and see what the general consensus is for your answer. Over time you will begin to find your trusted sources and then stick with them.

Tank Crash From a Contamination:

Aerosol Sprays

Aerosol Air Fresheners, Stinky Candles, and Misting Devices have been known to cause tank crashes by poisoning the water. Most people will have no problem with these but I have read that some are so concentrated and when released next to the aquarium the Activated Carbon and Protein Skimmer have not been enough to remove the pollutants.

I would advise using caution when using any of the devices in a room containing a saltwater aquarium. They may have been fine for a freshwater aquarium, but the marine environment is more delicate and may prove catastrophic if one of these is used without oversight.

You may find this article helpful: ‘Are Candles, Scented Oils & Air Fresheners Aquarium Safe?

Contaminated Water

Never ever put water from a bag into your aquarium. Water from another aquarium could contain any number of treatments or contaminants that could kill your tank.

You could purchase a fish from a store who is treating it with copper. Add copper to your aquarium and say goodbye to all your invertebrates!

Untreated supply water from your city or well. I live on a lake and I can smell an earthy tone in our house water after heavy rainfall. But my RO/DI unit produces 0 TDS all of the time and I’m not worried. An RO/DI water filter will be one of the best investments you ever make for your aquarium

Find out more information in my article How To Select An RO/DI System For Your Aquarium.

Dirty Hands/Arms

This is a common one. The majority of us use body washes and scented soaps to wash with. There can be traces left on our skin as we put our arms into the tank.

Have you been at work and forgot to wash your hands and arms before ‘Quickly Fixing’ something in the tank.

Contamination can happen quickly or be the catalyst to something more serious in your aquarium.

Tank Crash from Equipment Failure:

Cracked heaters, a heater or chiller sticking in the ‘ON’ position have caused many a tank crash. Replace your heater on an annual basis, buy good quality heaters.

For years I have used and recommended the Eheim Jager Range – Amazon.com link.

Stuck Heater/Chiller

Keep your chiller serviced and maintained and if you can, get yourself at the very least a temperature controller to shut off the device if your water temperature goes out of range.

An Aquarium Heater Controller is a great investment which you can find Here at Amazon.com

An aquarium controller is the best solution but the cost can make them prohibitive to many aquarists just starting out.

You can find loads more information on Aquarium Controllers in my article Here.

Dosing Pumps

A dosing pump not dosing is not too bad but a dosing pump that continues to dose is a big problem. You should keep them maintained and calibrate them regularly. Replace hoses and grease the rollers often to help maintain efficiency.

Mechanical Timer
Mechanical Timer

Dosing pumps that use Plug-In type timers to operate them need to be checked to make sure the time setting has not been accidentally altered. Mechanical Timers with the pins you move in/out should never be used on dosing pumps – They are too easy to accidentally hit.

Find a Good Electronic Timer Here at Amazon.com

ATO

Correct installation and setup are paramount with an ATO. A malfunctioning system ATO will drop the salinity in your aquarium rapidly and will lead to a tank crash if left too long.

Ensuring the run timer is set correctly and all the hoses and sensors are securely fastened will prevent most ATO problems.

If you are unsure what an ATO system is you can find out more in my article HERE…

Stray Electrical Current

An electrical current passing through the water can be deadly and if it is small enough can go unnoticed but can slowly cause an imminent death that snowballs into everything dying.

If you feel a shock when you place your hands into the tank its time to investigate every piece of electrical equipment to look for the culprit

Tank Crash – Chemical Imbalance

Ammonia

Ammonia is very toxic to aquatic livestock and it needs to be at zero. Dead, decaying animals & waste will all breakdown into Ammonia if not removed.

Water changes and good husbandry will maintain your Ammonia at zero.

Lack of Gas Exchange

Tightly fitting tank lids, lack of surface agitation or no water movement will prevent gas exchange at the water surface. Nitrogen and Carbon Dioxide need to escape and oxygen needs to be taken in to keep your livestock alive.

Keep the water moving as much as possible, especially during power outages. Oxygen depletion is the first killer during an outage.

Lack of Oxygen

All living organisms need oxygen to survive. You, your fish, your coral, your bacteria all need oxygen and without it, things are going to die quickly.

Algae and medications can strip the water of oxygen, gas exchange, mentioned above all contribute to lack of oxygen.

Water Parameter Imbalance

Keeping your water parameters stable is all you do as an aquarist. You don’t keep livestock, you keep water. Corals are especially susceptible to wandering parameters. Having a parameter like Alkalinity go off the chart is a great way to ensure your coral dies.

Weekly testing is the best way to keep an eye on your water parameters and help you catch anything early.

Rapid Parameter Change

As you may have heard many times, “The only things that happen fast in a Reef Tank is Death” and it is true. Any changes you make must be done gradually. Your aquarium is a finely tuned ecosystem and it needs time to adapt to change.

If you have any parameters changing rapidly you may be lighting the fuse to a tank crash.

Slow and Steady!

Beneficial Bacteria Die-Off

Your Nitrifying Bacteria are your biological filtration that converts the toxic Ammonia and Nitrite compounds into Nitrate and Nitrogen. If they die your tank is going to start heading south.

Lack of oxygen and medications are the two biggest culprits. Make sure you research any medication before you add it to your aquarium!

Keep the little guys alive and keep your tank alive.

Anemones Sucked Into a Powerhead

It happens often and it’s the only reason I do not have an Anemone in my tank. They move and can let go of their grip. Having a reef tank you need strong flow for your corals. Nems will ALWAYS get drawn to a powerhead if they fully let go.

They become shredded and release toxins into the water and there is usually no way back. If you have Anemones then be aware and protect them from the powerhead intakes. You can buy foam collars that help, but you need to clean them daily.

Lack of Maintenance

This is pretty self-explanatory. The majority of the causes previously mentioned can usually be prevented with regular maintenance, good husbandry, and a constant watch for anything arising.

Maintenance can become a chore but you need to find a way to make it easier for you, automate it or find a product so you have to do it less. The easier it is, the more you will do it.

Procrastination is one way to have a tank crash.

Mother Nature

No one can beat her and if it’s meant to be that your tank does not survive her wrath, that’s just the way it is.

Floods, fire, hurricanes, and power outages can only be tolerated so long before your tank reaches a point of no return. Preparation is the key here and the more you can be ready, the longer you tank will survive.

I have a great article on how to prepare your aquarium for a power outage HERE which gives you some great cheap and expensive ways to help.

Can You Stop A Tank Crash?

Generally, tank crashes are hard to stop because the owner is unaware of the situation until they see visible changes with livestock in the aquarium. Usually, by that point the tank crash is imminent and the potential of a total loss can be very high. A rapid water change may be the only help.

If you catch the symptom early enough you can possibly stop the lead up to a tank crash, but a tank crash is really the point of no return.

Good, regular, and proactive maintenance, good equipment, and vigilance are really the only things that can help you spot any problems early and help prevent the road to a crash. Once your tank has crashed, there is no going back.

What To Do After A Tank Crash?

Two options:

  1. Start Again
  2. Sell everything and leave the hobby

I hope everyone chooses option #1 but I know many just didn’t have the time or money to fully dedicate to their aquarium and the crash was inevitable.

Now is the time to begin to plan your new build taking into account everything you have learned. Make some changes and try to make your new tank as easy to work on as possible.

Further Questions

What Is Old Tank Syndrome?

This is generic term used when a mature tank crashes. It can be caused by numerous things that build up over time and slowly increase to a point where if un-noticed could lead to a crash.
Rising Alkalinity, phosphates or nitrates. The build up of Hydrogen Sulfide in a sandbed that is not regularly turned over. The clogging of pumps and pipework causing a drop in flow to your filtration media.
Good maintenance and husbandry will all help to alleviate ‘Old Tank Syndrome’.

Can I Reuse My Sand & Live Rock?

As for your sand and rock, just start again with new sand but if you want to keep your rock you will need to cook it and cure it. Not cooking on a stove! NEVER boil or heat up Live Rock!

Please do it properly and be aware of Palytoxin Poisoning!

Read my article on Palytoxin Poisoning HERE to keep you safe if you decide to keep and reuse your live rock.

Here is a great video from Mark at Melev’s Reef on how to safely cook your Live Rock:

How To Dip Corals – Easy Steps To Success


If you were like me, you may have heard about this thing called coral dipping when you were new to saltwater. Before I was ready for corals I keet seeing this on the forums, yet I had no idea what it was for or why?

Coral Dipping is the immersion of a coral specimen in a chemical solution to kill and remove any hitchhiking pests. It also helps to sanitize & heal any flesh wounds created from transportation or cutting from its mother colony. Infections and pests are two of the biggest reasons for coral fatality.

It is a simple process to dip a coral and one that many people seem to be afraid to do, but it is really easy and can save you from losing many corals in your main display tank.

Read on to learn all about it…

Why Do You Need To Dip Corals?

As just mentioned, it is to kill any hitchhiking pests that prey/live on certain corals and if they are allowed to enter your pride and joy, they can wreak havoc and cost you a fortune.

No matter where you get a new coral from it must ALWAYS be dipped. You could have received it from a good friend, family member, trusted local store, trusted online vendor, but the bugs are tiny and do get missed – If you don’t inspect them properly.

Think of this of like a quarantine for coral. Yes, a coral quarantine tank would be nice, but lights are expensive and running another tank just for corals is not feasible for the common aquarist.

Types Of Coral Pests You Need To Remove:

  • Acropora Eating Flatworms (AEFW)
  • Nudibranchs
  • Bristleworms
  • Fireworms
  • Zoanthid Eating Spiders
  • Red Flatworms
  • Asternia Starfish
  • Snails
  • Aiptasia

What Coral Dip Do You Need?

There are three main players in the coral dip market:

Coral RX

Coral RX

Coral RX was designed to help remove unwanted pests from corals but also act as a medication to help treat and repair tissue on corals. It is a proprietary blend of natural ingredients and it is also Iodine-free. Iodine has been known to stain some corals.

The only downside to Coral RX is that it is not effective in removing Acropora Red Bugs.

Dosage:
20ml per Gallon of Saltwater
1.25ml per Cup

You can find it HERE at Amazon.com

Two Little Fishes Revive

Revive

Revive is mainly designed as a coral cleaner for use in acclimation and coral propagation. It too is a proprietary blend of ingredients that help to remove or kill unwanted pests and is the main competitor to Coral RX.

Two Little Fishes does not list what pests will be eradicated using their solution, but it is highly regarded within the industry. I have used it too and had very good results with it.

Dosage:
40ml per Gallon of saltwater
2.5ml per Cup

You can find it HERE at Amazon.com

Bayer Advanced Insecticide

Bayer Advanced Insecticide

Bayer Advanced Insecticide is also a great pest removal solution. Not as popular as the other two solutions but does work very well according to many, many aquarists.

I have not personally used it but I am recommending it due to its reviews throughout the community. It is easy to purchase within the US, but may be more difficult in other parts of the world.

Dosage:
160ml per Gallon of Saltwater
10ml per Cup

You can find it HERE at Amazon.com

Any of the solutions will work great and it will come down to personal preference which you chose to use. Many aquarists use a combination in an effort to catch every pest. Again the choice is yours.

I switch between Coral RX and Revive depending on what my local fish store has in stock when I go to buy. I have had great success with both products and can highly recommend either.

What Equipment Is Needed To Dip Corals?

Before you embark on your first coral purchases I really advise you to get setup with your dipping supplies before you go. The following items I have found to be really easy and helpful when you get your new coral frags home:

Flashlight

Used for a really close inspection of your frags. It really helps to create shadows or see any color differences when looking for the tiny pests.

Magnifying Glass

Used in conjunction with the flashlight to look under all the nooks and crannies of the coral. This is where the pests are most likely to be hiding as they were safe from predators here in their previous aquarium.

Tweezers

Used to help gently lift parts of fleshy corals and used to pick off anything suspicious.

Tooth Picks

Same as Tweezers. Lifting, poking, and scraping.

Syringe

Used to measure out the required amount of dipping solution and good for sucking up and blasting the corals with the dipping solution/water mix.

Measuring Jug/Cup

Used for measuring out the required amounts of saltwater from your sump/aquarium to provide the correct dipping solution concentration.

Turkey Baster

Used to blast the coral frags and help remove any pests trying to hang on.

Towel

Lay it down on the work surface to help keep your work area clean and soak up the drips. Drips will get everywhere!

Assorted Tupperware Containers

I use a minimum of 3. One for the coral dipping solution, and 2 for washing the frags in aquarium water. Depending on the frag size I will only put 3-4 frags at a time in the dipping solution.

Dipping Solution

The required amount of your chosen solution. You can use one solution multiple times in one dipping session.

Aquarium Water

Required amount of water from your sump/aquarium. Do not use freshly mixed saltwater as the chemical elements like Calcium and Alkalinity may be too high and harm your new frags.

Coral Cutters

Used to remove most frags from their plugs ready for mounting on a fresh frag plug/disk. Fully encrusted SPS and Zoanthids are pretty much the only corals I leave on their plug.

You can find a great selection HERE at Amazon.com

New Frag Plugs

Frag Plugs
Frag Plugs

Ready for mounting your newly dipped coral frags onto.


Find a Great Selection HERE at Amazon.com

Superglue Gel

Used to glue your new coral frags to their new frag plugs.

If you are unsure about the type of glue to use this article my help you:
Reef-Safe Glues, Adhesives, Silicones & Cements – The Hobbyists Guide

Safety Glasses

Corals and the dipping solutions can be nasty to you. Protect your eyes from any splashes.

I advise you to read my article HERE on Palytoxin Poisoning now you are getting into corals. It’s good to be aware of this.

Be sure to Download my Free Symptoms Guide too and make your family aware of the symptoms
You may not notice them!

Latex Gloves

Protect your hands too. Hangnails and cuts are the perfect place to allow any coral toxin to enter your body. Stay safe.

How To Dip Corals – The Dipping Process

Now you have all your equipment ready its time to go frag shopping. This is by far one of the most enjoyable times for me personally. I think I enjoy it more than fish shopping!

Once you get back home here is the process that I have used successfully for years, and to date (Touch Wood) never a single pest!

STEP 1 – Float Bags

Your coral frags will have cooled during their journey, be it in your car or in the delivery truck. Now is the time to get them back up to your aquarium temperature.

If you have a sump this is the best place to do it because it is dark. If not turn off your display lights. Floating bags under the full intensity of your lighting is a sure way to kill or bleach your new additions!

30 minutes is what I would recommend. The small bags don’t take long to slowly warm up.

STEP 2 – Prepare Fresh Salt Mix

When you remove some of the water for your coral dipping you will need to replace that water back into your aquarium or your ATO System will do it for you, but with fresh water!

I usually just mix up a gallon of new mix and that is plenty to use for topping back off what I take out for dipping.

If you are unsure what an ATO system is, read my article HERE..

STEP 3 – Layout Towel and Equipment

Find a place near your aquarium/sump where you can work comfortably. A bench, table, kitchen counter works well for this.

Lay out your towel and place your equipment on it in the order in which it will be used. A spare towel for drying your hands is a good addition too.

I usually set out left to right for my flow.

STEP 4 – Prepare Dipping Solution

Don your safety glasses and gloves.

Take one of the Tupperware (or similar) containers and measure out your dipping solution and tank water using the measuring jugs and syringe.

I normally prepare:
2 cups of aquarium water to 5 ml of Revive
or
2 cups of aquarium water to 2.5 ml of Coral Rx

STEP 5 – Prepare Rinse Waters

I usually have 1 cup of aquarium water in each rinse container. Two containers in total. One for initial rinse, then one for post gluing rinse.

STEP 6 – Select First Frags

I usually have a selection of frags when I come back from the store. But if this is your first time and you only have one or two, the process is the same for each coral frag.

Select your first 3-4 frags and remove them from the bag. Discard the bags and water.

STEP 7 – Place In Dipping Solutions

Place the first frags into the dipping solution container for 10 minutes. Swirl the container and blast the frags with the turkey baster. You will start to see bugs jumping off!

STEP 8 – Remove & First Rinse

Remove each frag and place into the first rinse container. Swirl and turkey baste to help remove the dipping solution.

STEP 9 – Inspect

Remove one frag at a time and carefully inspect every millimeter of it using the magnifying glass and flashlight. Use the tweezers and toothpicks to remove anything you see left over.

Carefully hold the frag by the base and swish it one final time in the first rinse container.

STEP 10 – Glue Onto New Base

Use the coral/bone cutters to pry the coral off its old frag plug and dab the base dry. Place a good blob of Superglue Gel onto the new frag plug and place the coral frag onto the glueball and hold for a few seconds to allow to set. A drop or two of water speeds up the process.

Freshly Glued Frags
Freshly Glued Frags

STEP 11 – Second Rinse

Once the frag is set on its new plug its time to give it a second rinse. Again just place it in the second rinse container and swirl it for a few seconds.

STEP 12 – Repeat With All Other Frags

Just repeat the process with each frag but be sure not to take too long if you have many frags, as your solutions will cool quickly. If you have many frags I would make a new set of solutions after 8 frags. 4 per Dipping Container.

STEP 12 – Place On Sand Bed To Acclimate

As your frags become processed I would place them in groups on the sand bed in a shady spot to begin the acclimation process. They have just been through a stressful time and will need time to slowly adapt to their new home.

STEP 13 – Clean Up

Pour all used water/solutions down the drain and dispose of all the travel bags if you are unable to save them. If you can save them its great for when you get to a point of selling frags! Just give them a good rinse with freshwater and hang them up to dry.

Saltwater is terrible on tools, even Stainless Steel. Be sure to give all your tools a really good rinse in freshwater and then completely dry them if you want to keep them in pristine order.

I keep all my dipping tools and containers together so it makes it easy to dip if I have an impromptu stop by the fish store!

Lastly, be sure to give your hands and arms a really good wash with hot water and soap. Corals can leach toxins when stressed and you have been stressing the heck out of them!

To Finish

Coral dipping is a simple process and to many, it may seem overkill, but if you see what an aquarium owner goes through when a pest destroys ten years of coral growth in a beautiful aquarium, you will never add a coral without dipping again!

With time you will become faster and it does not take me long to do a dozen corals in one shot if you have everything prepared.

Just like fish quarantineAn ounce of prevention is worth a pound of cure!

Enjoy your new frags!

Further Reading

Best Beginner Fish for a Saltwater Aquarium


Beginner Fish Header

The constant movement of color from your fish in an aquarium can make a bland, boring box of water into a mesmerizing showpiece! The problem comes when you are new to saltwater aquariums you have no idea which fish are easy to keep and which fish can become a nightmare!

The fish in this list I have carefully chosen because they are some of the hardiest, most colorful, and sometimes personable fish you can collect to start off your saltwater journey. A careful selection is needed to ensure that every level in the tank is inhabited, they all get along, the color palette is varied and you have action, all the time.

I love to relax on my couch and watch the day-to-day goings on in my Reef Tank. Each fish have their own personality, they all do something different, some will become your favorites and some will just make you scratch your head!

With time you will find every family member in your house develops a favorite and the addition of a new aquatic member to your home is always an exciting time!


I have been fortunate enough to team up with one of the best online livestock suppliers in North America – Saltwaterfish.com
Each fish you see will include a link to it on Saltwaterfish.com to help you find even more great information, habitat requirements, and the latest prices! Online shipping is super easy too! That’s all I have ever done with my reef!


Some of The Best Saltwater Fish For Beginners Are:

  • Clownfish
  • Blennies
  • Gobies
  • Chromis
  • Wrasses
  • Cardinalfish
  • Hawkfish
  • Basslets
  • Pygmy Angelfish
  • Tangs

Top 20 Beginner Saltwater Fish:

1. Ocellaris Clownfish – (Amphiprion ocellaris)

By far the most famous saltwater fish of them all! Clownfish are hardy, active, and great tank mates which makes them such a popular choice for every aquarist. With cross-breeding, there are now some very, very nice and unique patterns in the Clownfish family, with some demanding a serious price tag.

Most aquarists keep a pair and many will host anemones, and if the conditions are right they become very easy to mate and lay eggs.

Clownfish

Size: 3/4″ – 2″
Diet: Omnivore
Care Level: Easy
Temperament: Peaceful
Min Tank Size: 10 Gallons
Priced From: $25.00 & up

From $29.99
Click Here to find out more at Saltwaterfish.com

2. Firefish Goby – (Nemateleotris magnifica)

These timid fish like to hover in the water column and just watch the goings on. When kept in pairs they will cruise around together giving a nice splash of color. These are best kept in a smaller reef aquarium with other peaceful tank mates.

Like many Gobies, they like to burrow in the sand to sleep or hide in holes within your rock, so make sure they have some in your tank. They like the security of their ‘Bolt Hole’ but beware that these fish can jump when startled, so ensure you have a lid or mesh covering your aquarium.

Purple Firefish Goby

Size: 1″ – 3″
Diet: Carnivore
Care Level: Easy
Temperament: Peaceful
Min Tank Size: 20 Gallons
Priced From: $15.00 & up

From $15.99
Click Here to find out more at Saltwaterfish.com

3. Six Line Wrasse – (Pseudocheilinus hexataenia)

One of my favorite fish in my aquarium! This guy never stops hunting pods. Constantly cruising the sand and rock trying to find his next meal.
The unique pattern and coloration of the Six Line Wrasse make him a favorite of many aquarists.

Like many of the Wrasse family, you need to exercise caution when kept with other Wrasses. Only one in a smaller aquarium. The Six Line can be known to attack small ornamental Shrimp so be cautious if these are on your stocking list.

Six Line Wrasse

Size: 1″ – 3″
Diet: Carnivore
Care Level: Easy
Temperament: Semi-Aggressive
Min Tank Size: 30 Gallons
Priced From: $20.00 & up

From $23.99
Click Here to find out more at Saltwaterfish.com

4. Yellow Tang – (Zebrasoma flavescens)

Another of my favorite fish in my aquarium! There is no other fish that can bring such a tremendous amount of color to your aquarium! The Yellow Tang is a constant grazer in your aquarium and the bright yellow burst of color can be seen across the street!

Like most of the Tang family, they need room to swim. Longer tanks with open aquascapes will provide plenty of room to keep this fish healthy. They can be aggressive towards other fish of similar size and coloration so careful planning is required on your stocking list. Not for the small aquarium!

Yellow Tang

Size: 1″ – 8″
Diet: Herbivore
Care Level: Easy
Temperament: Semi-Aggressive
Min Tank Size: 75 Gallons
Priced From: $60.00 & up

From $61.99
Click Here to find out more at Saltwaterfish.com

5. Flame Hawkfish – (Neocirrhites armatus)

If you are looking for a fish with a unique personality this is the one! Funny to watch as they like to perch on a rock or coral and then seem to sink rather than swim, they make a very different addition to any aquarium. The bold red and black contrasting color makes them easily stand out from the pastel shading of most coral.

Exercise caution when keeping these with other bottom-dwelling fish like Gobies and Blennies, as territorial disputes and squabbles may arise. They should also not be kept with small, ornamental shrimp as they are known to prey on them.

Flame Hawkfish

Size: 1″ – 4″
Diet: Carnivore
Care Level: Easy
Temperament: Semi-Aggressive
Min Tank Size: 30 Gallons
Priced From: $65.00 & up

From $67.99
Click Here find out more at Saltwaterfish.com

6. Azure Damselfish – (Chrysiptera hemicyanea)

These are only one of the two Damselfish species I would recommend to beginners! This is one of the most peaceful in the Damselfish family and is generally not aggressive unless kept in an overstocked aquarium.

The beautiful blue and yellow coloration on these active fish make them a great addition to any aquarium. They may become slightly more territorial as they mature and should be added toward the end of your stocking list.

Azure Damselfish

Size: 1″ – 3″
Diet: Omnivore
Care Level: Easy
Temperament: Semi-Aggressive
Min Tank Size: 30 Gallons
Priced From: $7.00 & up

From $6.99
Click Here to find out more at Saltwaterfish.com

7. Clown Gobies – (Gobiodon okinawae)

A perfect fish for the nano-aquarium. These small little fish are full of character and constantly hopping from one perch to the next. They come in a variety of colors, with green and yellow being the most popular.

They should not be kept with other fish that inhabit the same territory and they should not be kept with SPS coral as they like to lay eggs on the underside of branches. A great, easy fish for a beginner.

Clown Goby

Size: 1″ – 1 1/2″
Diet: Carnivore
Care Level: Easy
Temperament: Peaceful
Min Tank Size: 10 Gallons
Priced From: $10.00 & up

From $10.99
Click Here to find out more at Saltwaterfish.com

8. Chalk Bass – (Serranus tortugarum)

A uniquely colored and patterned fish that give great flashes of color as they move around your aquarium. A nice fish for beginners that can live in a shoal, provided they are added at the same time.

They like to hide in holes so ensure there is plenty of rock to accommodate these fish and beware of housing them with ornamental shrimp, as they may prey on them as they become larger.

Chalk Bass

Size: 1″ – 3″
Diet: Carnivore
Care Level: Easy
Temperament: Semi-Aggressive
Min Tank Size: 30 Gallons
Priced From: $15.00 & up

From $59.99
Click Here to find out more at Saltwaterfish.com

9. Royal Gramma – (Gramma loreto)

One of the most famous bi-color reef fish. This great beginner fish is constantly cruising the tank looking for food. Its coloring makes it easy to spot and this is my daughter’s favorite fish in our aquarium!

They make their homes in holes and ledges so be sure to house this fish with lots of rock. They can become aggressive to their own kind in smaller aquariums, but multiple can be kept in larger aquariums when added at the same time.

Royal Gramma

Size: 1″ – 3″
Diet: Carnivore
Care Level: Easy
Temperament: Peaceful
Min Tank Size: 20 Gallons
Priced From: $35.00 & up

From $35.99
Click Here to find out more at Saltwaterfish.com

10. Cardinal Fish – (Pterapogon kauderni)

The shape, color, and patterning of these fish make them a nice addition to the diversity in your aquarium. Slow, peaceful swimmers, they like to just hang out in the open waiting for passing food.

Kept in small shoals they do well, especially when they have the safety of rock or Long-Spined Urchins to rush to. An easy fish to keep that will breed once they are happy.

Cardinal Fish

Size: 1″ – 3″
Diet: Carnivore
Care Level: Easy
Temperament: Semi-Aggressive
Min Tank Size: 30 Gallons
Priced From: $7.00 & up

From $6.99
Click Here to find out more at Saltwaterfish.com

11. Diamond Goby – (Valenciennea puellaris)

If you wish to have pristine sand then this is the fish for you! The Diamond Goby is constantly munching up mouthfuls of sand and sifting it through its gills. The constant turning over of the sand bed keeps it clean and algae-free.

These are super easy and helpful additions to your tank, however, you must have a small grain size for your substrate and a closely fitting lid as they tend to jump when startled. A perfect beginner fish!

Diamond Goby

Size: 1″ – 6″
Diet: Carnivore
Care Level: Easy
Temperament: Peaceful
Min Tank Size: 25 Gallons
Priced From: $30.00 & up

From $32.99
Click Here to find out more at Saltwaterfish.com

12. Dwarf/Pygmy Angelfish – (Centropyge argi)

A constantly active grazer that brings a nice color combination to the aquarium. They are a nice little friendly fish when kept with other peaceful fish. Although they are a small fish they should not be kept in a tank smaller than 50 gallons and will fight when paired with another, unless they are a breeding pair.

They live in all levels of the water column and have been known to nip at LPS coral, feather dusters and clam mantles, however, I have not personally experienced this with mine.

Pygmy Angelfish

Size: 1″ – 3″
Diet: Omnivore
Care Level: Easy
Temperament: Semi-Aggressive
Min Tank Size: 50 Gallons
Priced From: $25.00 & up

From $24.99
Click Here to find out more at Saltwaterfish.com

13. Yellow Watchman Goby – (Cryptocentrus cinctus)

‘The Grumpy Old Man’ as the constant frown on their face makes them look grumpy, but these are great little fish. They like to create burrows where the rock and sand meet and will defend their home when taunted.

Similar to the Flame Hawkfish, they like to perch and sit and watch the goings-on. They can be regularly found cohabiting the same hole with a pistol shrimp which is neat to watch. They are jumpers so keep the top sealed!

Yellow Watchman Goby

Size: 1″ – 4″
Diet: Carnivore
Care Level: Easy
Temperament: Peaceful
Min Tank Size: 30 Gallons
Priced From: $20.00 & up

From $19.99
Click Here to find out more at Saltwaterfish.com

14. Green Chromis – (Chromis viridis)

The king of the shoalers. The Green Chromis can be seen in most aquariums all over the world. They are super easy to keep and once you have a small shoal they help to bring out even the most nervous fish from the shadows.

They like to swim in the upper half of the aquarium, using the rock and coral for bolt holes if they sense danger. They seem to keep better in shoals of odd numbers and the color flashes they give are a great addition to any tank.

Green Chromis

Size: 1″ – 4″
Diet: Omnivore
Care Level: Easy
Temperament: Peaceful
Min Tank Size: 20 Gallons
Priced From: $7.00 & up

From $6.99
Click Here to find out more at Saltwaterfish.com

15. Flame Angel – (Centropyge loricula)

One of the prettiest marine fish you can have in an aquarium! This Dwarf Angel is always on the move looking for its next meal and they swim all over the tank causing trouble for the territorial fish in your tank.

They have been known to nip at SPS and LPS coral, invertebrates and clam mantles so exercise caution. They can also harass any new additions to the tank so these are a fish best added last.

Flame Angel

Size: 1″ – 4″
Diet: Omnivore
Care Level: Easy
Temperament: Semi-Aggressive
Min Tank Size: 50 Gallons
Priced From: $60.00 & up

From $61.99
Click Here to find out more at Saltwaterfish.com

16. Lawnmower Blenny – (Salarias fasciatus)

The name says it all. This fish is an algae-eating machine! They spend their time searching out patches of algae to munch away on with their specialized set of teeth. This fish does not do well in a new aquarium. The need for algae requires the tank to be established with regular feedings of Nori.

They are a nice peaceful fish with great camouflaging that can make them hard to find at times. Provide plenty of rock holes for it to feel safe with and he will become a favorite of any aquarium owner.

Lawnmower Blenny

Size: 1″ – 5″
Diet: Herbivore
Care Level: Easy
Temperament: Peaceful
Min Tank Size: 30 Gallons
Priced From: $25.00 & up

From $25.99
Click Here to find out more at Saltwaterfish.com

17. Talbot’s Damselfish – (Chrysiptera talboti)

A nice purple/blue body with a bright yellow cap give this fish a nice contrast as it swims. They can be kept together as pairs or trios but would require a large tank to house many more. They should be added all together.

Generally, they are peaceful fish cruising around the upper half of the aquarium but can get into squabbles with other territorial fish. A nice and easy addition for any beginner.

Talbots Damsel

Size: 1″ – 3″
Diet: Omnivore
Care Level: Easy
Temperament: Semi-Aggressive
Min Tank Size: 10 Gallons
Priced From: $8.00 & up

From $7.99
Click Here to find out more at Saltwaterfish.com

18. Bicolor Blenny – (Bicolor Blenny)

The Bicolor Blenny likes to perch and watch with attitude! Their antennae on the front of their heads seem to give them an interesting personality as they hop and watch, hop and watch.

They are good algae eaters so another fish that should only be added to a mature tank. They have been known to jump so keep those tops sealed and be sure to provide lots of rock with hiding holes to help this fish feel safe.

Bi-Color Blenny

Size: 1″ – 4″
Diet: Herbivore
Care Level: Easy
Temperament: Peaceful
Min Tank Size: 30 Gallons
Priced From: $25.00 & up

From $25.99
Click Here to find out more at Saltwaterfish.com

19. Neon Goby – (Elacatinus oceanops)

The small size makes these a perfect colorful addition to a nano-aquarium. The highly contrasting black and neon blue stripes really help to catch the eye, especially when they swim.

They are a peaceful fish, although they can show aggression to another of the same species if they are not a mated pair. A great beginner fish, easy to keep, and an active addition to your tank.

Neon Goby

Size: 1″ – 2″
Diet: Carnivore
Care Level: Easy
Temperament: Peaceful
Min Tank Size: 10 Gallons
Priced From: $55.00 & up

From $55.99
Click Here to find out more at Saltwaterfish.com

20. Flasher Wrasse – (Paracheilinus carpenteri)

One of my all-time favorite marine fish! They are an active, brightly colored beautiful fish and they become a showpiece in any aquarium. If you have a large enough tank and can pair them together, the colors really become bold during the male’s courtship dance.

The female should be introduced first if you plan to partner them and be sure to fit a lid as these are prolific jumpers when startled. This wrasse can be easily harassed by other tank mates so it should be in the first half of your stocking list.

Carpenters Flasher Wrasse

Size: 1″ – 3″
Diet: Carnivore
Care Level: Easy
Temperament: Peaceful
Min Tank Size: 50 Gallons
Priced From: $40.00 & up

From $41.99
Click Here to find out more at Saltwaterfish.com

How Many Fish Can You Keep in a Saltwater Aquarium?

For a new saltwater aquarium, the general rule of thumb is 1″ of fully matured fish for every 3-5 gallons of tank volume. The bigger the aquarium, the more fish you can have due to the higher quantities of nitrifying bacteria processing the bio-load. A 75 G tank can house 25-15″ of fully-grown fish.

It’s very hard to draw up a definitive ‘Rule-Of-Thumb’ of how many fish you can safely have in a saltwater aquarium, but a general rule for beginners this has always been a benchmark:

1″ of Fish Per 5 Gallons of Water Volume

Notice I mention water volume there. If you have a 50 gallon aquarium and a 40 gallon sump you have in essence 90 gallons of water, but the important part here is that you should also have lots more beneficial bacteria in your biological filter to handle the fish.

The more bio-load you have, the more areas you need to grow and colonize beneficial bacteria. Rock, MarinePure blocks, sand, refugium, a good protein skimmer, and regular high-quality water changes all help to allow your stocking level to slowly increase.

If you wish to find out even more details and information about how many fish you can keep in an aquarium please check out my article here:

How Do I Know If I Have Too Many Fish?

If you have too many fish in your aquarium you may start to see a layer of muck or detritus begin to cover your substrate, algae growth may increase, and fish begin gasping at the surface, or dying unexpectantly. Regular water changes and maintenance are essential for aquariums with lots of fish.

Regular water testing is key to ensuring your water quality and is the only way you will know just how well your filtration is coming with the demand placed upon it. If you have more fish than your filtration can manage you will begin to see Ammonia, Nitrate, and Phosphate levels increase.

When levels increase too fast, your fish could become poisoned and die. At the very least they will become stressed and diseases like Ich and Velvet could show their nasty faces!

Keep the fish stocking low and you will have no problems. As you become more experienced and your tank matures you may be able to slowly add more fish.

Here are the optimum water parameters you should be aiming to achieve:

  • Temperature: 78 – 80°F or 25 – 27°C
  • Specific Gravity (Salinity): 1.023 – 1.025
  • Ph: 8.1 – 8.4
  • Ammonia: 0ppm
  • Nitrite: 0ppm
  • Nitrate: <15ppm
  • Alkalinity: 8 – 12 dkh
  • Calcium: 350 – 450ppm
  • Magnesium: 1250 – 1350ppm
  • Phosphate: <0.03ppm for SPS Corals
  • Phosphate: <0.05ppm for LPS, Zoas & Soft Corals
  • Phosphate: <0.2ppm for Fish Only

How To Select Saltwater Fish For Beginners?

Selecting the fish you would like to have should be done while your tank is in its cycle. Planning is a key part to the success and getting the right balance is key. There are many fish that cannot be housed together or require a tank that is far bigger than yours.

Here are the steps I advise people to use to select their ‘Fish Stocking’ list:

  1. Look at online suppliers and make a list of all the fish you would love to have
  2. Look at your tank size and remove all the fish from the list that requires a bigger tank
  3. Look at my Fish Compatibility Chart HERE and remove all the fish that you cannot keep in a community tank
  4. If you plan to add corals later, remove the fish that prey on corals
  5. Now you start to have a fish ‘Short List’
  6. Select your ‘Must-Haves’
  7. Take your aquarium volume and draw up your ‘Master List’ that will allow all your fish to safely thrive in your size aquarium. Remember 1″ per 5 Gal
  8. Number your fish from least territorial to most territorial
  9. Once you begin to purchase the fish off your master list you start with the least territorial fish
  10. Try and stick to this list as much as you can!

Now I highly recommend you go and read these next articles before you create your list:

To Finish

Now you have some ideas on how to create your stocking list, it’s time to go and do some research to be sure you can cater to the needs of every fish on that list, ensure your aquascape is going to work and that they can all live peacefully.

It can take many years to finally reach the end of your list but patience and letting your tank mature and grow will always pay dividends in a happy and healthy stress-free aquarium.

This is one of the most exciting parts of a new aquarium. Take your time and read, read, read!

Further Reading

If you found this article helpful you may enjoy the following articles too:

How To Prepare Your Aquarium For a Vacation


As an aquarium owner, the thought of going on vacation sends the stress levels through the roof. Vacations are supposed to be a time to relax so here I’m going to give you some awesome tips to prepare your aquarium to allow you to lie on that beach stress-free!

Automatic feeders, aquarium controllers & light timers help to keep everything running normally in an aquarium while you are on vacation. Tank sitters, wifi cameras, no new additions, and good pre-trip maintenance will help to relieve anxiety while away.

I have been on many vacations, some of which have been up to 4 weeks and having a plan, good maintenance and an awesome aquarium controller allowed me to do this time after time. Read on to find some great tips and ideas…

Short Getaway Or Long Vacation?

Are you planning a trip away for the weekend or a month-long tour? The length of time you are going to be away is going to dictate the amount of planning and prep work you are going to need.

Short weekend getaways are pretty easy and have minimal preparation. An auto feeder and making sure your ATO and dosing containers are full is about all that will be required.

The longer week+ vacations need a bit more thought and work for them to be stress-free for you, but allow your aquarium to survive.

What Time Of Year Is The Vacation?

Some of us like to get away when the weather is gray, dull and miserable, Some of us like to take trips for business or pleasure. Which ever trip you are planning you have to start to think about the environment outside your house.

Is it the middle of summer and your home air-conditioning helps you from needing an aquarium chiller?
Is it the middle of winter and your furnace or pellet stove keeps your house from becoming an ice cube?

These items need to be regularly serviced to ensure they keep working. Replace the battery in your thermostat to ensure that keeps going.

I woke up one morning to a FREEZING house in the middle of one of our -40°C spells a few years back because the battery had died in my thermostat. Luckily my aquarium heaters were working overtime, but it was a lesson learned!

Are you in the middle of storm season? Do you have regular power outages? What happens to your aquarium when the power comes back on? Do you ever need to reset anything?

All things you need to start thinking about and what actions you need to have in place ‘Just In Case’.

Never Change Or Add Anything Last Minute To Your Aquarium

Not following this one tip has crashed so many aquariums it is not funny. The times I have read and helped people who tinkered with something 10 minutes before leaving or bought that new coral 2 days before flying off and then came back to serious problems.

The last things you should ONLY ever do before leaving your aquarium is topping off your ATO reservoir and looking around to make sure everything is as it should be – That’s it!

Test Run Your Aquarium Vacation Setup For A Few Days

After reading all the tips below and figuring out what you need to do before your trip I HIGHLY advise you to get it all set up the week before you go and let it all run, just as if you were not there.

This way you can ensure your plan works and everything is doing what it should. All you have to do on the last day is Top Up your ATO and go!

It takes practice to get your aquarium ready and if you are planning a big trip why not test out your entire plan a few months/weeks beforehand while you are home.

Setup your ‘Vacation System’ and do not touch your system. Just observe. If anything needs tweaking then adjust and re-assess. There are reasons why we have practice runs, its to weed out the bugs and perfect the plan.

If your aquarium easily manages for the ‘Two Week Trial’ while you are home it will fill you with great confidence while you are away, thus allowing you to relax and enjoy your trip.

31 Great Tips To Help You Prepare Your Aquarium Before Vacation

1. Try Not To Do Everything Last Minute

Packing and getting ready to leave on any trip can be stressful, especially when pets and children are in the equation. The last thing you need to be thinking about is your aquarium.

Forgetting to turn off the RO/DI system or forgetting to turn back on your ATO, for example, could have serious consequences! Ensure all your aquarium maintenance and ‘stuff’ is done at least several days before so all you have to do is plan on packing.

2. Ensure ATO And Dosing Containers Are Large Enough

How long does your ATO container last? How long do your dosing fluid containers last? If you are going away for a weekend this is probably not an issue.

However, if you get through a 5 gallon bucket of Top Off water in 7 days and you are going away for 10 days you need a bigger container. Getting a larger container and placing it in front of your aquarium is an easy solution and its only temporary.

Make sure to set up the larger containers a few days before to ensure they work fine and you don’t get any back siphoning etc. Just give them a final top up the day before you leave.

3. Do Not Add New Equipment Just Before Leaving

Setting up a new piece of kit to help while you are away is always great, but do not do it just before you leave! A lot of equipment may need a ‘Break-In’ period or need some fine tuning to get them running correctly.

A new piece of equipment can also affect how another item runs for example. We have all seen a skimmer go nuts when something new is added. Set up any new item at least a few weeks before you leave!

4. Do Not Add New Livestock Just Before Leaving

Aside from all new livestock should go into quarantine before being added, putting a new fish into your tank days before leaving is asking for trouble.

A dead fish left to decay in your aquarium for 2 weeks may cause problems if you don’t have a good clean-up-crew, established biofilter and mature tank, so why take the risk.

If you see the fish at the local fish store and ‘Need To Have It’, purchase it and ask them to hold it for you.

5. Do Not Adjust Anything On The Day Of Leaving

Many a time have people missed their flight because they tinkered with something just before they were about to walk out the door and all hell broke loose.

I almost missed a flight because I went to fill up my auto feeder 10 minutes before leaving and I knocked my entire tub of pellets into the tank!
DO NOT touch anything! Get it all done ahead of time!

6. Do A Final Check Of All Plugs, Switches, Valves & Connections

This should be done at least a day before leaving and then do not touch your tank! Have a quick visual a few hours before you leave but that is all.

7. Do Not Adjust Home Air Conditioning When You Leave!

I have heard many times that when people leave for vacation their partner turns down the AC or heat because no-one is there. Your aquarium runs perfectly when you are home. Forgetting about them and turning the AC down usually always gives you a problem waiting for your return.

Leave the house just as if you are there!

Thermostat

8. Do Not Allow Visiting Family To Adjust The AC

Do you have parents that ‘Like to Help’? I’ve heard of tank crashes because Mom turned off the AC to help save you money when she came to check up on the house!
Leave a big sign on the thermostat! DO NOT TOUCH!

9. Purchase A Smart Thermostat

Want to make sure no one messes with the temperature while you are away, buy a wireless smart thermostat! These are so simple to set and monitor from anywhere in the world, so now the meddling mother can be taken out of the problem equation.

You can view a great range of Smart Thermostats with reviews and prices HERE at Amazon.com

I really recommend the Nest Thermostat. Its the one I have and it is awesome. Not the cheapest, but its pedigree and quality were what sold it for me. You can read more on it HERE at Amazon.com

10. Purchase A Timer For Your Lights

Do your aquarium lights need to be manually turned on and off by someone? If you have not done this already, purchasing a timer to automatically turn them on/off is one of the best additions you can make to your aquarium.

This will also help you keep your lighting periods consistent which is very important when you begin to keep coral in your aquarium

11. Set Up An Automatic Feeder

If you are new to saltwater this is a must! Those floating 2 week feeding blocks you can get for freshwater aquariums just won’t cut it anymore.

You can purchase the industry’s most popular feeder, the Eheim Everyday Feeder HERE at Amazon.com and you will not regret it. It’s the one I use and it truly is a Set-And-Forget unit.

Eheim Automatic Fish Feeder

Be sure to set it up a few days before to ensure it works and all fish are feeding. Ensure the batteries are good/new. I always remove the batteries when I put it away for storage.

12. Pellets Work Better In Auto Feeders

I find that pellets work best in the auto feeders as they do not clump. A small amount of moisture can make flake foods clump in the barrel of an auto feeder causing it to clog.

If you need to feed flakes, I suggest you use a mix of pellets and flakes, that way the pellets will tumble and help keep the flakes from clumping.

13. Feed Less

Your fish can easily survive a few weeks without food so by slightly reducing the amount you feed while you are away will help keep your Nitrates and Phosphates down. This will help if you usually do a water change every week but are now unable to do one for 2-3 weeks.

Auto feeders can dump in huge amounts of food. I use a small bowl to see how much is in my ‘Usual Pinch’ then I try and match the dosed amount to that. This way it saves you dumping lots of food into the tank while you set up your auto feeder.

14. Change Filter Floss/Socks The Day Before Leaving

Sometimes when changing floss or sock your Protein Skimmer can go nuts. You are best to change your floss or socks the day before you leave in case this happens.

An overflowing skimmer can cause so many problems while you are away!

If filter socks last only 5 days and you are gone for 10 leave them out. Maybe look at adding floss somewhere. I place some in my sumps bubble trap leaving a 2″ gap on one end to allow the water to bypass the floss when it gets blocked.

15. Install a Roller Mat/Fleece Fliter

If your aquarium gets through floss and socks very quickly, you could look at investing in a Roller Mat, also known as a Fleece Filter. These fairly new ingenious devices allow you to go weeks without changing your mechanical filter media.

These will help prevent detritus buildup if your socks are unable to last the duration of your trip.


You can find out more on Roller Mats/Fleece Filters HERE at Amazon.com

16. Clean And Service Protein Skimmer A Few Days Before Leaving

Protein Skimmers can be an odd duck sometimes. One minute they are running fine, the next they are overflowing like crazy! Because they are removing dissolved organics from the water, anything can make them overflow.

I remember my wife lighting a ‘Smelly’ candle once and 30 minutes later my skimmer was going nuts!

Because of this ensure you clean and service your skimmer a few days before leaving. Empty the collection cup, clean the neck, the silencer, pump and impeller, the air venturi, everything. Then leave it be.

17. Ensure Any Skimmer Overflow Stays In The Sump

Ensure that when your skimmer cup overflows that it all drains down back into the sump. I have seen skimmers pushed right up to the sump wall and then the collection cup hangs over the edge of the sump. This is going to cause a flood AND your ATO to kick in.

Keep the skimmer an inch or two inside the sump, then if it does overflow it won’t matter as much.

I have seen some people place a large ZipLock bag over the collection cup to direct any overflow directly down.

18. Clean All Pumps And Overflows

A week before you leave remove all your powerheads & wavemakers and give them a good vinegar bath to remove any dirt and Coralline Algae. Brush the impellers and cages to remove the fuzz and keep everything working as efficiently as possible.

Be sure to clean any algae, especially Bubble Algae from your overflows and give the teeth/slots a good brush too.

Leaving plenty of time to do this will ensure it’s all working correctly when you leave.

19. Set Up A WiFi Camera

This is by far one of the better, cheaper options for peace of mind! I have been using one for years and it saves so much stress!

A simple $30 camera looking at your aquarium, that you can view via an app on your phone is an absolute must! They are super simple to set up and the real-time picture quality is fantastic. They even do two-way voice so you can talk to a tank-sitter while they are there if needs be!

Wireless Webcam

THIS ONE from Amazon.com is perfect for your needs and is under $40! This is what I would buy if I was looking today. I have two older ones that I use and I never go on vacation without setting them up!

Sit it on a stool and open your stand doors, it will also allow you to see what’s going on in the sump too!

Buy two cameras if you have a filtration room that is separate from your aquarium. My sump is in my basement but I can view both cameras at the same time on the included app.

For more information on Wifi cameras for your aquarium I have a full guide here:
Aquarium WiFi Camera – Simple Setup For <$30

20. Always Run Two Heaters In Your System

This is has saved my tank once and I know of others this helped. Heaters can be temperamental at times and no matter how good the quality is you can always get defects.

Most of today’s digitally controlled heaters are far better than the old style, but you can still get failures. I would never trust such an important water parameter to just one device!

Having two heaters provides redundancy and will always protect your tank in case one fails. They are cheap! Just install two, set at the same temperature and leave them be.

To be extra safe you can run one off a temperature controller like this Inkbird Digital Temperature Controller at Amazon.com, then run the other heater as a back up set 0.5°F lower.

21. Get An Aquarium Controller

I cannot begin to describe how much of a lifesaver and life-changer these devices are. I’m lucky as I was able to make my own, but I will never own an aquarium without one. Just like a webcam, they will reduce your stress so much!

Unfortunately, they are not cheap, but after lights and filtration are the best investment you can make in your aquarium. You can also move it from tank to tank as you upgrade.

In essence, they are a device that constantly monitors and controls equipment and if there is a problem they alert you instantly via your phone or email so you can take action. Because they automate so many tasks you will wonder how you ever managed without one.

The Neptune Systems Apex Aquarium Controller is by far the most popular and also has the most ‘Add-Ons’ to allow you to custom build your own control system as you go.

You can find out more about these great controllers HERE in my Aquarium Controller Article

22. Have A Flood Sensor Installed Into The Controller

Saltwater causes huge damage when leaked and being able to detect and shut down the offending item is a great way to save some serious repair bills.

Many of the aquarium controllers have available Flood Detection Sensors that you can install by your sump or cabinet. You can have your controller set to shut off your Protein Skimmer, Return Pump or any other item you think could be causing the flood as soon as it detects the flood.

Once it alerts you, you can then diagnose and get the rest of the system running again all from your sun lounger! Then call in a helper to go to your home and investigate.

23. Prevent Wireless Blackouts To Your Aquarium Controller

Many aquarium controllers like the Neptune Apex connect wirelessly to your home internet connection. From time to time they can lose this connection preventing you from getting the data on your phone/laptop.

Some of these controllers need to be reset by the push of a button, which can be another stressor for you. Now you have to get someone to go over to your home and press it.

A solution is to temporarily plug your aquarium controller directly into your wireless router with an ethernet cable, while you are away.

You can find some examples cheap Here at Amazon.com at pretty much any length you require. Because your controller is now not relying on the wireless connection, it will never lose contact with you.

24. Buy A Local Sim Card For Your Phone

Are you traveling in a location where you may have sporadic connections to WiFi and you are worried about your aquarium controller not being able to reach you or you are worried about roaming charges when looking at your webcam?

Most phones can now accept a sim card for use in other countries. You can usually pick up a Pay-As-You-Go sim card for cheap in your vacation location and this will allow you to receive data and be instantly connected to your controller or webcam.

If you are unsure about your phone, go see one of the phone stalls which seem to be in every mall across the world! They will be able to get your phone ready for a different sim card if needed.

25. Install an Automatic Water Change System For Long Vacations

I built in an automatic water change system into my own aquarium controller and it saves me hours each month and it allows me to maintain my weekly water change schedule with a push of a button while I’m away.

My setup allows me to have a trashcan full of new mix water ready and I have access to a drain. My system drains water, then refills it. This system is almost one of the best upgrades I made to my aquarium!

The Smart AWC Touch from AutoAqua does just that. You could temporarily set this up with a couple of buckets or Brute trash cans by your aquarium and if you are going on a long vacation this WILL really help you.

Jeff from Premium Aquatics gives a great review of it here:

You can find out more information on the Smart AWC Touch HERE AquariumSpecialty.com

26. Battery Backup For Your Powerheads/Wavemakers

A power loss at any time could have catastrophic effects on your tank, let alone while you are away. The rate at which you will begin to lose oxygen in your aquarium is the number one cause of tank crashes during/after a power outage.

A simple way to help prolong this is to keep the surface of your water agitated to help gas exchange. Having just one powerhead on a battery backup you could save your aquarium.

There are two really effective and simple backup systems available depending on the powerheads you run:

For EcoTech Pumps you can get more information on their battery backup system HERE at AquariumSpecialty.com

For other manufacturers, you can get the IceCap Universal Battery Backup system.
This one comes with a range of connectors to suit many DC pumps and you can find out more information HERE at Amazon.com

Both systems can have extra batteries added to them to extend the working time of the pump during the outage. These are a great investment not just for when you are away, but for year round use!


For even greater information on Battery Backup Systems, I have an article dedicated to them.
Aquarium Battery Backups – Your Ultimate Guide’


27. Install a Simple, Smart Battery Powered Air Pump

If the cost just prohibits you from the battery backup systems mentioned above you could look at this much cheaper alternative.

This battery-powered air pump monitors electrical power to your home. When it senses a power loss, it automatically switches on the batteries and starts to pump oxygen into your aquarium water. Because this is fully automatic, it is a great option.

Each pump is recommended for aquariums up to 30 gallons, but by adding more you could easily keep your water oxygenated in a larger aquarium.

You can read the great reviews and find out more information HERE at Amazon.com

28. After A Thunderstorm/Power Outage

After a power outage or thunderstorm get a friend/family member/neighbor/tank sitter to check all the GFCI plugs that supply your aquarium equipment to ensure none of them have tripped.

GFCI Plug

Surviving the storm or outage is great but if your power is not on to your equipment then you will come home to a dead aquarium. Thunderstorms can be notorious for tripping GFCI plugs, so have someone come and check each plug just to make sure everything is back up and running.

Maybe inform a neighbor before your departure to shoot you a text message if they have a power outage or thunderstorm so you can arrange for someone to stop by and check.

29. Have A Fellow Aquarist On Standby To Help If Needed

Having a friend who owns an aquarium that lives close by is a great asset. If they own a saltwater aquarium then even better. By having someone who knows about aquariums on-call can really help you in a crisis.

Have them come over and learn your system, maintenance, and routines and do the same for them. By helping each other it can really reduce the stress on your vacation

30. Have A Tank Sitter Who Knows Your System – Train Them

I have heard so many horror stories of tank sitters that unknowingly did something that led to entire tank losses. Having a tank sitter is great but you need to train them on your system.

If you can, just get them to observe the aquarium and call you if there is a problem. The more they touch, the more the chance of a problem arising.

Face Time is a great tool when talking to the tank sitter or trying to explain how to fix something. They can show you exactly what is wrong and you can advise them what you want them to do step-by-step, real-time.

It is a good idea to prepare bins of RO/DI and New Mix water and have them sat by the aquarium, just in case of an emergency and your tank sitter has to top up or do a water change. The more you can prepare for them the less that can go wrong.

Give the tank sitter instructions only on what they MUST do and MUST NOT do.
Make it clear so both of you are on the same page.

31. Hire A Professional Aquarium Maintenance Company

Having worked as an Aquarium Maintenance Technician I can tell you this is a great asset to have. A professional person who knows what they are doing on your system can save your tank and your sanity, but it costs.

If this is a route you would like to take, especially if your vacation is going to be 3+ weeks then you need to plan this EARLY.

There are some great companies out there, and there are some terrible ones out there! Speak to your local fish store they will be able to recommend the good ones.

My advice would be to get them in to maintain your aquarium a few weeks before you go so that they can get to know your system and you. Then when you are away, they carry on maintaining your system, just as if you were there.

Trust can be a big issue and letting a stranger into your home is a major concern for many people. If this is the case ask a family member to be there while they work, then get them to lock up.

There is always a solution!

To Finish

Preparation is the key to a successful and stress-free vacation. Yes, there will be times when no matter what you do your tank was not going to make it but, preparing as much as you can will really, really help.

I hope you found these tips helpful because I know many of them I personally use and it really helps me enjoy my time away.

For further reading on topics that may provide further help you can read my articles listed below:

How To Easily Acclimate Aquarium Fish – The Best Methods!


Most living organisms are sensitive to sudden changes in their environment and any changes need to made gradually. Think about when you walk out of a lovely air-conditioned room and into 120°F of summer goodness. The sudden change makes you feel uncomfortable until you become accustomed to it.

Your fish are no different, except only a small change in just one water parameter could be enough to kill them.

Fish acclimation is a slow process of equalizing water parameters between two containers to prevent any sudden change from harming or killing the fish. The main two popular methods are Bag Floating and Drip Acclimation. Both are very easy to complete with great survival rates.

Moving fish from one water source to another is a simple but very necessary process and one that has been perfected over the decades by thousands and aquarists.

This article shows you step by step on how each method to ensure your new addition makes the move without a hitch!

Is Fish Acclimation Really Necessary?

Fish are susceptible to rapid changes in PH, Temperature, Salinity, Ammonia, and Nitrates to name just a few. When you purchase a new fish from an online supplier, local fish store or another aquarist, the chances of their water matching your aquarium water are slim.

Many fish stores like to keep the salinity level on their tanks a lot lower to help keep sickness and diseases spreading and wiping out their entire stock.

Your job as the new owner is to provide the most stress-free journey for the new fish into your aquarium. A move is always stressful and stress can bring out a hidden illness which can and does wipe out an entire established aquarium.

Any new purchase should ALWAYS be quarantined to protect your aquarium!

How Long Do You Acclimate Fish For?

Most acclimation takes place over a minimum of 30 minutes to one hour and should not be rushed. Patience will always pay dividends to your new purchase and it is an important step that needs to be done every time a fish moves habitat.

What Do You Need For Acclimating Fish?

No matter which method of acclimation you chose, the following items will be used for years. Oh and its better to get your own stuff rather than steal your partners! Trust me I got yelled at many times before getting my own!

  • Scissors
  • Plastic or Wooden Clothes Pegs/Pins – One for each transport bag
  • Small Jug – Approx 1/2 cup or similar
  • Fish Net – Sized to fit into the transport bag opening

Additional Items For Drip Method:

  • Clean bucket or container to fit all fish being acclimated
  • Airline Hose – 6ft

Steps Before Acclimating Your Fish

Like any process, there need to be a few things prepared before you begin the acclimation process. These simple steps are to help the move be as stress-free as possible for your new fish:

  • Turn off the lights on the main display tank or your quarantine tank
  • Dim the lights in the room where you will be unboxing the new fish
  • Never have any bright light directly aimed into the transport box of your new fish ( Pot lights in the ceiling etc)
  • Open one side of the transport box to allow a small amount of light to begin penetrating into the bags. Leave for 5 minutes
  • Over the next 5-10 minutes slowly open the box to fully acclimate them to the light of the room

Now your fish are ready to begin one of the fluid acclimation processes, depending on their sensitivity.

What Are Popular Fish Acclimation Methods?

There are two tried and tested methods of acclimating not just fish, but these also work for acclimating invertebrates and corals. Each process depends on the sensitivity of the organism being moved.

  1. Bag Floating Method – Ideal for fish
  2. Drip Method – Ideal for Invertebrates & Coral

Bag Floating Method

  1. Get a clean cloth and a cup of aquarium water
  2. Use the aquarium water and cloth to give the transport bags a really good clean to remove any surface oils or dirt
  3. Rinse the outside of the bags with RO/DI water
  4. Keep the bag/s sealed and place them in the aquarium to float for 15 minutes. This allows the temperature of both bodies of water to equalize.
  5. After 15 minutes carefully cut open the transport bags, roll the top of the bag opening down like a sock approx 1″ and fix/peg them to the rim of the aquarium. This will prevent any of the transport water escaping into your display/QT tank
  6. Get a small jug and pour in approx 1/2 cup of your aquarium water into the transport bag
  7. Repeat this process every 5 minutes
  8. When the bag starts to become full use the jug to remove 50% of the transport bags water and dispose of it down the drain
  9. Repeat Steps 7 & 8 until you are past 30-50 minutes
  10. Test the water in the bag for temperature, Ph and Salinity. Once it matches your aquarium you can proceed to Step 11
  11. Use the net to remove the fish from the transport bag and slowly place the fish into the aquarium
  12. Carefully remove the transport bag from the aquarium and dispose of

NEVER ALLOW ANY WATER FROM THE TRANSPORT BAG TO ENTER YOUR AQUARIUM!

Drip Method – (This Is My Personally Preferred Method)

  1. Ensure the bucket or container is thoroughly washed and rinsed
  2. Place the bucket next to the aquarium
  3. Use the scissors to cut all the transport bags and empty all the water and fish from the transport bags into the bucket
  4. Make a note of the water height and find a level at double that height
  5. Use a clothes peg to secure the airline hose to the rim of your aquarium
  6. Tie a loose knot into the airline then suck on the hose end nearest the bucket to start the flow of water from the aquarium – Stop sucking before the water gets to your mouth! ;0)
  7. The tightness of the knot will set the drip rate. Aim for 2-4 drips per second – Looser the knot = Faster drip rate
  8. Allow the water height in the bucket to double, then remove half the water and dispose
  9. Repeat this step for 40-50 minutes
  10. Test the water in the bucket for temperature, Ph and Salinity. Once it matches your aquarium you can proceed to Step 11
  11. Use the net to remove the fish from the bucket and slowly place into the aquarium
  12. Dispose of the water in the bucket, rinse the bucket, dry and store for future use
Drip Accliamtion

What Do You Do After Acclimating New Fish?

Leave off the aquarium lights for the rest of the day if able. If unable, slowly bring up the lights to full intensity after a minimum of four hours after fish introduction.

I like to acclimate new fish in the early evening. This allows a longer period for the new fish to settle in before the next full day of light.

Keep an eye on your new introductions. Many established fish may begin to chase and terrorize your new additions.
When I introduced a Copperband Butterfly into my aquarium, the Yellow Tang harassed in constantly.

I taped a mirror to the side of the aquarium, then my Yellow Tang harassed itself for the next two days, giving my Butterfly a chance to get settled. After removing the mirror, the Yellow Tang was back to normal.

If you find an established fish is just not letting up and it looks like it is going to harass the new fish to death, then you need to isolate the aggressive fish. Never isolate to the new fish. This new fish needs to settle into the new tank.

You can buy an isolation cage that just drops into the aquarium and is full of slots to allow water to move through it. Place the older, established & aggressive fish into this for a couple of days to give it some ‘Time Out’.

Fish Isolation Box

This one HERE at Amazon.com works great. Its the one I have used a few times in my own aquarium and the ‘Time Out’ usually works great.

Ensure your new additions are eating well and are not shying away from venturing out into the open space of the aquarium. Spot feeding new, shy fish with a turkey baster full of food may help them.

This is another reason why quarantine is so important. Having your new fish-eating and fattened up before entering the chaos of the main aquarium could be the difference of them surviving those first few weeks.

Is Fish Quarantine Needed?

Quarantine is the process of placing any new purchase or a sick/injured/harassed fish into a separate aquarium, away from your main tank, to allow them to either be medicated or inspected to ensure nothing passes into the main aquarium. 6 weeks is a typical quarantine period.

It is my strong recommendation that ALL new purchases should be quarantined. You can set up a simple quarantine tank for under $100 and it will save you from having to deal with an aggressive disease destroying years of hard work.

Quarantine Aquarium
A Simple Quarantine Aquarium Setup

Acclimation needs to be done both going into quarantine and from quarantine to your main display tank. In fact, anytime you are moving a fish from one tank to another, you need to acclimate!

For a detailed article on how to set up a simple quarantine tank, you can read my article HERE…

To Finish

Acclimating your new fish is a simple process that does not take long. Once you have done it properly for the first time you will soon become a Pro.

Do not rush it and please, please get yourself a quarantine tank ready to go. I always medicate any new purchases no matter if they look healthy or not. You never know what parasites may be hiding inside them.

To date, I have never had any illness or disease in my aquarium and I can bet this is down to my quarantine and acclimation processes. Yes, I have lost a few fish during quarantine, but in my opinion, if they were not healthy enough to make it through quarantine, they were not ready for my main aquarium.