RECENT ARTICLES

16 Ways To Cool Your Aquarium In Summer


Are you entering into summer and the temperature in your aquarium is beginning to get too high and cause your livestock some discomfort?
It happens to us at some point and we have to take preventative measures to keep it in check.

This collection of 16 Tips For Safely Cooling Your Aquarium gives you some cheaper, temporary options all the way up to some more expensive and permanent solutions. Depending on your aquarium, one of the cheaper tips may work, for others, you may have to spend some money.

Ways To Safely Cool An Aquarium Are:

  • Close window blinds
  • Install UV reflective film on windows
  • Open the aquarium canopy
  • Fish-Only Aquarium: Keep the lights off
  • Offset the lighting period
  • A fan blowing across the water surface
  • Float bottles of ice
  • Install an aquarium chiller
  • Window AC unit
  • Open windows to create a breeze

How Do You Diagnose a Warming Aquarium?

Before diving in head first into spending money and effort in cooling your aquarium, we first need to diagnose the problem. Just because the room is warm does not mean that is the culprit!

Here are a few things to check before we know its the ambient air temperature causing our fishy friends some discomfort:

  • Check your thermometer is reading correctly. As a hobbiest, you should be in the habit of touching your tank every time you walk past. This will give you a good indicator over time of what it should feel like.
  • Test with a glass thermometer if you suspect the digital one is off.
  • Ensure the temperature probe has not come out of the water and is giving you an incorrect reading.
  • Ensure the heater is not stuck in the ‘ON’ position. Older heaters without digital control can weld the switch together and prevent it from turning off.

Smaller aquariums will warm and cool quicker than larger aquariums which will make them fluctuate faster. However, larger aquariums take longer to heat up, thus it will take longer to cool them down.

Is Ambient Heat Causing Your Aquarium Temperature To Rise?

Now we know for sure its the surrounding air temperature that is our culprit, let’s look at 16 more Tips on how to safely get your tank cooled down to its normal operating temperature.

For more information on recommended water parameters, check out my guide HERE…

Cheaper Options:

1. Keep Window Blinds Closed

If the room in which your aquarium is in gets the sun all day, try keeping the blinds/drapes/curtains closed all day. The heat radiated into the room from direct sunlight will soon raise the temperature.

By keeping the blinds and windows closed, it can make a significant difference to the temperature of that room over the course of the day.

2. Install Reflective Window Film/Insulating Blinds

To go one step further with your window coverings, you could install a special reflective film on your window that helps reflect the suns rays and prevent a good portion of them penetrating into the room.

UV  Window FIlm

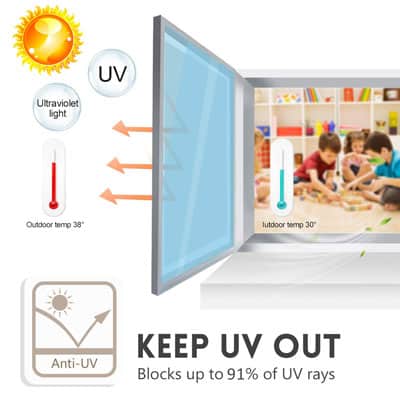
You can also find insulating curtains and blinds that help to reflect the sun’s rays. Both come in many forms to suit every home and window size.

You can view some great examples HERE at Amazon.com

3. Open The Aquarium Canopy

Just like opening the sunroof in your car, opening the canopy of your aquarium can drastically reduce the temperature of your water.

Because heat rises, it can now escape into the surrounding air and disperse. The air trapped between a canopy lid and the surface of the water can get really warm, especially if you are using Metal Halide lights. This pocket of air is just going to heat the water when it’s trapped.

Be aware that opening the canopy will also increase evaporation so be sure to keep your aquarium topped off or your ATO vessel full every day!

If you are unsure about ATO’s you can read my article HERE on Automatic Top-Off systems.

4. Fish Only Aquarium – Keep The Lights Off

Lights, even LED’s radiate heat into your water. Metal Halides are by far the worst, but if you are running a fish only aquarium I don’t imagine you will be running MH’s!

Fish do not need light to live, most corals do however. You can keep your lights off during the day and then place them on for a few hours in the evening when you are relaxing. The fish do not care!

5. Coral Aquarium – Offset Your Lighting Period

If you have a coral aquarium you could look at reducing your lighting period a few hours or even moving your lighting period to run later in the evening when it’s cooler.

If your corals need 8-10 hours, there is no problem by offsetting your lighting period a few hours each week and have the lights on from 6pm to 4am! Just be sure to move the offset by no more than 30 min/day.

You could start this adjustment early in the summer in anticipation for the hotter months, then move it back once your hotter months are ending.

6. Pedestal Fan

The power of evaporative cooling can lower the temperature of your water by as much as 5°F, depending on the size of your aquarium. The strong airflow over the surface of your water increases evaporation and thus removing heat as the water evaporates.

There are two fairly small downsides to this method:

  1. You have to be home to set up the fan in the first place
  2. Your water level will considerably drop from evaporation, so you will need to ensure your aquarium or ATO vessel stay topped up.

Even with the small inconveniences, this solution is a very simple and viable option for most aquarium owners!

7. Open Windows/Doors To Get A Through Breeze

Do you live in a high rise condo or out on the prairies and have a nice, strong breeze during the day? If so, you could look at leaving some windows open to create a wind tunnel in your home.

Just as using a pedestal fan, a good natural breeze will increase the evaporation rate and help cool the water. Be aware of any dust that comes with that breeze. That could cause more problems than heading off to Walmart and buying a pedestal fan!

8. Decrease Home AC Temperature

Do you have full home air conditioning? A simple option to helping cool your aquarium is to drop the room temperature a few degrees. This may cost a little more in your electricity bill each month, but it will help to keep your water temperature stable.

A few cautions to be aware of when relying on home AC to cool your water:

  1. Keep your AC unit serviced and cleaned. It will stop working on the hottest day of the year. That’s how Murphy’s Law works!
  2. Have a back-up plan for power outages! You can find out more about how to prepare for power outages in my article HERE…
  3. Do not forget and raise the AC temperature a few degrees when you go on vacation because no-one is there. You will come home to a dead tank!

9. Bottles Of Ice

Reusing plastic drinking bottles is a great way to cool your water and recycle. Remove the labels and give the bottle a good soak in warm water and vinegar to help remove all the dirt, oils and grime on the bottle. Rinse well with clean water, RO/DI water if able.

Once the bottles are clean, fill them 2/3 full with water and place them in the freezer.

By placing a frozen, sealed bottle into your aquarium or sump you will help to keep the water cool. Use small bottles for small aquariums and large bottles for large aquariums.

Once they are fully melted, remove, rinse, dry and place back in the freezer. Just drop another bottle into the aquarium to continue the cooling. Be sure to monitor your temperature to ensure you are not cooling it too much.

This process means you have to be home for it to be effective. Not always an option!

More Expensive Options:

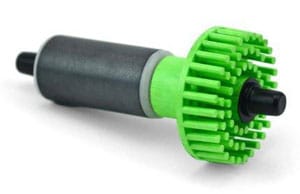
10. Aquarium Cooling Fans

You can purchase cooling fans designed to clip onto the rim our your aquarium to move air like the pedestal fan. These are far less unsightly, move a ton of air, run fairly silently and are reasonably priced.

They come in a range of 1 to 6 fans depending on the size of your aquarium.

You can view a great example HERE at Amazon.com

Aquarium Cooling Fan

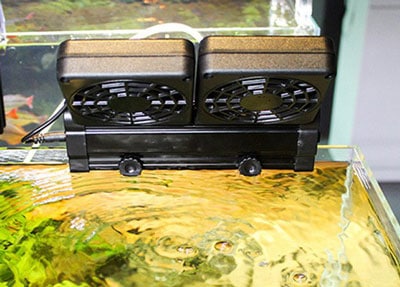
These fans can be linked to an aquarium controller to automatically turn on and off depending on the water temperature which makes them a fully autonomous feature.

For those of you that don’t have a luxury of an aquarium controller, you could also purchase a temperature controller like This One at Amazon.com to make this totally automatic too.

The other great feature about these dual receptacle controllers is that you can also use it to turn off your lights if the water temperature gets too high!

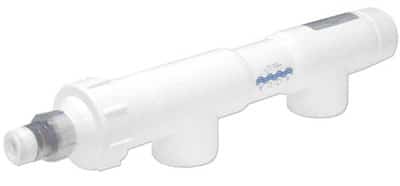
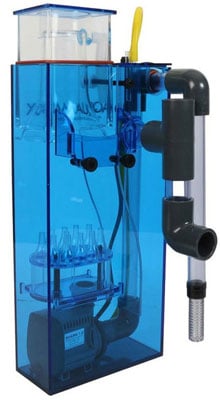
11. Nano Tank Ice Probes & Chillers

These great little devices use Peltier Cooling (Wiki Link) technology to help cool small aquariums up to 8°F. They are in essence a mini-chiller.
They work by passing an electric current through two semiconductors that create a temperature difference between them.

One side gets hot, the other gets cool. By utilizing this technique the device is attached to a probe that stays cool, this probe is inserted into the water and helps cool it.

This NanoProbe Version at Amazon.com may require some modification to your aquarium/canopy to install it.

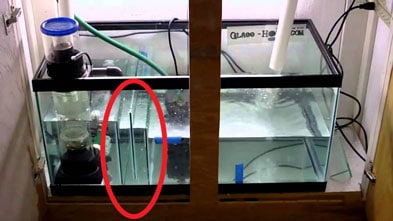
12. Replace Internal Powerheads To External Powerheads

Any electrical device in the water is going to radiate heat into it. It may not seem like much but a powerhead in a small aquarium could raise the temperature by 1F. If you have 2,3 or 4 powerheads this will definitely add to the problem.

Corals require lots of random flow and multiple powerheads or wavemakers are a great way to achieve this, but corals also require stable water temperature so its a catch 22!

Although it soon gets expensive, you could look at replacing your internal powerheads with a more efficient, but more expensive externally mounted wave maker like the Vortech range from EcoTech. More details HERE at AquariumSpecialty.com

The benefit to these devices is the electrical motor (the part that gets warm) is mounted on the outside of the glass and uses airflow to cool it rather than the water. The propeller is the only part that is mounted inside the aquarium and stuck to the motor using magnetism through the glass pane.

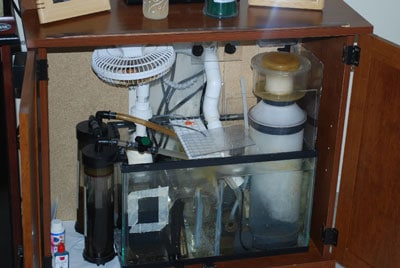
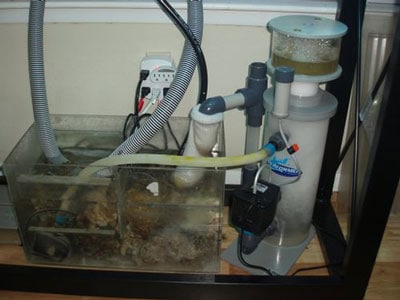
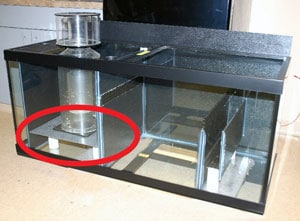
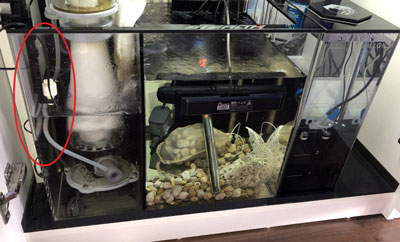
13. Change An Internal Return Pump To An External Return Pump

Just as the powerheads, a return pump installed within a sump will radiate all its heat into the water. If you have an All-In-One aquarium or your equipment is all Hang-On-Back (HOB) then this option is not available to you.

For those of you with a sump and have room next to it you could look at either replacing your return pump with one than can be run externally, or many of the return pumps that are designed to be placed inside the sump can usually be plumbed to sit outside of the sump.

The Eheim range is a good example. This will require you to drain your sump and drill and install a bulkhead (Glass or Acrylic sumps are both easy to drill).

Here is a great video on how to drill an aquarium or sump:

I drilled my frag tank while it was in situ and it was a painless task. Just be slow and patient, and be sure the sump is not tempered glass of course. Most are not!


I have an article on how to try and see if your glass is tempered. You can find it HERE…


Once you have your sump drilled and a bulkhead installed you can then use a section of flexible PVC hose and hosetails to install your return pump back into the system.

Now your pump is located outside of the water you can feel how warm the pump gets and see how much this was heating up your aquarium.

14. Purchase A Window AC Unit

If whole home AC installation is out of the question, which it usually is for most, you could look at purchasing a portable or window-mounted AC unit. These units work great for significantly dropping the temperature of a single room when the door is kept closed.

If your aquarium does not provide an easy installation method for adding a chiller then a window AC unit is a great option. Yes, you are looking at having to pay a few hundred dollars for one, but how much money, time and effort have you spent on your pride and joy getting it to its current state!?

I have seen this option work very well for many aquarists, just be sure to not have it set too cold, then your aquarium heater starts to turn on!

15. Replace Metal Halide Lights to LED Or T5 Lights

Metal Halide lighting has been the go-to light source for many Reef Keepers for decades. The light spread, PAR, shimmer, and growth you get from these lights are exceptional but man, those bulbs create tremendous heat!

As I write this I cannot think of any other aquarium device that radiates more heat into the water than Metal Halide lights. If you have Metal Halide lights you will know this already, but in recent years the advancement in LED technology is making the switch an easier pill to swallow.

LED and T5 light setups are not cheap, but too be honest nothing really is cheap in this hobby. By changing your light setup to a light system from Kessil you will get the shimmer, PAR and growth you are used to, just without all the heat.

If changing your MH lighting system is not an option, maybe look into piping the heat to an open window with something similar to an inline bathroom ventilation system.

I have seen some great installations where the pipe, with inline fan, comes out of the back of the canopy and drops straight into a wall-mounted vent next to the aquarium. Done correctly you never know its there.
Just be sure there is a way for air to enter into the canopy so the fan system can draw in the new cool air as it pulls out the hot air.
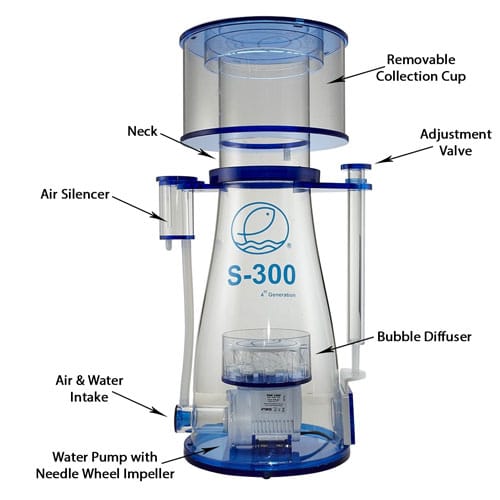
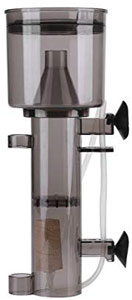
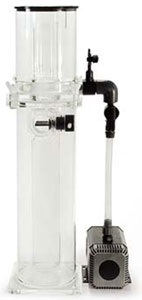
16. Chiller

The last of the expensive options is an Aquarium Chiller. These are truly a set and forget system that are specifically designed to operate with salt water. There are many size options to choose from depending on the size of your aquarium and the amount you need to chill it by.

I managed to pick up an awesome chiller on the aquarium classified pages for $200 and its one of the best bargains I have ever got!

A chiller works by having a pump continually pass water through it. When the chillers’ internal thermometer senses a rise in water temperature it will turn on and begin to cool your water. Once it reaches your ideal temperature it will shut off.

Pretty much every chiller I have seen will have a digital control panel where you can set your ‘On’ and ‘Off’ temperatures to make this fully autonomous. Each chiller requires a specific flow rate for it to work at its optimal performance.

Aquarium Chiller Sizing Chart

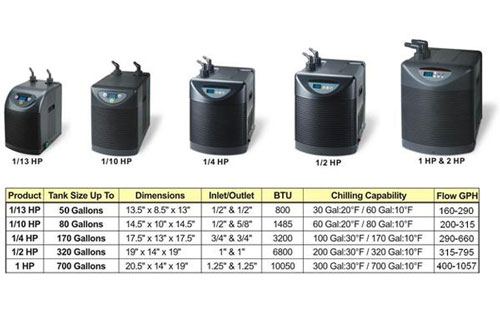
My chiller is fed off my Return Pump Manifold and the temperature in my tanks stays rock solid, year-round at 80°F with only 0.2°F fluctuation. Not bad for saying I get summers up to +35°C and winters down to –40°C.

Just be sure to keep the front filter cleaned as its surprising how quickly it can become clogged. If you filter gets clogged the internal fan will have trouble sucking in enough air to pass over the cooling element, thus reducing the cooling capability of the chiller.

If you would like to know more about correctly sizing a chiller read my article
What Size Chiller Do I Need For My Aquarium?

How Not To Cool Your Aquarium!

Never Add Ice Cubes

Adding ice cubes will adjust the salinity of your water making it less salty. All this does is create another problem for you. If the ice cubes are also made from city water from your faucet, you now add the risk of adding phosphate, nitrates and a whole host of junk into your water.

Have a read of this article from American Scientist on what they found in city water in 45 states…

Never Add Cold Water

Adding cold water straight to your saltwater aquarium will do two things:

  1. Drop the salinity just like adding ice cubes
  2. Adding a large amount of cold water could shock your inhabitants and kill them. Remember your aquarium is all about stable parameters and Gradual Changes!

If you want to add cool water, the way you can do this is by a water change and having the new water only 1°F cooler than the aquarium. This is not going to do much unless you do a very large water change, but again this is not recommended because of rapidly changing the temperature parameter.

Never Insert Ice Bottles That Are Not Thoroughly Cleaned Externally

Do you know what bacteria and oils are on the outside of your water bottles? Do you know how clean it has been stored during its delivery to you? No one does. But adding an uncleaned and unsanitized bottle to your aquarium you could fix your temperature problem, but now you could have just introduced a bacteria that wipes out your entire tank! Just wash them and keep them for aquarium use only. It takes 5 minutes to wash half a dozen bottles!

Never Run Out Of Top Off Water

When using fans to blow across the water surface or if you have an Automatic Top-Off System installed, it is SO important to check on both your aquarium and top-off container water levels regularly!

Fans increase your evaporation rate an incredible amount and it will shock you the first time you install them at how much your aquarium water level or your ATO container drops in a day.

I have whole house AC, my life-support system is in my cool basement and I have a chiller, and my 90 gallon aquarium system still evaporates 2 gallons of freshwater every day! Year round! It’s a scary amount how much water we use on our tanks!

Every aquarium setup is different, some will evaporate less, some more. You just have to be aware that you could be getting through a 5 gallon pail of freshwater regularly.

So what does this mean? Check your aquarium and ATO container daily and keep it topped up, you never know when you may have an emergency and have to be away from home for a night or two.

Ensure you have replacement filters for your RO/DI unit. Ensure you have spare bottles of Prime De-chlorinator if you use city water. Ensure you have spare bottled water from the grocery store.
However, you make water ensure you have plenty available!

The Most Important Tip For Topping Off…

ONLY EVER TOP UP WITH FRESH WATER!!

Salt does not evaporate. Only ever replace water lost to evaporation with fresh water! Do Not Add Saltwater! You will send your salinity through the roof! Be sure to regularly (every day or two) check your salinity using a refractometer during the summer months.

You can read my article HERE on checking salinity for more information.

Upgrades

In addition to some of the tips I have mentioned above, the one upgrade I can really, really recommend is an Aquarium Controller. This single device can do so much to offload your work and stress when it comes to keeping your aquarium stable.

When you have an aquarium controller these are just SOME of the hundreds of functions it can automatically do for you:

  • Monitor your water temperature and email/text you alarms if it gets too hot/cold
  • Monitor your water temperature and shut off the heater if it suspects it has stuck in the on position
  • Monitor your water temperature and shut off the chiller if it suspects it has stuck in the on position
  • Monitor your water temperature and turn on and turn off cooling fans mentioned earlier
  • Monitor your water temperature and turn off lights if the water temperature is getting too high
  • Ensure that both the heater and chiller are not on at the same time, negating each other
  • Controlling lights to shift their photoperiod later each day over the space of 2 weeks

This is just a small sample of these devices capabilities! I am a great fan and advocate of aquarium controllers. I am lucky, I have an electronics background so I built my own controller and I can tell you now that without it I would not be able to take the stress-free vacations that I do, let alone the daily tasks it does!


If you are interested in further information on Aquarium Controllers you can have a look Here at AquariumSpecialty.com for some great information and pricing. I can assure you that you will never regret buying an aquarium controller. I will never own an aquarium without one!


To Finish

Safely cooling your aquarium can be done with relative ease, especially if you use a couple of the tips together. Some of the options are expensive and are out of the reach of many hobbyist, but when you are planning your next aquarium upgrade (Yes, well are guilty of constantly doing this!) you now have some ideas you can look at implementing to help maintain rock solid water temperature.

Further Reading

RO/DI Water Filters For Aquariums – Step By Step Setup!


As aquarists, our job is not to maintain our fish but to in fact maintain water. By maintaining high-quality water, your aquarium will thrive. A good RO/DI water filtration system is where it all begins and this article is not only going to inform you all about the filter system itself but how to select one to match your setup.

RO/DI water filters are a modular filter system made up of sediment & carbon filters, a reverse osmosis membrane, and a resin of de-ionized beads to filter and polish any source water. Using this to filter all the water before it goes into your aquarium is the preferred way.

This article gives you all the information required to help you begin to select the best system for your home and aquarium.


Read on to see how…


If you wish to view some RO/DI Water Filter Systems to reference while reading this article, you can find a great selection of systems below:

TBR Recommends

Marine Depot 4 Stage Advanced RO/DI System

A Good Quality RO/DI Water Filter Help Will Prevent So Many Water Problems!

Find Them Here At
Amazon.com

What Is An RO/DI Water Filter?

I know you are wondering what the heck RO/DI stands for.
RO = Reverse Osmosis
DI = De-Ionisation
These two important processes are what will give you nothing (Hopefully) but pure H2O.

There are many RO/DI units on the market today and many of them range from 3 stages all the way up to 6 & 7 stages, so which one is right for you? Read on and find out all about it…

As an aquarist, you need access to clean water for your initial tank fill-up, ongoing water changes and daily topping off due to loss through evaporation. Most city and well water are full of chemicals, metals, salts, and dirt that will play havoc with your reef.

The RO/DI unit will filter out all of these contaminants to give you the best quality water, usually at 0 TDS (Total Dissolved Solids).
TDS is a measure of anything dissolved in your water except Hydrogen and Oxygen and 0 TDS is what we all want going into our aquarium ALL THE TIME!

What Are The Parts Of An Aquarium RO/DI Water Filter System?

4 Stage Basic RO/DI Water Filter System
A Typical Saltwater Aquarium RO/DI Setup

Sediment Filters:

These are used to trap large particles suspended in the water. Dirt, sand & debris all get caught in this filter. They come in a range of sizes ranging from 0.5 microns to 20 microns for use in our hobby. This is always Stage One on the filter system.

Carbon Block Filters:

These are used to remove scents, organic pollutants, heavy metals, pesticides and much more. These filters remove so many pollutants I would be here all day typing them out. They are by far one of the most efficient filters for getting clean water!

Reverse Osmosis Membrane Filters:

The heart of the filtration system. The filters used before this are there to help prolong the life of this fantastic membrane. This filter is a thin film composite, semi-permeable membrane that passes the water over it under pressure for the membrane to remove any leftover heavy metals, trace elements, and dissolved solids that the first 2 stages were unable to remove.

Osmosis works by water migrating from an area of low salinity to higher salinity, so Reverse Osmosis is the opposite. When the water migrates, it is forced under pressure through the membrane of the RO filter at which time many of the contaminants are captured, allowing only the water and a few contaminants to pass through it.

The membrane is very susceptible to Chlorine, hence why the Carbon Block filter/s before it.

The RO membrane housing always has 2 hoses coming from it:-

1. Clean, Purified Water – To be used in the aquarium.

2. Waste Water – This water is still good for feeding plants, washing cars etc. It is just more concentrated with the contaminants we do not want in our aquarium.

The biggest problem with the RO membrane is the amount of wastewater it produces. Most membranes produce wastewater at a ratio of 5 or 6 to 1. In other words, you will get 5 gallons of wastewater for every gallon of purified water.

There are some systems out there that seem to be getting better ratios and there are upgrade kits available to help reduce this wastage and those will be discussed later in the article.

De-Ionized Resin Filters:

The filters before this stage have been able to remove up to 99% of your water’s contaminants but we need 100%! This is where the DI-Resins come into play.

De-Ionized Resins are tiny beads that are electrically charged with either a positive or negative charge. The great things about these resins are that as they attract the remaining contaminants, they change color which makes it super simple to see when they need to be replaced. Placing these beads in a clear reactor makes this super easy!

There are 3 types of commonly used DI Resins:

Mixed Resin – This DI resin is a mix of both Cation and Anion resin beads. They are great for most aquarists and work well for removing the last 1-2% of contaminants left in the water. The mixed bed is generally used as the last stage of the filter system.

Cation Resin (+) – This filter resin is made of only Positively charged beads, therefore it attracts the negatively charged containments left in the water. Most commonly used as the first stage in a dual bed resin filter system.

Anion Resin  (-) – This filter resin is made of only Negatively charged beads, therefore it attracts the positively charged contaminants left in the water. Most commonly used as the second stage in a dual bed resin filter system.

The de-ionized beads will need to be housed in a reusable cartridge to prevent them from being washed into the aquarium.

You can find the cartridges Here at Amazon.com

Pressure Gauge:

For the RO membrane to work efficiently it needs a minimum amount of water pressure to help push the water through it. The only way to see what pressure your city or well is at is to install a pressure gauge in the line coming directly from the faucet or house pipework.

Most RO membranes require a pressure of 40psi to 80psi to work at their maximum efficiency and if you are unable to meet that pressure you may have to install a pressure boosting pump.
Each membrane will have a label/instructions showing its optimum working pressure.

Find the Pressure Gauge Here at Amazon.com

Membrane Flush Kit:

It is recommended to flush your RO membrane for 5 minutes before and after using it to remove any waste that may have accumulated in the film.

When your RO/DI Kit arrives, it will contain a flow restrictor device that goes onto the ‘Waste Water’ line from your RO membrane. This device is what helps build the pressure in the membrane to help it work efficiently.

RODI System Flush Valve

The Membrane Flush Kit bypasses this restrictor and allows full faucet pressure to run through the membrane flushing out the accumulated matter. This is just a valve that you turn on for 5 minutes, then turn back off.

This kit dramatically increases the life of your RO membrane and is highly recommended.

You can find the flush kit to match your Gallons Per Day requirement Here at Amazon.com

TDS Meter:

This little device comes in three types:

Single Meter – Has one sensor to monitor the TDS coming out of the RO membrane.
Dual Meter – Has two sensors. One to monitor the output of the RO membrane/DI Resin, and one to monitor the incoming TDS from the street/well.
Triple Meter – Has three sensors. One to monitor the output of the RO membrane, one to monitor the output of the DI Resin, and one to monitor the incoming TDS from the street/well.

The Dual Meter is my recommendation and is the one I use. I like to see the TDS coming into the filter system and the TDS leaving the filter systems to ensure it is working efficiently.

Once you begin to get more than 15 TDS coming from your RO membrane it is time to replace it.

You Can find the TDS Meter Here at Amazon.com

Pressure Boost Pump:

This is a must if your pressure gauge is showing your city or well pressure less than 40 – 50psi. As explained earlier, your membrane needs a minimum pressure to function efficiently. If you do not have this you will create lots more wastewater and your membrane will have a much shorter service life.

A Boost Pump is easy to install and really are worth their money. RO membranes are expensive and a boost pump will pay for itself in a few years of use.

You can find the boost pumps below at Amazon.com:

Automatic Shut-Off Valve:

This is mainly used when you want to use a ‘Float Valve’ to shut off the RO/DI water to your container, once it is full. These devices are great to have and WILL prevent you from forgetting and overflowing your container and flooding the floor. Yes, it happens a lot in our hobby!

RODI Shut Off Valve

Once the float valve shuts the pressure builds up in the filter and the Automatic Shut-Off valve sense this and shuts off the flow to the membrane. This prevents the membrane from sitting under constant pressure when it’s not in use. Again this helps to prolong the life of the RO membrane.

You Can find the Automatic Shut-Off Valve Here at Amazon.com

The Most Basic 3 Stage RO Only System:

The 3 stage system forms the foundation for all the larger stage systems and consists of:

Basic 3 Stage RO Water Filter

Stage 1:

The first filter that your city/well water meets is a Sediment filter. This is used to trap the larger particles suspended within the water before transferring the water to the next stage. The usual filter size for this stage is 5 microns.

Most Sediment filters will need to be replaced every 6-8 months. They begin as pristine white and will turn a yellow/brown as they become clogged.

Stage 2:

The second stage is a Carbon Block filter. This is a filter made of activated carbon and is used to strip the water of heavy metals, organic pollutants, Chlorine and Chloramines.

Most Carbon Block filters will need to be replaced every 6-8 months.

These two stages are mainly to prepare the water to go through the RO filter. By providing this pre-filtering it prolongs the life of your RO filter which in essence is the heart (and most expensive) part of the whole filter system.

Stage 3:

The final stage of the Basic 3 Stage Filter is the RO (Reverse Osmosis) membrane.

Most RO membranes will need to be replaced after 12-24 months of use depending on how much its filtered, how many stages you have before it etc. A TDS meter will help you to see when this time comes.

The Most Popular 4 Stage RO/DI System:

This is the 3 stage system but with an added filter stage, the DI or De-Ionised Resin. The water coming out from your RO membrane is good, but it may not be completely clean, The DI resin is here to completely strip any remaining contaminants from the water and give you pure H2O.

4 Stage Basic RO/DI Water Filter System

The DI Mixed Resin is made up of tiny beads that are either positively and negatively charged. Each type of bead attracts contaminants on an ion level using its charge. By having a mix of both charges it captures any waste left coming from the RO membrane.

This setup will provide you with 0 TDS water and is the benchmark system for most aquarists. This is the system that I personally own, with all the extras except the boost pump, as my city pressure is high enough.

Why Are There 5, 6 & 7 Stage RO/DI Filter Systems Available?

This all comes down do how many ‘Nasties’ you have in your water supply. So many cities and well’s are full of contaminants and a 4 stage system can get used up very quickly. The extra stages are added to help deal with the increased level of certain contaminants.

If you suspect you have a lot of contaminants you should look at getting your supply water tested and see what it contains. This will give you a good idea of which extra stages to add. Many towns will have a service for testing water free of charge or for a small fee. Contact your local water department to see what they offer.

Another option is the companies that supply drinking water fountains to businesses. They will have an RO/DI unit on steroids, but they will have had to tailor it to suit the incoming water supply. A quick call or visit to them may give you an insight into what you may need.

A word of caution though, they WILL try and sell you one of their systems! Do your research and check for pricing on similar filtration systems as the type offered by these stores are usually way overpriced!

For Example:

If you have well water that is full of suspended solids you could have 2 sediment filters. The first a larger 5 micron sediment filter and the second a 1 micron sediment filter. This would be a 5 stage system with 2 of those stages aimed at sediment.

or

If you have city water that is high in Phosphates, Silicates or Nitrates, for example, you could use 2 Carbon Block Filters to help clear the elements before sending the water to the RO membrane.

When you start getting to the 6 and 7 stage filters your incoming water source is absolutely full of contaminants and need some serious processing to get your water pristine.

A Typical 6 & 7 Stage system is good if you have high levels of:-
Ammonia
Carbon Dioxide
Phosphate
Chlorine
Chloramine

A 6 Stage System will consist of:-

1 One Micron Sediment Filter
2 One Micron Carbon Block Filters
1 RO Membrane
2 DI Mixed Resin Filters

6 Stage RO/DI Water Filter System

If you find you are burning through the Mixed DI Resin filters too much, you could look at getting an extra stage and splitting the DI Resins into their own charged reactors with a Mixed DI Resin for a final polish.

A typical 7 Stage System will consist of:

1 One Micron Sediment Filter
2 One Micron Carbon Block Filters
1 RO Membrane
1 DI Cation Resin Filter (+)
1 DI Anion Resin Filter  (-)
1 DI Mixed Resin Filter (+ & –)


Keep Reading to See Exactly How I Would Set Up A RO/DI Water Filter System


How To Select An RO/DI System That Is Right For Your Aquarium?

  1. Have your water tested or see what other local aquarium owners are using
  2. Decide on how many stages you think you will need based on Step 1
  3. Research the different types of systems available and narrow down which you think will be right for you
  4. Start with the least amount of stages you think you will need, but leave space to add further stages if needs be in the future
  5. Is your filter system going to be permanently installed or portable? (More on that later)
  6. Look at flooding prevention products – Trust me it will save your behind!

RO/DI Installation: Permanent vs Portable

Most RO/DI water filtration units come with the filter canisters mounted to a bracket. This bracket is then secured, usually to a wall, near a sink. Your RO/DI unit will need to access the water supply in your home and also a drain of some sort for the wastewater.

This is how I have my 4 stage installed:

Saltwater Aquarium Sump

Most aquarists permanently install their RO/DI unit on the wall or under the sink in the cabinet to keep the unit neat and tidy. This is the best solution, but what if you rent a property or you have nowhere to physically install the unit? What about if you have nowhere to locate a water container such as a Brute trashcan for your water while you fill it?

Many of the locations you could find in your home to make and store water are very rarely next to a water source so what do you do?

The answer is to have a portable stand or frame to mount your RO/DI unit to and then you can bring out the unit when you need to make water, then put away out of sight again.

Another alternative if you are handy is a DIY Stand. You can see a simple DIY stand made from 2 shelf brackets and some pieces of wood:

Having a stand will make it easy for you to bring the unit out into the bathroom, for instance, connect the RO/DI unit to the house water using a faucet adapter and the place the drain hose into the bathtub. Now you can leave your unit to run and make water.

Beware of flooding your home though whenever you make water! Every month I hear through the many social channels and forums I follow of people forgetting and flooding. You will not be the first and certainly not the last person to flood if you don’t take a few precautions to prevent it.

Another thing to consider when looking to install your RO/DI filtration system is the amount of time it will take to fill your water vessel. Most of the popular units run at either 75 or 150 gallons per day and trust me, it seems to take forever! Most units take anywhere from 45 min to 1.5 hours to fill a 5 gallon bucket.

It could take you half the day to fill a 30 gallon Brute Trashcan, so is your partner going to let you take up the bathroom for the whole day? Probably not.

If you are setting up a large aquarium (+100 gallons), it is going to take a long time to fill it and to make enough water each time you wish to do a water change. Having a location, out of the way where you can leave your unit running and filling will take some thought and planning, but it is something you will need to consider. 

There are upgrades you can purchase to help speed up the water filtration and those will be discussed later.

Plumbing Connections

There are various methods you can use to plumb in your new RO/DI unit and they all depend on:-

  • Can you do your own plumbing?
  • Do you need to call in a plumber?
  • Is your RO/DI unit permanent or portable?

If you can do your own plumbing or have a plumber then this section is not really needed for you as you/they will know what to do, but if you don’t have those luxuries, there are some simple installation methods:

Permanent Installation Without A Plumber Needed:

You will need a Supply Valve and a Drain Saddle:

Supply Valves are for your COLD WATER home water connection and they generally come in two types:-

  1. Fixing to a rigid copper/plastic water pipe
  2. Fixing to a braided hose water pipe.

Rigid Pipe:

The rigid pipe supply valves clamp around the pipe then you screw in a piercing needle which punctures a hole in the pipe. You wind the needle back out and then water can flow to your RO/DI unit. Super easy to install!

Braided Pipe:

Braided Water Line

Find them Here at Amazon.com

You cant use the piercing supply valves on flexible and braided hoses so the alternative is the adapter. You unscrew the braided hose from the COLD WATER valve under your sink, insert the adapter, then fit the braided hose onto the adapter. Again, super easy to install.

Portable and Non-Permanent Installations:

Garden Hose Adapters:

These are great for when you are using a portable RO/DI unit. These adapters screw onto your faucet that has threads on the outside of the spout, you can connect your input hose to them, then run the hose to your RO/DI unit.

Faucet Adapters:

The same principle as the garden hose adapter, but these are to fit your faucets with threads on the inside of the spout. Most kitchen/bathroom faucets have a screen in the outlet of the faucet which you can unscrew, fit the adapter and then connect on the above garden hose adapter.

Screw-In Faucet Adapter
Faucet Adapter Assembly

Find them Here at Amazon.com

Drain Saddle:

This is used to permanently connect your RO/DI wastewater line to your sink/home’s drain plumbing. All you need to do is drill a 1/4″ hole in one side of the drain pipe, then install this with the hole lining up with the tubing connector.

If your RO/DI unit is portable, just secure your wastewater pipe down the drain hole in your sink or bathtub while you are making water. Just be sure it cannot pop out!


Keep Reading to See Exactly How I Would Set Up A RO/DI Water Filter System


How Do You Prevent Aquarium RO/DI Filters From Flooding?

Flooding happens all the time when making water and even the most conscientious aquarist can get distracted and have the container overflow. Here are some great ways to help prevent or minimize the chances of you walking in and getting a wet sock!

The Flood Guardian (AKA: The Marriage Saver):

The video says it all and for 70 bucks, it’s worth all the nagging you will get off your partner when you have just ruined your hardwood floor!

You can see more on this unit from Here at Amazon.com

Float Valve:

This is one of the best lower priced items you can buy. It will automatically shut off the water once it reaches the height of the float valve.

You have to drill a hole and permanently fix the valve to the container and all you do is connect the pipe from your RO/DI unit and leave it to fill.

RO/DI Float Valve Installation

They work on the same principle as the float valve in your toilet. When the container is empty, the float on the valve falls down due to gravity. As the water rises, the float will begin to rise on the top of the water until it fully closes the valve. At this point, the water stops flowing. No flood!

Flood Alarm:

This device has a water sensor that detects water and sounds an alarm. You could use this in two ways:
1. Place the unit on the floor and when it screams at you, the floor is wet 😉
2. Remove the sensor part of the alarm and hang it near the top of the water collection vessel. When the water is nearing the top, the alarm goes off!

Flood Alarm

You can find out more on this cheap device HERE at Amazon.com
or
You can find alarms that connect to your Cell Phone HERE, also at Amazon.com

Alarm On Your Cell Phone:

We all have a cell phone and why not set an alarm to remind you to turn off the RO/DI unit. Time how long it takes you to fill your water collection vessel then next time set your alarm to go off 5-10 minutes earlier to remind you to shut it off.

Just don’t go out and forget because 10-15 minutes after your alarm goes off your floor might be getting wet!

Container In The Bathtub:

This one is simple. Who cares if it floods if you have your container placed in the bathtub! Just make sure you can physically lift your container out when it’s full. Even a 5 gallon pail is going to weigh close to 50lbs when it’s full!

Overflow Drain On The Container:

If you have your system set up in a permanent location and your RO/DI is plumbed into the drain, why not plumb in an overflow drain into your collection vessel. A hose connector fitted near the top of the water collection container that runs to the drain will ensure you will never flood the floor.

Hose Clamps:

You would not believe how many people have flooded their home because they did not properly secure their hoses! The hose going into the drain and the hose going into the collection vessel MUST be tightly secured.

Hoses can slowly move over hours of use and if they become dislodged from where they were meant to be you can get a lot of water discharged before you realize! Get them clamped!!!

Another thing you might want to look into is insurance if you flood your home or rented property, especially if you live above someone. Floods can be VERY costly and you need to make sure your rear-end is covered!

Have a read of my article on Insurance for Aquariums.

Upgrades To An RO/DI Aquarium Water Filter

At first, you will most likely want to get your RO/DI system up and running. Setting up a saltwater aquarium is not cheap and somethings you really need to spend your money on. There are a few things with an RO/DI unit that you can purchase in the future that can really work wonders for you.

Water Saver Kit:

The one downside to RO/DI filters is the amount of wastewater they produce and luckily there is a way in which we can reduce this ratio!

We should all do our part to not waste any water on our planet and making RO/DI is no excuse.
The answer to this is the Water Saver Upgrade Kit from Amazon.com.

RO Water Saver Upgrade Kit

This is an additional RO membrane that hooks up to the ‘Waste Line’ of your first RO membrane and the second membrane filters that waste into filtered water. You have now just halved your wastewater production in one go!

Drinking Water/Fridge Add-On

Having a really good water filter for your aquarium is great, but why let your liquid friends get all the good stuff? If your RO/DI unit is fairly close to your kitchen, or underneath in the basement, why not send some good water up to your fridge or to a new faucet on the sink?

RODI System Fridge/Faucet Connection

By tapping off the RO water before it goes into the DI resin you can add a simple ‘Drinking Water’ kit that can feed both the fridge and a new faucet. These kits are super cheap and give your whole family access to clean, filtered drinking water.

Drinking Water Upgrade Kit

When installing a drinking water upgrade kit it is important to make sure you tap off before the DI resin as stripping the water totally of its minerals and salts can actually harm the body. When pure H2O is ingested into the body it can cause the salts and minerals to be absorbed out of the stomach cell walls causing what is known as ‘Osmotic Shock’.

You can find this Faucet Addon kit Here at Amazon.com


How I Would Setup An RO/DI Water Filter System…

I know this can seem like a daunting thing to set up but it really is a lot simpler than you think and your livestock will greatly appreciate it and reward you with a thriving tank! These are the components I would get if I were to set up a new water filter myself:

Three-Stage RO/DI filter housing comprising of the following filter media:
1x One or Five Micron Sediment Filter
1x One or Five Micron Carbon Block Filter
1x RO Membrane

1x DI Mixed Resin media stored in a Reusable Cartridge
1x Add-On Filter Housing for DI Resin cartridge

1x Water Saver Kit
1x Flush Kit

1x Pressure Gauge
1x Pressure Boost Pump (If required)

1x Automatic Shutoff Valve
1x Vessel Float Valve

1x Rigid Pipe Connector
1x Drain Saddle

1x TDS Meter

You can find alternate or replacement filter cartridges Here at Amazon.com

You can shop around and find all these separately or some of them come as a pre-assembled bundle like THIS ONE at Amazon.com. To complete this setup you would also need the following:

1x DI Mixed Resin Filter – Replace the last carbon filter with DI Mixed Resin media & Cartridge

1x Pressure Boost Pump (If required)

1x Drain Saddle

1x TDS Meter

You will have to adjust your filter media sections to suit your local water conditions but this is exactly how I would have mine. My current setup is missing the water upgrade kit but that is on order and will help to reduce my waste water volume:

Here you can see my 4 stage filter system with my Freshwater collection bin in the far left of the photo. Use the installation diagrams you see in this article to help you connect all the components to suit your system.

RO/DI filter installations only require a few basic handtools but there are a few extra supplies you may need that will help. All links to Amazon.com:


To Finish

The RO/DI water filtration is one of the best purchases you will ever make for your aquarium. By having, your water tested you can speak to the pros and get a setup tailored to perfectly filter your water with minimal cost and wastage.

Installing it permanently or portable, you will not regret the few hundred dollars you spent to ensure your aquarium inhabitants have the cleanest environment to live in.

Cloudy Aquarium – Diagnosis & Fixing Guide


Have you just walked downstairs or into the room and your aquarium water is cloudy? Have you begun to panic a little? Well, don’t. Diagnosis is the key to a cloudy aquarium and we need to know the cause before we can treat.

A cloudy aquarium is usually caused by sudden algae blooms, a coral spawning event, bacterial blooms, microbubbles from a pump or powerhead or from high flow stirring up the sandbed. Diagnosis is the key to determing if its a mechanical, biological or a chemical issue which can then be addressed.

Many of the causes of a cloudy aquarium are pretty easy to diagnose so lets go and see what caused your heart to skip a beat!

How Do You Diagnose Reef Tank Water Cloudiness?

You want to begin with eliminating the obvious.

Determine if its bubbles or sand:

  • Has your powerhead fallen off its mount, has the suction cup let go and it’s now blowing all the sand around the tank?
  • Did you purchase a Sand Sifting Goby the day before? Their name says it all.
  • Has the powerhead been knocked and is sucking in air from the surface and creating mass bubble chaos?
  • Has your protein skimmer developed a problem and firing bubbles out of the pump and into the sump?
  • Has your water level dropped and the return nozzle is now pulling in air from the surface and creating bubbles?

These are usually simple to fix if its a mechanical issue. If its the Sand Sifting Goby, you may want to vacuum the sand bed to remove the majority of the fine particulate matter that has settled within the bed.

Did you have any Anemones?

Did you own an Anemone that has unstuck itself and been dragged into a powerhead – Large emergency water change & run Activated Carbon if this is the case!

If the anemone has been mashed up and it has likely ejected toxins into the water. You need to be swift to get the toxins out before they begin to affect the other fish and corals.

Anemone Guards Are Great Protection

Run activated carbon is mesh bags , turn on the UV if installed and do several large water changes over the next few days and cross your fingers.

To help prevent future situations many pumps and powerheads can be fitted with cages and foam protection devices to prevent active amenones being pulled in and minced up.

What Color is the Water? Green or Milky?

Green = Algae-based problem
Milky  = Bacteria, Coral Spawning or Precipitation based problem

More on these causes later…

Did Your Aquarium Go Cloudy During Its Cycle?

Cloudy water during an aquariums initial cycle may be due to insufficient nitrifying bacteria to convert the bio waste currently in the tank. Too many fish may have been added too soon after or even during the initial cycle. Water changes and adding a live bacteria culture can help clear the water.

During your aquariums cycle, you are allowing time for aquariums beneficial nitirfying bacteria to build in your system to deal with the Ammonia, Nitrites, and Nitrates that your livestock releases each time they go to the bathroom.

When there are not enough bacteria to manage the waste you could see the water have a cloudiness or haze to it as the Bacteria blooms. These can last from several days to several weeks depending on your situation. As time passes, the water will clear as the beneficial bacteria multiply and deal with the issues causing the cloudy water. As you have probably heard many times already, Be Patient!

Did Your Aquarium Water Go Cloudy After A Water Change?

When mixing saltwater for a water change, elements from within the salt mixture can come out of suspension and remain floating. When adding this water to the aquarium it can appear to make the water cloudy. With time the mechanical filter stage should capture the particulate matter ready for removal.

Mixing saltwater can sometimes give you headaches! It is rare but sometimes you can have a new batch of salt that takes longer to fully dissolve into the water. I usually begin mixing my new saltwater batch a day or two before I do my water change to ensure thorough mixing, but you may not have that situation available.

If your water is cloudy after a water change these are probably the most common reasons:

  • Salt not fully dissolved – Patience, it will dissolve with time
  • If you have disturbed the sandbed during vacuuming or adding the water this will have released dust and detritus into the water column. Allow your filter floss or filter socks to remove the suspended particles
  • Microbubbles are always present for a few hours after a water change. The mixing of the water, adding the water and general messing around with the water all adds microbubbles. Again, patience will see them clear

For More Information on Water Changes Check Out this Article:

Saltwater Aquarium Water Change – Your First Time


Did Your Saltwater Aquarium Go Cloudy Overnight?

It is not uncommon for corals in an established aquarium to spawn during the night. Large sperm and eggs masses can be released into the water causing the water to appear milky when the lights turn on in the morning. Mechanical filtration and a water change are the easiet ways to remedy this.

Do you have a tank full of thriving corals and you woke up to a cloudy tank? It’s not uncommon for corals to spawn during the night once they are happy and thriving, especially if you have multiple corals of the same species.

Depending on how many spawned will depend on how cloudy your water became. Your corals may have been spawning for years but only on a small scale and your filtration removed any trace of it before your lights came back on the next day.

Coral Spawning

This year may be different! You could have had a mass spawning event and it’s taking a while for your filtration to clear it. Run through the items in this article to ensure it is not something else causing the cloudiness and if not, congratulations! You could have a thriving Reef! To me, having an animal reproducing in your aquarium shows it is happy and all its needs are met!

On the other hand, if you have no corals in your aquarium, or you only have a few and they are new, then spawning is not likely to be the cause.

How Do You Get Rid Of Milky Water In A Fish Tank?

Your aquarium is full of different types of bacteria all doing a specific job, you have Nitrosomonas Bacteria that convert Ammonia into Nitrite, you have Nitrobacter Bacteria that converts Nitrite to Nitrate and you have Bacteria that feed off organic waste such as uneaten food, poop, and detritus, just to name a few.

The bacteria that most likely caused a milky cloudiness to your aquarium are called Heterotrophic Bacteria and these are the ones feeding on the decaying waste. They can have explosions of multiplication when a food source is in abundance. A water change and reguar maintenance will remedy this.

What this shows you is that you need to do more to remove the decaying matter in your tank. More frequent water changes, vacuuming the sand bed, turkey basting your rocks, cleaning your floss/socks more often, increasing your clean-up-crew or reducing your bio-load by having less fish or feeding less. The cloudiness will soon clear with a bit of maintenance and a water change!

Bacterial blooms are nothing to get panicked over, its just mother nature taking advantage of the abundance of available food. As time goes on, the different bacteria will multiply to help deal with the bio-load and hopefully, your increased maintenance will prevent this from happening in the future.

If you find this is happening regularly and your maintenance is good then you could look at adding a UV Sterilizer to your system. They come in all sizes to accommodate every tank size and the sterilizer will kill any bacteria that flows through it. This could help control the cloudiness if you have tried everything else.

If I was going to install a UV system on my aquarium I would definitely look at the great range of sterilizers from Aqua Ultraviolet here at Amazon.com. They come in a vast range of sizes to accommodate any system and are bacteria sterilizing machines!

Aqua UV Sterilizer
Aqua UV Sterilizer

I know of a few owners who love them and they really helped clear their water.


For even more information on UV Sterilizers, you can read my article –
Aquarium UV Sterilizers – What Do They Really Do?


How Do You Get Rid Of Green Water In Your Fish Tank?

Suspended algae matter is the most common cause of green aquarium water. An abundance of food has caused a growth explosion. Water changes with high-quality water, regular maintenance, installing a refugium or turf scrubber, or running Bio-pellets all help reduce the food source algae thrives on.

If they multiply enough there can be cases where you cannot even see the fish! I have seen this many times on freshwater aquariums where the maintenance has been poor at the best of times!

The excess algae bloom is usually fuelled by one or more of the following situations:-

Too Much Light

Algae is a plant and it uses photosynthesis to convert light to food. If your aquarium has too long a lighting period or has direct sunlight you will get more algae growth. I have one small corner that receives direct sunlight first thing in the morning and that corner is always greener than the rest of the glass.

If this may be a cause, shade the tank somehow from the direct sun or reduce the lighting period on your lights. I like my lights on more in the evening when my family and I are around so my lights ramp up from noon and then ramp down beginning at 10pm. I have good algae growth on my glass but I Mag-Scrape (Magnetic Glass Cleaner) my glass every 2 days.

Excess Nutrients

Do you have a lot of fish? Do you overfeed? We all do at some point! Excess nutrients are just fuel for algae. Algae love Nitrate, Phosphate, and light to thrive and a good way to provide the first two is a heavy bio-load. Having a lot of fish and feeding them regularly is OK providing you clean up!

Make sure to vacuum your sand bed and turkey baste your rock before a water change are great ways to help remove detritus. Same goes for the sump, turkey baste any sitting waste and get it into the water column. The more waste you have sitting, the more it will break down into Nitrate and release Phosphate into your water, fuelling the algae.

High Levels of Phosphate

As just mentioned, algae loves Phosphate. The higher the level you have, the more food you are providing for the algae. Get the detritus removed to prevent it from releasing the Phosphate into the water.

High Levels of Nitrate

Just as Phosphate, the higher level you have, the more food you are providing for the algae. Regular water changes are a great way to help keep Nitrate low.


To also help, you can also view my article on lowering Nitrate HERE


Tips To Help Make Your Saltwater Aquarium Crystal Clear

  • Regular water changes
  • Don’t overfeed
  • Install a Refugium ==> See my article HERE on Refugium’s <==
  • Vacuum sand bed and turkey baste rocks & sump weekly
  • Mag-Scrape your glass often
  • Keep filter floss and socks clean
  • Keep your Protein Skimmer clean and working efficiently
  • Have good water surface agitation for gas exchange and keep oxygen level high
  • Keep powerheads from disturbing the sandbed
  • Have a Bubble Trap in the sump after your Protein Skimmer
  • Use good quality Activated Carbon. Change it regularly
  • A UV sterilizer is another solution since UV light will kill microorganisms in the water such as bacteria, algae, and viruses. In theory, good guy micro-organisms in the rock and sand are not killed since they must be free-floating and pass through the UV sterilizer.

To Finish

Just like many of the other methods of controlling a parameter or issue within your saltwater aquarium, it requires a multi-angled approach. By having a good, regular maintenance schedule and incorporating some of the tips listed in the article your phase of cloudy water will be short-lived and hopefully not to be seen again (Unless its coral spawning which is a good thing!).

Many of the problems I see with beginners are mainly caused by either their first time experiencing the issue or the lack of knowledge on what caused the issue.

Further Reading

If you found this article helpful, may I suggest a few more for you:

Aquarium Insurance – Cover Your Butt or it Could Cost You!


I just saw a forum post of a poor guy whose tank had just exploded and having seen the mess got me thinking. Does my own house insurance cover this kind of event?

Aquarium insurance policies cover damages caused by a catastrophic aquarium failure, leaks, and overflows, but most will not cover the loss of livestock. Policies can start at a reasonable price and cover the cost of repairs to your property or others living below you if the worst were to happen.

This is a topic that appears to be a great area of confusion and I don’t see it getting any clearer! If you have an accident with your aquarium, big or small, what is covered? What is not? Can you get sued? This article will help point you in the right direction for what you need to know when looking for coverage.

As an aquarium owner, I did a lot of research into this to try and find out the simple answers to being insured and found out there are no such things as simple answers when it comes to insurance! Read on to learn about what I found and what we need to know…

Does Renter Insurance Cover Aquariums?

Before you even look at insurance the main thing you need to be certain of is ‘are you allowed’ to have an aquarium in your rental property? Do you even know if you are allowed an aquarium? These are questions you need to find answers for either from your written ‘Rental Agreement’ or in writing from the property owner.

You always need to get any clarification in writing and have it signed and dated to help protect yourself if there was ever an incident! Not being allowed an aquarium, then not having insurance is a sure-fire way to being sued!

OK, so you are allowed to keep an aquarium and that’s all good, but now what happens if your 100 gallon aquarium bursts 5 minutes after you have left for work and your neighbor below you now has water pouring through their ceiling! Two Words – Renter’s Insurance.

As a renter, you should have this anyway to protect you and your landlord, but what you need to look for when buying a new policy is how your aquarium could affect that policy.

Most renter’s insurance policies may cover the cost of water damage from a leak or burst aquarium, or if a fire occurs from a faulty piece of aquarium equipment. You may also be covered if your landlord decides to sue you for damages and loss of revenue etc. Always seek professional advice first.

What you will most likely not be covered for is the cost to replace your aquarium, equipment, and livestock.

Some insurance companies may advise you to take out an additional ‘Liability Policy’ to cover your aquarium, which is usually only a few dollars more each month.

I use the word ‘MAY’ a lot because from my research talking to insurance companies, it varies from company to company, state to state, country to country. You will need to personally talk to a LOCAL agent in your area and ask them exactly when you are covered for.

Most Rental Insurance policies I called for were in the $15-30 per month range for an average 1000 sqft apartment.

Does Home Insurance Cover Aquariums?

A home insurance policy should cover the cleanup and repair costs of an aquarium leak to not only your home but any other affected properties. General home insurance will not cover replacing the aquarium, livestock, or equipment. An additional add-on policy will have to be taken out.

Just like the renter’s insurance, the question of ‘Aquariums’ when asked to an agent can return a plethora of answers, even from the same company. Aquariums are not a usual item that gets questioned but when an incident occurs, the clean-up costs are always significant.

You will need to check your policy to see exactly what it says on there and if you need to clarify in writing, I advise you to go to a local office and speak directly with an agent. The call center staff are a lot less experienced in dealing with these matters and have very little power when it comes to figuring out what you need.

Trust me I called a lot of them! “Let me check with my supervisor” was a common reply I received!

Aquarium Fire

What To Check For Aquariums On An Insurance Policy

The policy wording is the gray area that insurance companies love to tangle us up in. They will word your policy in a language that most of us will never understand and that is how they can then use those words to interpret the situation as THEY wish.

Here are a few things you may see mentioned:

Flood Damage – This is when water comes up from below the home. Not from your aquarium incident.

Sump Failure – This is referring to your groundwater sump in your home, not the sump under your aquarium.

Hot Tubs and Water Beds – Your policy may or may not class your aquarium as the same as these in-home water storage devices.

Appliances – If your dishwasher or washing machine leaks, is this the same as your aquarium leaking?

Look for any wording specific to an aquarium and have your local agent clarify in writing EXACTLY what that statement means.
Have them point out what damage is covered if you have a leak and what is not covered.

Understanding your policy is key to knowing what to prepare for and hopefully prevent a disaster. It is also good to understand if you need to shop around for a new insurance company to cover your needs.

Aquarium Insurance – What Are You Covered For And What You Are Not Covered For?

This is by no means an exact statement of what is covered but a generalization of what I have found during my research. Your personal policy will dictate your coverage. This is just a general guide:

  • If your aquarium leaks or bursts you may be covered for the damage, cleanup and repairs to your residence and anyone else affected.
  • If your aquarium catches fire you are covered
  • If someone breaks into your residence and steals your equipment or aquarium you are covered
  • If someone breaks into your residence and smashes your aquarium you are covered
  • If you forgot to turn off making water and you flood, you may be covered
  • If your landlord sues you for negligence you may be covered
  • If your aquarium leaks, you are not covered for replacement of your aquarium or livestock
  • If your policy specifically states ‘Any damage caused by pets or aquarium’ you may not be covered
  • Loss of power to your residence is not covered
  • Hurricanes or floods may not cover your losses

Aquarium Insurance – Things To Be Aware Of

  • If you move across state lines your coverage may be affected. Each state can have it’s own rules on your policy, even within the same company.
  • Change residence = check your policy with a local agent!
  • Always get clarification and in writing, NEVER ASSUME!
  • Make sure there is not an aquarium size limit on your Insurance Policy or Rental Agreement
  • Keep a total of all your equipment replacement costs and ensure your policy coverage is enough.
  • I have seen repair and replacement bills from $15,000 to $100,000!
  • Keep up to date on this total as the years go by (It will scare you how much gear you have!!)
  • Claims are all about the wording. But blatant lying will get you in trouble.
Broken Aquarium

Tips For Finding Better Aquarium Insurance Coverage Policies

  • Ask if that agent has dealt with an aquarium incident before. Maybe try and speak to an agent who has
  • Ask around your social circles to see if anyone knows an Insurance Claim Adjuster. They are the ones who come to inspect the damage and have the final say on your payout. They may have some good advice. The Agents just try and sell you their products
  • If you are unable to get coverage with your current insurance company then its time to look around for a new one
  • Ask around your forums for the advice of any aquarium owner that is local to you and who they use
  • You may be able to purchase an extra ‘Add-On’ to your policy to cover just your aquarium
  • Look at ‘Bundling’ your policy with your existing insurance policies, eg car insurance, for extra discounts

Does Pet Insurance Cover Aquariums?

Generally, pet insurance will not cover an aquarium replacement, equipment or loss of livestock. There are specific policies will that will cover the vet and replacement costs of individual fish but will not cover the cost of a full livestock replacement. That would require a purpose-built policy.

If you wish to cover a specific fish that was of great value there are several instance policies available should you wish to take that route. Many policies begin from around 410/month per fish. You can find out more about each policy by clicking on it:

To Finish

My recommendation to you is to go and visit one of the good insurance agents or brokers near to you and talk to them face-to-face about exactly what you have and what can you get covered for. Shop around and see which companies can give you what.

The cheapest price may not be the best coverage! A $1000 deductible to someone on a low wage is not going to get you back into having another tank if you have an incident!

ALWAYS fully understand what you are covered for and what you are not covered for. Being negligent and blatantly trying to defraud an insurance company could end you up in a lot more trouble than just a wet floor!

Read around the forums on aquarists who have had accidents and try and learn from their mistakes and tips in case you are ever faced with a similar situation!

Insurance may seem like a hindrance or an ‘Extra Cost’ but to not have it and then face months of sleepless nights because you are being sued is not worth the cost of a pizza once a month!

Further Reading

If you found this article helpful I think you will like these too:

19 Best & Super Easy Corals For Beginners – With Pictures!


Corals! They are what makes a Reef Tank! But they are super hard to keep right? Depends, some are and some are not. This article was put together to help you begin your journey into adding corals to your saltwater aquarium with ease.

The corals I have selected are not just my opinion, but are true, tried and popular selections that thousands of aquarists began with. Many of the corals here, I too began with and are still in my tank today.

19 of the Best Corals for Beginners are:

  • Zoanthids
  • Mushrooms
  • Palythoas
  • Toadstools
  • Kenya Trees
  • Pulsing Xenia
  • Green Star Polyps
  • Montipora
  • Duncan Coral
  • Bubble Coral
  • Frogspawn Coral
  • Candy Cane Coral
  • Feather Dusters
  • Brian Coral
  • Torch Coral
  • Hammer Coral
  • Blastomussa Coral
  • Ricordias
  • Birdsnest

It may be tempting to go out and buy the first frag of coral you see, but they will grow and before you know it you will have no room left to add better and more colorful corals in the future. This happened to me!

I ended up having to take out rocks, sell them and then get new rock so I had room to move into SPS corals! Take your time and find the colors, patterns, and shapes that will fit into your idea of a dream aquarium.

Remember, some corals will make it and some corals won’t. You may be able to get a coral to thrive while your friend cannot keep them. Every tank is different and there just may be a coral that you may never be able to keep with your current setup. That’s just the way it is sometimes!

The main thing corals need is water parameter stability. You can view what the ideal parameters to aim for are HERE.

I have started the list here at your tank being 3 months old. By this point you should have made a lot of your rookie mistakes (and hopefully learned from them), you will have a maintenance and water change routine sorted out, you will have a few fish and kept them successfully, you will have had some algae blooms and your bacteria have had a chance to settle in and allow your ecosystem to stabilize.


Now let’s look at 19 of the best beginner corals to start getting some color, movement, and diversity into this glass box of yours!

After Your Tank is 3 Months Old:

Once your tank has hit the 3 month mark the bacteria should be coloinsed enough and your tank cycle has completed. Although you may still be trying to figure out your maintenance routine there are some hardy corals that can tolerate quite abit of water parameter instability and allow you to get started on your coral journey.

Palythoas (Paly’s)

A very hardy coral and a great choice for your first few corals. They can come in a huge range of colors but a lot of them are muted and bland, search out the good ones and leave the junk at the store! You can find some brightly colored ones if you look around. I have some bright pink ones in my tank and each head is about 1/2″ diameter.

They will multiply and spread well once they are happy and established and you can place them next to other Paly’s and Zoa’s to help the colors mix.

Palythoas

Size: 1/4″ – 2″
Placement: Bottom to Mid Level
Lighting: All Areas. Shady – Full Exposure
Flow: Moderate to High
Food: They gain energy from the light but supplemental feeding of Zooplankton and Phytoplankton will help them grow and spread

A word of caution when you own these corals. SOME carry a deadly toxin called Palytoxin. It is hard to know which contain the toxin and which do not.

>> Click Here to read my article here on Palytoxin Poisoning to help you be aware, recognize the symptoms & what to do if you suspect poisoning <<

Zoanthids (Zoa’s)

Zoa’s are some of my favorite corals. The colors you can find in these are breathtaking. They are super easy to keep, you can place them anywhere, they grow fast and multiply quickly. Many people create entire tanks just of Zoas and they look awesome. I like to use Zoas to fill in the holes between my LPS and SPS corals. They are in the same species of Palythoas so be careful with regard to Palytoxin Poisoning.

Zoanthids

Size: 1/4″ – 3/4″
Placement: Bottom to Top
Lighting: All Areas. Shady – Full Exposure
Flow: Moderate to High
Food: They gain energy from the light but supplemental feeding of Zooplankton and Phytoplankton will help them grow and spread

Mushrooms

Mushrooms are a great beginner coral because they require the least demanding conditions to survive. They do best lower down and with low flow. You can get them in some great patterns and colors.
My favorites are the blue mushrooms and bright orange mushrooms. They grow easily and spread well.

Mushroom Coral

Size: 1/2″ – 3″
Placement: Bottom to Middle
Lighting: Low to Moderate
Flow: Low to Moderate
Food: They gain energy from the light but will capture food from the water. They will eat anything they can capture.

Toadstool Leather Coral

The Toadstool Leather comes in a variety of pastel colors, shapes and can make a nice focal point in any aquarium. The polyps provide a nice motion when irregular flow crosses the coral, even Clownfish have been known to host them.
They can become large and shadow any coral placed underneath them so plan their location before purchase. As they grow they will crease up and create unusual patterns.

Toadstool Leather Coral

Size: 1″ – 10″
Placement: Middle
Lighting: Moderate to High
Flow: Moderate
Food: They gain most of their energy from the light but will definitely benefit from Phytoplankton feedings

Kenya Tree

As its name suggests it grows like a tree, but this is a beautiful coral full of branches and polyps. It sways back and forth in the current and you can find them in many colors from white, through purple to bright green ($$$ for that one! Been on my list for a while!).
They grow well and will drop branches that will sprout into new corals. Just pick them up and stuff them in a rock hole and you have a new tree. Awesome!

Kenya Tree

Size: 2″ – 7″
Placement: Anywhere
Lighting: Moderate to High
Flow: Moderate to High
Food: They do require food to be in the water column and supplemental feedings of phytoplankton and Zooplankton will help it thrive

Pulsing Xenia

One of the most mesmerizing corals in our hobby. When you get a mat of these they are just incredible. I have a mat on each end of my reef and I love them. They move by themselves and when placed in a lower flow area will allow you to see them ‘Pulse’!
They grow fast so be sure to control them or you will have a tank full of Pulsing Xenia!

Size: 1″ – 4″
Placement: Bottom to Middle
Lighting: Low to Moderate
Flow: Low to Moderate
Food: They gain most of their energy from the light but will definitely benefit from Phytoplankton & Zooplankton feedings

Green Star Polyps (GSP)

Another very popular and mesmerizing coral, but this one glows neon green under a little bit of actinic light! These individual polyps multiply and grow fast! They will grow on any surface, even the glass.
The waving polyps look like wind blowing over a wheat field when you get good irregular flow on them.
However, they will cover your ENTIRE tank if you let them! Many aquarists keep them on a rock isolated on the sand bed or allow them to cover their back glass and keep them trimmed using a razor blade!

Green Star Polyps Coral

Size: 1/2″ – 1″
Placement: Anywhere
Lighting: Moderate to High
Flow: Moderate to High
Food: They gain most of their energy from the light but will definitely benefit from Phytoplankton & Zooplankton feedings

Frogspawn Coral

Part of the Large Polyp Stony (LPS) family these great corals are super hardy and bring great color to any aquarium. The long tentacles with rounded tips resemble frogspawn, hence their name.
They come in a range of colors from green, pink, purple and orange. They are aggressive towards other corals but can be kept with each other and Hammers and Torches.

Frogspawn Coral

Size: 1″ – 3″
Placement: Middle
Lighting: Moderate to High
Flow: Moderate to High
Food: They gain most of their energy from the light but will definitely benefit from Coral Foods like Reef Roids and Reef Chilli

Hammer Coral

Part of the same Euphyllia family as Frogspawn and Torch family these are another popular LPS beginner coral. I have a Hammer Garden in my reef with Blue, Pink, Yellow, and Green/Purple Hammers all together and they look fantastic when they rock in the flow and intertwine their tentacles.

Hammer Coral

Size: 1″ – 3″
Placement: Middle
Lighting: Moderate to High
Flow: Moderate to High
Food: They gain most of their energy from the light but will definitely benefit from Coral Foods like Reef Roids and Reef Chilli

Torch Coral

The last coral of the popular Euphyllia species trio. Comprising of long straight tentacles with the tip a different color to the stalk. These really catch the water flow well and when you place several next to each other of varying colors they really do look great.
They come in many colors from green, purple, pink, gold and they grow well.

Torch Coral

Size: 2″ – 6″
Placement: Middle
Lighting: Moderate to High
Flow: Moderate to High
Food: They gain most of their energy from the light but will definitely benefit from Coral Foods like Reef Roids and Reef Chilli

Bubble Coral

Its name says it all! These bags of water move well in the water flow and it makes a great contrasting coral. They come in shades of white, pink, purple and green and they make very unique focal points in any reef!
Easy to care for and requiring low light make them a good choice for the aquarist on a limited lighting budget.

Bubble Coral

Size: 2″ – 8″
Placement: Bottom – Middle
Lighting: Low to Moderate
Flow: Low to Moderate
Food: They gain most of their energy from the light but will definitely benefit from any food it finds in the water

Feather Duster

I love these little guys! So fun to watch them pull their feather duster crown back into their tube when touched or harassed. This is actually a worm that builds a tube and extends its feathered crown to catch food from the water column and move it towards its central mouth. It can drop its crown if stressed, but it soon grows back! Even though this is not actually a coral, it’s a great addition for the beginner!

Feather Duster Coral

Size: 1″- 7″
Placement: Bottom
Lighting: Low
Flow: Moderate
Food: Supplemental feedings of Zooplankton, Phytoplankton, Reef Roids, Reef Chilli or anything you can get your hands on!

After Your Tank is 6 Months Old:

Your aquarium is starting to settle down and find its natural balance. Your water parameters should becoming more stable and your maintenance routine is getting dialed in. You can now begin to start adding corals that require a little more stability and care.

Candy Cane Coral

This branching coral has large inflated fleshy heads with tentacles that trap food. They can be aggressive to neighbors, so keep them a few inches away from other corals.
They can be found in shades of pink, blue, purple, green and neon green. They multiply well when they are happy and are a great addition to any reef.

Candy Cane Coral

Size: 1″ – 3″
Placement: Bottom – Middle
Lighting: Low – Moderate
Flow: Moderate
Food: They gain most of their energy from the light but will definitely benefit from Phytoplankton & Zooplankton feedings

Blastomussa (Blasto’s)

Blasto’s are another of my personal favorite beginner corals because they are so easy and so pretty. These are a good coral to get once you have started to get things figured out and are wanting to try something different.
They like low to moderate lighting and flow. If you find the fleshy heads are not opening you may have them in a place that is too bright or too much flow.

Blastomussa Coral

Size: 1″ – 3″
Placement: Bottom – Middle
Lighting: Low – Moderate
Flow: Moderate
Food: They gain most of their energy from the light but will definitely benefit from additional feedings of coral food to help speed up growth

Brain Coral

A good beginner LPS coral full of pattern and color. They come in a wide variety of colors and they are stunning. Keep them on the sand bed and away from other corals as they have sweeper tentacles that will sting neighbors if they are too close. They are slow growers be very resilient if you have stable water parameters.

Open Brain Coral

Size: 1″ – 7″
Placement: Bottom
Lighting: Moderate
Flow: Moderate
Food: They gain most of their energy from the light but will definitely benefit from feedings of Zooplankton

Ricordia

I love the color and bubbles on Ricordias. The colors you can find them in making them perfect for creating a ‘Ric Garden’. Easy to care for once you have your parameters stable and will reproduce easily when happy.
They require good light and flow, but not being blasted by a powerhead. They will soon become a favorite of yours once you start to collect a couple and you see how they contrast from one another.

Ricordia

Size: 1/2″ – 2″
Placement: Bottom – Middle
Lighting: Moderate – High
Flow: Moderate
Food: They gain most of their energy from the light but will definitely benefit from feedings of Zooplankton

Duncans

Duncans are a nice addition to your aquarium with the colors and movement in the flow. They branch off and form new heads and a large colony looks great. When they are happy they grow and multiply quickly with minimal attention. They like high light and flow.
You can find them with green, pink, purple, blue and cream color variations and adding them close to one another makes really nice focal points.

Duncan Coral

Size: 1/2″ – 2″
Placement: Middle
Lighting: Moderate – High
Flow: High
Food: They gain most of their energy from the light but will definitely benefit from feedings of anything meaty!

Birdnest

Birdsnest Coral is one of the easiest SPS corals to keep. It is a great beginner coral and introduction into seeing if your water is stable enough to add SPS further down the line.
The Birdsnest is a tree-like coral that grows multiple pointy branches and comes in pinks, greens, and purples. It grows fast when it is happy and frags really well.

Birdsnest Coral

Size: 1/2″ – 8″
Placement: Middle – Top
Lighting: Moderate – High
Flow: Moderate – High
Food: They gain most of their energy from the light but will benefit from feedings of Zooplankton, Phytoplankton & other coral foods

Montipora

I think everyone is familiar with Monitpora Coral. The ‘Dinner Plates’ that grow and shadow everything. They are another great beginner introduction into SPS as they grow well, grow fast and are usually the first frags that you can sell. I have pink, green and purple Monit’s in my tank and the pink and green ones are bright neon! They are awesome.
Be careful where you place them as they will cut off the light to everything underneath it as it grows. I have mine on the ends of my tank and my shrimp like to hang out under them.

Montipora Coral

Size: 1/2″ – 12″
Placement: Middle – Top
Lighting: Moderate – High
Flow: Moderate – High
Food: They gain most of their energy from the light but supplemental feedings will speed up their growth

When Can I Add my First Corals?

This hobby is all about keeping water, not livestock. If you can keep good water, then you can keep anything providing the conditions are right. Good flow and powerful light are essential when you first get into corals and its a case of buying the good equipment once rather than buy junk first, then the good stuff later!

It is best to add your first coral after 3 months of starting the tank and you have sufficient light and flow for the corals you wish to keep. After 3 months the water paramaters are beginning to stabilize and the maintenance routine should be regular. Soft corals are the best to begin with.

In your first few months just get your routine down and practice keeping your water parameters stable. You will go through algae blooms and that’s just part of the natural growth of a reef tank. In fact, I’m battling Bubble Algae right now but the Foxface I purchased is destroying it!

Corals are no harder to keep than your fish, just take your time and don’t be in a rush to fill your tank. Leave the top half of your rock free for the nicer and harder to keep corals as both you and your tank mature.

When you first get your corals I suggest placing them on the sand bed for a few days to allow them to acclimatize to your flow and lights. Corals that turn brown or white are being exposed to too much light too soon and need to place more in the shade.

Have fun, take your time and go and buy some frags of the coral mentioned above and see how you go!

If you would like to know abit more indepth about when is the best time to begin adding your first corals please check out these articles:

Where Do You Buy Corals From?

Corals can be bought from many places in the US. Your local saltwater fish store, corals meet events and online coral suppliers. All corals bought online are be shipped next-day delivery in insulated boxes with heat/cool packs installed depending on the climate.

Living in the US we have access to some of the most stunning corals available and the one supplier I highly recommend you check out is the online store of Unique Corals. Backed by the biggest names in the industry, Joe and his team at Unique Corals have some of the highest customer satisfaction scores you will ever find and they are the reason why I’ve teamed up with them.

Their online store allows you to see the EXACT coral frag that you are going to receive and you can grab some absolute bargains on some incredible pieces. Their fast shipping, excellent customer service, and 7-day guarantee mean you will have healthy specimens at your door in no time! I have been ordering corals online for years and it is so simple and stress-free!

See Behind The Scenes at Unique Corals

To View Unique Coral’s Incredible Coral Selection Available For You & See Their Latest Deals At Their Online Store:

>>>> Unique Coral’s Online Store Click Here <<<<


Once you have either bought or been given your first coral frags I highly suggest you dip them and give them a really good inspection before placing them in your aquairum. Doing this will prevent any corals pests from getting into your aquarium and creating a disaster.

To help you I have created this simple, step-by-ste guide for you to follow:

How To Dip Corals – Easy Steps To Success


Planning which corals to start with is a fun process, but you may also find these other articles helpful too:

Protein Skimmers: All you Need to Know!


I remember when I first made the move into saltwater many, many years ago and I kept hearing about this thing called a ‘Protein Skimmer’. I had no idea what it was or just how important it was to a saltwater ecosystem!

Protein Skimmers create millions of microbubbles to help remove dissolved organic waste by-products created by the livestock in a saltwater aquarium. Fish & food waste cling to the bubbles and collect in a cup mounted on top of the skimmer when each bubble bursts.
It’s the
main filter of a reef tank.

I would personally never run a saltwater aquarium without a protein skimmer as I have seen aquariums that do run one and ones that don’t and I can tell you from experience the ones that don’t have a skimmer always have more issues with fish death and poor coral health!

If you would like to view a nice selection of protein skimmers to reference while reading through this article I highly suggest you take a look Here at Amazon.com. If you are like me, looking at pictures and specs while learning about something new always helps it sink into the old gray matter!

How Does A Protein Skimmer Work?

The main wastes the protein skimmer removes are Dissolved Organic Compounds, Proteins & Amino Acids. These are the main waste by-products from your fish, bacteria, invertebrates. Basically, anything living in your aquarium that produces waste.

This waste is dissolved in the water and the protein skimmer removes them before they begin to decompose and produce Nitrates.

Saltwater Aquarium Sump
My Protein Skimmer – Device With Red Lid

A protein skimmer uses something called ‘Surface Tension‘ to help collect and remove this waste.

Surface Tension, what’s that?

You have all blown bubbles as a kid or with your kids and when you create those bubbles you see an oily, rainbow-colored film on each bubble. That is surface tension sticking the detergent to the outside of the bubble’s surface.

The protein skimmer is a bubble blower on steroids. It sucks in air and water at the bottom and as the bubbles rise through the water inside the device, the waste sticks to the bubbles. The Science why is way beyond what we need to know!

As each bubble rises, it joins with more bubbles to produce foam, that foam then continues to rise up the neck of the protein skimmer until the foam bubbles burst when they reach the lid.

Once the bubble bursts, it drops the hitchhiking waste product which collects in the Removable Collection Cup.

You empty the collection cup that is now full of nothing but organic waste and a little water.

Does a Reef Tank Need A Protein Skimmer?

Short answer, Yes! If you have come to saltwater from the freshwater world you may have never heard of a protein skimmer, but in the saltwater side of the hobby, it is by far one of the most important pieces of equipment needed to ensure your aquarium is healthy and clean.

There are protein skimmers for every type and size of aquarium. Some are excellent and some are terrible. A protein skimmer is a piece of equipment that you do not want to ‘Cheap Out’ on!

What Are The Parts Of A Protein Skimmer?

Parts of a Protein Skimmer

Water Pump with Needle Wheel Impeller:

The main job of the water pump is to suck in water and air from the ‘Air & Water Intake’.

Needle Wheel Impeller
A Needle Wheel Impeller

The Needle Wheel Impeller is a specially designed device that breaks up the large bubbles being sucked in and creates millions of tiny bubbles, thus creating more surface area for the waste to stick to.

The more surface area created, the more waste can be collected during the bubble’s journey upwards.

Air & Water Intake:

This is a venturi. A venturi is a pipe that gets smaller in diameter before it gets larger again. Think of an old sand timer lying on its side.

As the pump sucks water through the venturi, the water pressure within the venturi decreases and the speed of the water increases (See Bernoulli’s Principal on Wikipedia). At this point, the air pipe is connected so that the maximum amount of air can be sucked in at the same time.

The water and air mixture is then sucked into the Needle Wheel Impeller before being blown up through the ‘Bubble Diffuser’.

Bubble Diffuser:

The job of this item is to reduce turbulence in the water. Protein skimmers use large water pumps to get the maximum amount of air and water into the skimmer. Because of this, the flow that comes out of them is insane.

The bubble diffuser helps to smooth out the turbulence of the water being blasted out and allows the bubbles to easily rise into the calmer water flow above. If the water is too turbulent, the bubbles will burst as soon as they are formed and not allowed to rise.

Air Silencer:

Ever heard a kid sucking up the last of their milkshake through their straw? This is what you would constantly hear if you didn’t have an air silencer. It is a small device that places a baffle or two inside a small canister to make the sound waves travel around corners. This dampens the noise.

You can still hear a constant sucking noise, but it’s far quieter!

Adjustment Valve:

This opens a valve to let the water out of the protein skimmer body. This valve is used to set how high the water surface gets inside the neck of the skimmer.

The more water you let out of the skimmer, the lower the height will be. The less water you let out of the skimmer, the higher the height will be.

The manufacturer’s instructions will tell you the best height to set the water surface level at inside the neck. On my Reef Octopus NWB150 Protein Skimmer, I have my height set just below where the Collection Cup attaches and I get great, stinky waste collected!

Removable Collection Cup:

It is exactly as is sounds. It’s the part that collects all the waste which you can then remove and throw the gunk down the sink. If the waste stinks your skimmer it doing its job well!

Some collection cups have a small connector on the bottom that allows you to attach a hose and pipe the Collection Cup to a larger container to allow you longer times between emptying.

Are There Different Types Of Protein Skimmer?

Co-Current Design

An older style design of protein skimmer that uses a wooden airstone to create the bubbles and the upward movement of the bubbles pulls in water at the base.

Co-Current means the water and the bubble travel in the same direction. In this case, Upwards.

The water/bubble contact time is not very long and not many bubbles are produced, therefore they are not very efficient and you rarely see them being used today.

They were mainly used on smaller aquariums and were either hung on the side or stuck to the glass like the one shown.

Co-Current Protein Skimmer

Counter Current Design

Counter-Current, you may have guessed means the water and the bubbles travel in the opposite direction to one another. This aims to provide a longer contact time between the bubbles and the water as the water has to go down and then back up through the bubble stream before exiting the skimmer body.

Again, an old design of skimmer and not used very often. The advent of the ‘Recirculating’ skimmer has really taken over how most protein skimmers are designed today.

Counter-Current Protein Skimmer

Recirculating Design

This is by far the most popular design in today’s industry.

By using a venturi to suck in the air and water and then send that stream into the skimmer body at an angle, creates a great whirlpool effect under the Bubble Diffuser.

This allows for a huge contact time between the water and bubbles before the bubbles begin to rise through the water column.

Recirculating Protein Skimmer

What Are The Most Common Types Of Protein Skimmer?

There are 3 main types of protein skimmer available today to accommodate any sized tank and any type of installation. They are:

  • Internal Protein Skimmers
  • External Protein Skimmers
  • HOB – Hang-On-Back Protein Skimmers

Internal Protein Skimmers

There are by far the most popular and the type that I personally recommend for those who have a sump installed on their tank. The protein skimmer sits in the chamber that the drain from the display tank feeds into.

There are many manufacturers and sizes to suit your needs and it all comes down to personal preference and reviews as to which brand you chose.

Protein Skimmer In Sump

The main reason why I like internal protein skimmers is that from time to time your skimmer will go nuts and overflow your collection cup. Because the protein skimmer is already sitting in the sump, the waste just pours back into the water. No mess created.

External Protein Skimmers

These are skimmers that are mainly aimed at large aquariums or where there is no room to install them in a sump. Many of the external protein skimmers can have several pumps and be of a larger diameter to be able to handle massive volumes of water.

Some of the smaller internal protein skimmers can also be plumbed to be used externally when space is at a premium.

External Protein Skimmer
Externally Installed Protein Skimmer

These are a great alternative but you must keep an eye on the collection cup. If it overflows the waste can really stink for a long time if it gets in the wrong place. Have you ever spilled milk in a car and then summer comes along?!

HOB – Hang-On-Back Protein Skimmers

These are purposely designed for aquariums that do not have a sump. They are usually made of a flat style box so they can be discretely hung on the back of the aquarium and be hidden. A HOB skimmer uses the Co-Current method of water/bubble interfacing.

HOB Protein Skimmer
HOB Protein Skimmer

The pump will suck up water from the aquarium, mix it with the air and the collection cup collects the junk, just like the other skimmers. They are mainly used for aquariums up to 100 gallons but due to their size and shape, they are not as efficient as the Recirculating Protein Skimmers.

As with all the other skimmers, there are many to chose from depending on your aquarium size and bioload so no matter what your system, you should be able to find a HOB skimmer to fit.

How Do You Size A Protein Skimmer To An Aquarium?

Remember the protein skimmer mainly removes Dissolved Organic Compounds. These are produced by the bioload (Biological Load) of your aquarium.

How many fish do you have? How large are those fish, How much do they poop? (Watch your Tang take a dump!), How much food do you feed? How much Clean-Up-Crew do you have? Do you vacuum your sand bed? Do you turkey baste your rocks? Do you have strong, irregular water flow? How many fish are you wanting to end up with? What size will these fish grow to?

The more of these answers you have, the higher the bioload in your aquarium and the bigger the skimmer will need to be to handle all of this waste.

There are two general rules of thumb:

  1. Pick a skimmer that is rated for around the total system volume (Aquarium, Sump, Frag Tank etc) and bioload.
  2. To match the air input of the skimmer to the system volume. eg: if the skimmer is rated at 400l/hr (100GPH) of air it will be suited for aquariums in the 90-100 gallon range.

Most protein skimmer manufacturers will show each skimmers recommended aquarium size and sometimes a bioload rating to help you decide.

My aquarium is 75 gallons, my sump is 20 gallons and my frag tank is 8 gallons. Once you take out the displacement for rock and water height in my sump, my total system volume is around 90 gallons.

My Protein Skimmer
My Protein Skimmer at Installation

The Protein Skimmer I selected was the Reef Octopus NWB 150. Its a great skimmer rated for 150 gallons, great reviews, great price, and my bioload is relatively low. This made it a perfect fit for my system.

Be careful not to pick a skimmer that is too big otherwise it may not pull out any waste from your water and you will have paid more than what you need.

Your skimmer needs to have a consistent source of dissolved organics to allow the bubbles to stick together and produce the foam. If the skimmer is too large and it strips the water of its organics, no foam will produce and it must wait until more dissolved organics are formed before it can begin removing them.

This ends up in a skimmer that is in a kind of ‘On/Off’ state which leads to inconsistent water parameters.
By reading the reviews of fellow protein skimmer owners you can pick one to suit your system very easily.


To see many different types of Protein Skimmer please take a look at the vast range HERE at Amazon.com. They have every kind of Protein Skimmer to suit any installation.


How Do You Set up A Protein Skimmer?

There are two main elements you need to address to ensure your protein skimmer will work efficiently:

  1. Surrounding Water Height if your skimmer is an Internal Type
  2. Water/Bubble Surface Height set correctly

Surrounding Water Height

If your skimmer is an internal type then the manufacturer will show you the height at which the surrounding water must sit. In other words, how high must the skimmer body stick out the top of the water in the sump. This is to ensure it works at its optimum designed performance.

There are 3 ways to achieve a set water height around your skimmer:

1. Sit your protein skimmer on a stand or blocks to raise it to the correct height.

2. Install a glass baffle in your sump to act as a dam and fill the water in that compartment to the correct height.

3. Install your Automatic Top-Off System to keep your sump water level at the correct height.

ATO Sump Water Level

To read more about Automatic Top Off Systems check out my article Here

Water/Bubble Surface Height

Protein Skimmer Water/Bubble Height

Each protein skimmer will also come with instructions on how to set the Adjustment Valve to get the water/bubble height just right. It may take a little bit of playing but its usually somewhere in the neck of the skimmer.

Setting the height higher will mean the bubbles will be wetter when they burst, meaning you will be skimming ‘Wet’ or if you set the height lower the bubbles will be a little drier and when they burst there will be less liquid content and thus you will be skimming ‘Dry’.

What Is Wet Or Dry Protein Skimming?

Wet Skimming is when there is a little more liquid and less waste in the collection cup. It produces Skimmate (Name given to the collected waste) faster, but it’s less concentrated.
Be aware that if you are skimming wet and you are pulling out lots of liquid on a small tank, your Automatic Top Off will be replacing this with just fresh water. Your salinity will slowly start to drop if not taken care of!

Dry Skimming is when there is less liquid but more waste in the collection cup. It produces Skimmate slower, but it is more concentrated.

Most people tend to set their skimmer on the slightly drier side so that the Skimmate is a rich yellow/brown, stinky consistency.

What Is A Protein Skimmer Break-In Period?

Every protein skimmer will have what is known as a ‘Break-In’ Period. When a protein skimmer is molded during manufacture, the machines coat the molding tools in oil to prevent the plastic from sticking to the mold.

It can take anywhere from a few days to a few weeks for this oil to break down and be removed from your water system. Cleaning the skimmer before use is always recommended, but there will be places you cannot reach.

During this break-in period, you may have to adjust the valve daily to keep the water/bubble surface at the correct height, but once it is ‘Settled In’ you will hardly have to touch the Adjustment Valve.

How Do You Maintain A Protein Skimmer?

As with everything in this hobby you need to keep things clean to keep them working at their best. Here are a few things you need to do to ensure your gunk keeps getting removed:

  • Empty & clean your collection cup frequently. You don’t want the waste the skimmer has just removed overflowing back into the water!
  • Clean the neck of the skimmer and the collection cup weekly to keep the sides smooth. Rough sides cause the bubbles to burst prematurely. I use a toothbrush and rinse the cup under the tap.
  • Keep the air intake free from salt creep. A blocked intake will raise the water/bubble height and produce fewer bubbles.
  • Remove and clean all your pump and Needle-Wheel Impeller every month or two.
  • Every year completely remove your skimmer and run it in a bucket of warm water and white vinegar to help remove baked-on coralline and crustaceans. Rinse well and put back into your aquarium system.

Common Protein Skimmer Questions:

Do I run my protein skimmer during the tank cycle?

Yes, you need to let the protein skimmer Break-In and allow your tank to adjust to all its equipment and find its natural balance. As your bacteria build during the cycle, all the factors affecting your tank will determine its natural parameters. If you then turn on an item like a protein skimmer, your tank will have a tiny re-cycle as it now adjusts to the change in the eco-system. Run everything on your tank during its cycle as you would run it normally. Light Schedule, all equipment, everything. The only thing you do not do is a water change.

Why does the skimmer keep overflowing?

This could be caused by a brand new protein skimmer that needs to Break In. Just adjust the valve as low as it goes, let it run and overflow, it will settle down in a day or two.

A blocked air intake
A medication introduced to the water (Chemiclean for treatment of Cyano Algae always sends your skimmer nuts)
A wandering fish found its way into the sump and got sucked into the pump intake
A family member spraying air freshener in the room
Scented Candles burning

Sometimes you can adjust the skimmer valve down to drop the water/bubble level for a few hours/days or turn off the skimmer for a few hours and try again.

Why does my protein skimmer not produce any foam?

Your skimmer could be in it’s Break-In period and just needs a little more time.
Ensure your entire air line, silencer and venturi are not blocked
There is not enough bioload in your system yet and there is not enough dissolved organics to produce a good amount of foam.

If you would like some more information on the Aquarium Cycle, Sumps or Automatic Top-Off Systems be sure to check out my articles on them: