You may have just heard about this myth or you have been in a local saltwater fish store and seen Mollies swimming alongside Nemo, and yes, it is true. Mollies can be adapted to living in saltwater aquariums!
Mollies naturally live in brackish waters where rivers and oceans meet. Sailfin Mollies can be easily transitioned to saltwater from freshwater by a slow, drip acclimation of a period of at least 3-4 hours. Mollies are livebearing fish that are easy to find, keep, inexpensive and small.
If you want to find out how to get Mollies acclimated to your aquarium please keep reading!
Why Put Mollies In A Saltwater Aquarium?
Mollies are very poplar in freshwater because they are colorful, can have nice patterns and they are cheap to purchase.
To a beginner to saltwater the high prices of saltwater fish, compared to the few dollars they may have been used to in the freshwater world, can be daunting.
A trial by using Mollies AFTER your aquarium has fully cycled could be the confidence boost you may be looking for. If you find it takes you 6 months to get all this water parameter stuff figured out and you lose a pair of mollies, then your bank balance takes less of a hit than if you lost a pair of Clownfish!
The other reason you may be wanting to add Mollies to your aquarium is for their beauty or as a talking point with visitors to your aquarium!
“Hey, Bill! Is that a Molly in your saltwater aquarium?” You may find that as ‘Reef Nerds’, any chance you get to talk about your tank and fish is welcomed – I know my wife just rolls her eyes and walks away when I start talking ‘Nerd’ with our guests!
What Are The Best Type of Mollies For Saltwater Aquariums?
Over the years many people have tried and successfully kept Mollies in a saltwater aquarium but there is a pattern of two certain species that seem to survive the best.
The two species that you want to look for are:
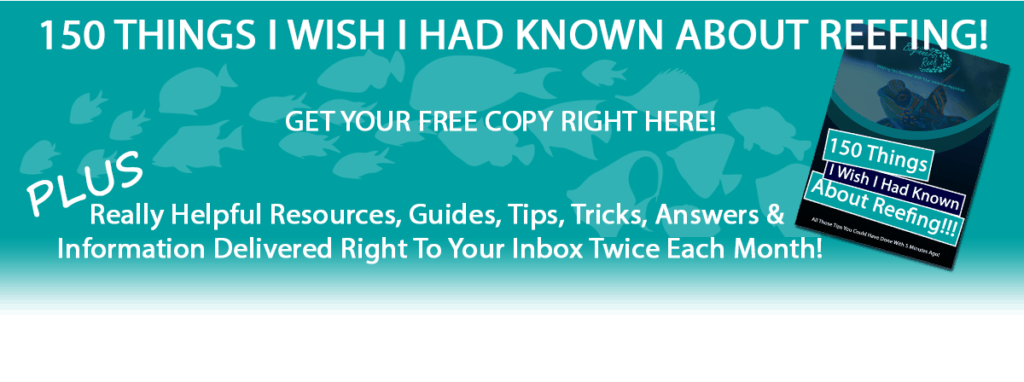
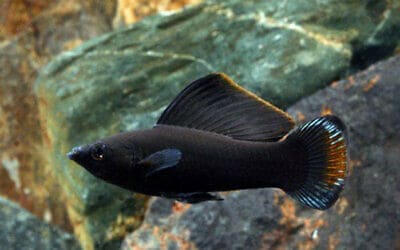
1. Poecilia latipinna – Sailfin Molly
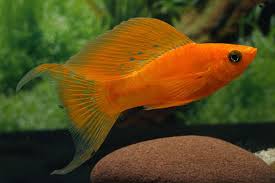
2. Poecilia velifera – Giant Sailfin Molly


Are There Benefits of Adding Mollies To Saltwater Aquariums?
Apart from the diversity Mollies bring to your aquarium there are several other benefits they have to offer:
Cost
As stated earlier for those of you on a tight budget but are dreaming of setting up just a small saltwater aquarium, then Mollies can make a perfect choice.
They can cost only several dollars each and can be housed in Nano aquariums without any trouble.
You can find a whole plethora of Mollies Here at LiveAquarium.com starting at only $1.99ea. By searching out your local fish store you will easily be able to find some nice specimens to acquire.
Color & Pattern
Generally speaking, the coloration and patterning of saltwater fish are one of the many reasons why aquarist makes the move to saltwater from freshwater.
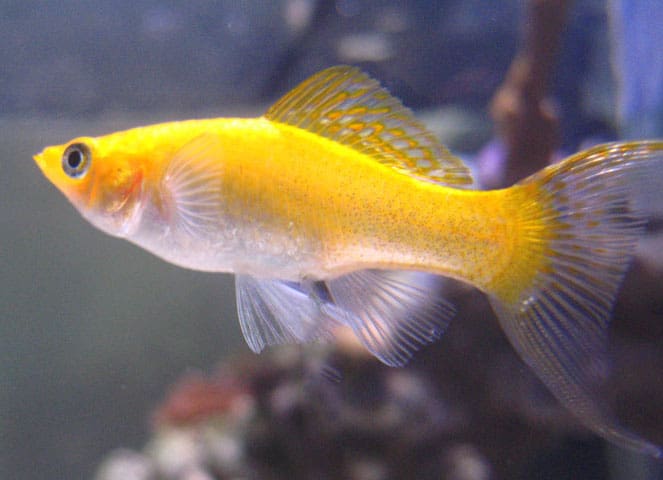
But, some of the colors and patterns the Mollies have to offer can look incredible under the intense lighting we have in our reef tanks. The blue and UV spectrum can really turn a drab looking Mollie into one of the most spectacular fish you may have ever seen!
Great Algae Eaters
Mollies are awesome algae eaters and will spend the majority of their day cruising around the tank picking at algae. They are perfect for smaller aquariums or even frag tanks to help keep any nuisance algae at bay when the tank is too small for a Lawnmower Blenny or Tang.
This is the main reason why I first tried acclimating a pair of Mollies! It was to look after the algae in my 8 gallon frag tank. They did an awesome job and for $5 they were a bargain!
Easy Breeders – Free Food
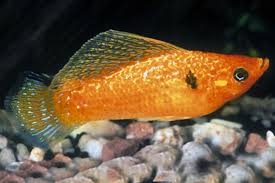
Mollies breed really easy in the home aquarium and yours can be no different. Once they are happy and settled and you have a Male and a Female they almost aways become a mated pair and will regularly produce live fry.
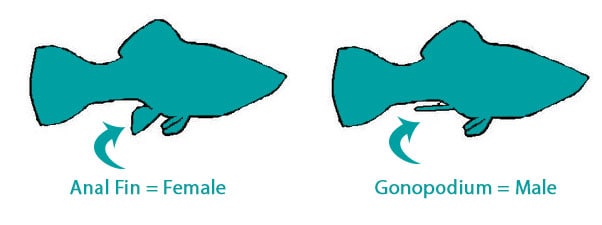
When you are in the fish store the easiest was to tell is by looking at the anal fin as shown in the diagram above. By purchasing a Molly of each sex it should not be too long before they mate.
But why do you want them to mate? Two Words – Free Food!
Mollies are live-bearers and a female can give birth to anywhere from 6 -200 fry in any one go, and they can keep reproducing every 28 days. This means that free, live, nutritious food can be constantly given to your tank.
How Do You Acclimate Mollies To Saltwater Aquariums?
If you have been perusing the fish forums before finding this post you will have probably seen a dozen different ways to transition Mollies from freshwater to saltwater.
They probably range from just dumping them straight into a saltwater tank to very slowly acclimating them over a period of several weeks – All with varying degrees of success.
The Sailfin and Giant Sailfin Mollies have been recommended as these have seemed to be the hardiest and they are the only ones I have been able to successfully transition.
One of the most popular ways to acclimate your new mollies is as follows:
Step #1 Get All Your Supplies
You will need:
- A clean 5 gallon bucket – Used salt buckets are great for this or head to your local hardware store and pick up a new one. Give it a good wash with warm water and white vinegar and rinse well. This will remove any of the mold release agents that were used during its manufacture
- A length of airline hose
- A small 5-10 Watt heater – set to the temperature of your aquarium – Usually 78°F
- Some old towels
- A fish net
Step #2 – Place Your Fish Into The Bucket
Empty the fish into the clean bucket with all the water from their bag. Then dispose of the transport bag.
Step #3 – Place Heater
Most acclimation procedures don’t usually require the use of a heater but because you are going to be very slowly acclimating these fish the water will soon drop to the surrounding ambient room temperature without a heater.
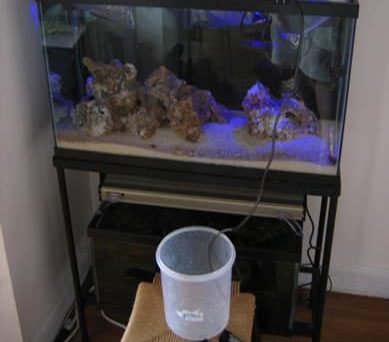
Step #4 – Secure the Airline
Insert one end of the airline under the water surface of your aquarium and secure it so that it will not fall out in a few hour’s time. Ensure the airline is not pinched or the water will not flow.
Step #5 – Set The Drip Rate
Suck on the other end of the airline and get the water moving. Be sure to remove the airline from your mouth before the saltwater reaches you 😉
Tie a not in the airline. The tighter the know the slower the drip rate.
You want to aim for 2 drips/second. Secure the end into the fish bucket.
Step #6 – Turn Off ATO System
Because you are removing water from the Aquarium it is important to turn off your Automatic Top-Off System if you have one fitted. This will prevent it from replacing the withdrawn saltwater with freshwater and messing up the salinity of the aquarium.
Step #7 – Prepare New Water
If your aquarium is only a small nano aquarium then removing 2-3 gallons of water from it could be a lot. Now is the time to make up some new saltwater to add to your aquarium once the acclimation is finished.
Ensure it is matched for temperature and salinity.
Step #8 – Remove Water
After the drip has been running for an hour remove half the water volume from the bucket and dispose. Repeat this process every 30 min until the water in the bucket is the same salinity as your aquarium.
This process should take 3-4 hours. Adjust the drip rate to suit.
Step #9 – Quarantine – If You Can!
As a beginner, you will probably not have a quarantine tank setup. I highly recommend you have a read of my Quarantine Tank Setup article in the ‘Further Reading’ section later in this post.
You can set up a simple quarantine tank for around $50 and it can save your aquarium from contracting a devastating illness or disease.
If you have a quarantine tank the following steps are adding to your QT tank, not your aquarium.
Step #10 – Prepare Your Aquarium
Now is a good time to turn off the aquarium lights to allow your new additions to be able to hide in the shadows if they wish.
Ensure the bucket temperature and salinity match your aquarium.
Maybe add a very small sprinkle of food at the opposite end of the aquarium to distract the fish already in the tank.
Use the net to scoop up each Molly and gently add them to your aquarium.
Step #11 – Replace Water
Now is the time to top your water back up in your aquarium for the water that was removed during the acclimation procedure. Remember this is where your prepared SALTWATER is used to bring the water level back up to normal running height.
DO NOT forget to turn your ATO System back on!
Step #12 – Monitor
It is best to leave the lights off for the rest of the day to allow your new fish to settle in their new home. They do not need to be fed as your tank has been fed and this could only cause distress as feeding time is always chaotic.
Keep an eye out for signs of distress and heavy breathing and if a fish dies be sure to remove it straight away and dispose of it.
Other than that, enjoy your new additions!
To Finish
Adding Mollies is a fun addition to your aquarium and they are great for being your ‘Childrens Fish’.
Depending on the quality of the Mollies you purchased it may require you to have a couple of tries before being successful.
Keep at it and your patience will pay off!
Further Reading
If you found this helpful may I suggest some of our other articles to help you:
- Fish Quarantine. How To Be Ready In Minutes
- 36 Awesome Nano Fish For Beginners – With Pictures
- 20 Best Saltwater Fish For Beginners – With Pictures
- How To Acclimate Saltwater Fish
- How To Measure Salinity In An Aquarium