If you’re setting up a saltwater aquarium I bet you are wanting to keep corals! It was certainly the reason I started mine. I can still remember the first day I saw a coral reef aquarium at a store over 25 years ago. I can still see the cat sleeping on top of the canopy!
Getting the aquarium up and running and cycling requires you to learn a lot, nevermind what you then have to learn to keep corals. They are super hard right, No! Corals can be super easy, provide you start with the right types of coral and your aquarium is ready.
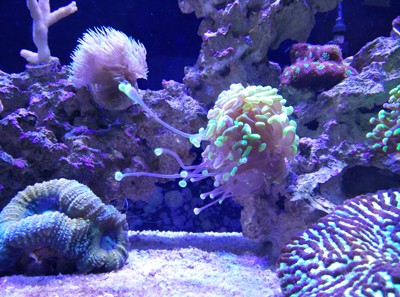
Corals require good lighting, stable water parameters, and good flow. As a beginner to corals, you must meet these requirements and start with hardy specimens like Zoanthids, Mushrooms, and Xenia to achieve the greatest success.
Let’s find out just how simple your first coral purchase is going to be…
1. Ensure You Are Ready For Coral
As a beginner to saltwater aquariums, your main focus should be patience. Rushing to get your first coral in your aquarium is only likely to end up in an algae-covered skeleton.
After your aquarium has cycled you need to allow time for both you and your water to stabilize. You need to learn and find a routine to ensure your water gets changed regularly, your maintenance is consistent and you are testing your parameters.
Generally, it is going to be at least several months before adding your first coral as you want to allow for all the algae blooms to finish as these can affect your new purchases. This period also allows you to work out your maintenance routine and aim to keep every parameter stable.
See the ‘Further Reading‘ section at the bottom for when you are ready to add corals.
2. Research Which Corals To Buy
A plan of how you wish your aquarium to look in several years’ time is key. Find an aquarium you would love to have in your home and copy their stocking.
I have an ‘Aquarium Inspiration’ page on Pinterest to give you some ideas for how your aquarium could look. You can find that page HERE.
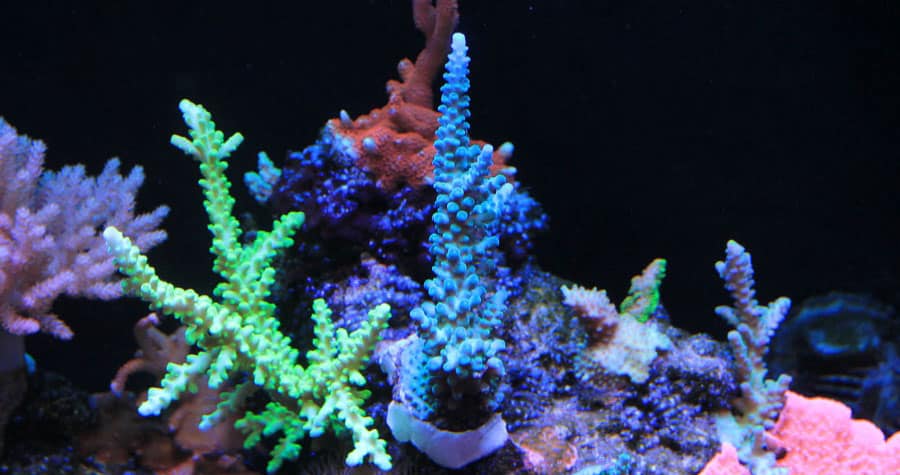
Color, texture, movement, placement, neighbors, light, flow, all need to be researched for every coral you wish to have. Most corals cannot move once placed, so ensuring you have them in the right location in your aquarium will dictate whether it will thrive or shrivel.
By far the most important part of the research is which are the best corals to begin with! Don’t go buying a $100 frag of an Acropora for your first coral as chances are it will not survive. Learn to walk first with some of the excellent, hardy and simple-to-keep beginner corals.
See the ‘Further Reading‘ section at the bottom for which corals are best for beginners.
3. Decide What Corals To Buy
Now you have done your research into the types of corals you wish to have and your aquarium is ready for them its time to put together your shopping list.
Just like deciding which fish to purchase, having a list that you can make a plan off is a great step. What I recommend is at the top of the list you have the hardiest, easy-to-keep coral working down to what you would ultimately love to have. This list may take years to complete, but without a list and a plan you could waste money on corals you are not ready for.
Zoanthids and Mushrooms are pretty much the only corals I would advise to be your first purchase. They are super easy, come in a huge variety and are relatively inexpensive.
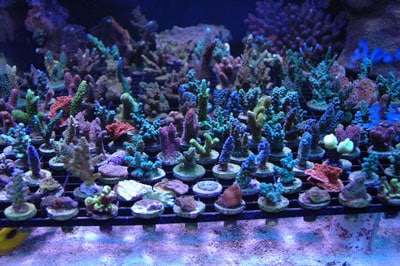
4. How Many Frags Can You Add In One Go?
When you are in the fish store or browsing the pages of the online websites it can be so tempting to buy lots of coral frags. Your aquarium is looking bare and you want to get it filled as quickly as possible!
This is where you need to exercise your patience and remember its a marathon, not a sprint!
As these are your first corals I would only purchase 2-3 frags for your first time, see how they go, then in a few weeks head to the next items on the list. Adding a maximum of 5-6 frags at any one time is all I recommend until your experience grows.
A Frag is an abbreviated word for ‘Coral Fragments’, whereas ‘Colonies’ are larger, mature and more expensive corals. Think of frags as cuttings off a plant.
Each time you purchase a new coral, following this process needs to happen and you don’t want to get overwhelmed at the start or it simply takes the excitement out of it.
5. Ensure You Have Coral Dipping Supplies
As part of purchasing corals, you need to be aware of and understand how to prevent pests from entering your aquarium. Most of the pests will be introduced to our aquariums as tiny hitchhikers on coral frag plugs.
Inspecting, dipping and monitoring your coral frags is super important to the long-term health of your reef, not to mention your sanity.
With this being your first purchase you are unlikely to have the supplies and tools required for getting your corals ready for your tank. I suggest you read the article below so that when you go to the store, be it local or online, you can also get all the supplies you need so you are ready when the corals arrive at home.
See the ‘Further Reading‘ section at the bottom for a simple step process for dipping your corals.
6. Buy Local or Online?
You are facing a lot of firsts during the first months of your new saltwater aquarium and this is another one. There is a great deal of awesome online suppliers and I bet you are nervous about buying from them.
For your first time, I would recommend you seek out a fellow reefer and see if you can buy some coral frags from them or head down to a high-quality fish store and buy your frags there.
When you purchase locally ALWAYS look at the aquarium the corals are coming from. If you see any Aiptaisia, algae blooms, pests or dead fish, walk away. This goes for the fish/coral stores too! I have a store near me that has disgusting tanks and I would never by livestock from them, just supplies.
Don’t Start Off Your New Aquarium by Introducing a Pest!
If you are like me where there is no-one local you wish to buy coral from, then online may be your only option. Most online vendors specialize in their coral and that’s all they do. They have dedicated growing facilities and they are very good at what they do.
Living in the North, I’ve had coral delivered in -30°F winters with no problem, until the package gets lost by FedEx, but that’s a different story! Your online supplier will package the corals with a heat pack and put them on same-day or next-day delivery. Just be sure to be home to receive the corals the second they arrive!
I have been working with a few coral suppliers for some time and they are some of the best online coral suppliers with a great selection, prices, shipping, and customer service. I really recommend you check them out, in your applicable country:
US Based
Unique Corals is one of the best US-Based Coral Suppliers.
Based in Florida, Joseph and his team deliver awesome corals from their 14,000 gallon facility to anywhere in the US.
Canada Based
Fragbox is a Toronto based coral supplier with some of the most impressive corals you can find in Canada.
March’s focus on the highest quality corals linked with the best customer service ensures you get the best frags delivered to your door.
For 5% Off Your Purchase
Use Discount Code:
thebeginnersreef

7. Coral Dipping Process
Before you dip your corals you need to float the sealed transport bags in the aquarium for 20 minutes to help bring up their water temperature from shipping. Once the temperature is up to your aquarium temp its time to begin the dipping process.
Don’t worry if your corals look dead, slimy, closed-up, or discolored. This is normal for corals to do this during shipment and handling. Give them a few days and they will start to return to normal.
Dipping your corals is a simple process which basically helps to kill and remove any pests that may be lurking in the tiny spaces of your coral. By gently rinsing your coral frags in a liquid solution for several minutes you are helping to prevent any pests from getting into your aquarium.
Coral RX and Revive are two of the most popular coral dipping solutions. Cheap and simple to use, you would be crazy to not dip your new corals!
For a Step-By-Step Guide, what products, supplies, and tools you are going to need I advise you to head over to the following article after you finish here:
How To Dip Corals – Easy Steps To Success
8. Coral Acclimation
Receiving your corals and dipping them is a great step, but now comes the most important one – Acclimating them to their new home!
The lights in your aquarium are usually of the main reasons a lot of new corals will not make it. Place your corals on the sand bed or on a frag rack low down in the aquarium. The reason to do this is the amount of light energy they will receive will be lower.
When corals receive too much light they turn white or ‘Bleach’. This is the algae inside the coral trying to protect the tissue. A bit like human skin turning brown in the sun.
Leave the corals on the sand bed for 2-3 days before slowly moving them up the rocks until their final placement. It can take anywhere from 7-10 days to reach their final placement. Don’t be in a rush!
9. Final Coral Placement
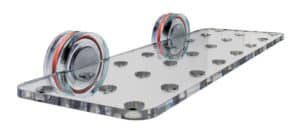
As your corals are slowly moving up the rockwork, or the frag rack is slowly getting higher (This is a great reason to buy a magnetic frag rack), they will soon be close to their final mounting position.
If you can, try and sit the coral in that location for a few days before fixing it in place. The reason to do this is to monitor the coral to ensure it has the right amount of:
- FLOW – It’s gently moving, not blasted or folded over
- LIGHT – It’s not bleaching from too much light, or browning/muted color from not enough light
- NEIGHBORS – Ensure any of its neighbors are not stinging it at night with sweeper tentacles – This is will be more applicable as your aquarium fills with coral.
If the coral shows any signs of above move it to a different location and try again for a few days.
Once the coral appears to be happy in its final location its time to permanently fix it in place. The best way to do this is with a coral epoxy. Its like modeling clay of two colors. Snap off two equal-sized pieces of each color and mix them together in your fingers until all one color.
Split the ball in half and use one ball of epoxy clay to stick the plug to the rock, then mold the rest around the edge of the plug to help secure it in place.
I find turning off the wavemakers for 30 minutes helps to let the epoxy harden or your frag may get blown over. You may need a small amount of epoxy to prevent the frag from falling over while you are testing its final placement position.
Slime or particles stringing off the coral and into the water is normal. It is all fully aquarium safe, providing you use the appropriate products.
You can view the most popular aquarium Epoxy Putty HERE at Amazon.com
10. Signs of Coral Distress
Having new corals in your tank is exciting but what if after a week they are not looking like you think they should. Here are some common signs of distress and what to do about them:
Closed Heads/Polyps – Possibly too much flow or as simple as your shrimp likes to keep walking on it!
Holes Appearing In Tissue – Ensure detritus has not settled on the coral. Detritus can burn a hole in the tissue, especially on Toadstools.
Tissue Loss – Receding tissue toward the skeleton is a sign of unstable water parameters or too much flow.
Color Turning White – Too much light, place the coral lower down the aquascape of in a shaded area of the aquarium.
Color Turning Brown – Not enough light, move the coral out of the shade or up the aquascape.
Scars – Signs of possible stinging or burning could indicate it’s being stung by a neighbor. Some coral can extend sweeper tentacles over 8 inches!
Chunks Missing – Some aquatic inhabitants like to nip at coral tissue. Keep an eye on your fish, shrimp, and crabs to identify the culprit. Remove the coral or remove the culprit.
Algae Growing on Skeleton – Usually, this is a sign the coral is dead. If there has been receding tissue then algae begins to grow or the skeleton begins to turn green, its a goner.
These are just a brief overview of possible coral problems. The actual causes can be vast and pretty much every problem you will come across has been seen, discussed and solved many times over on the forums.
I would suggest you do a full panel of water parameter tests, take photos then ask on the forums for help. Parameters and photos will usually guarantee you get help!
Some of the best forums out there are:
Nano-Reef.com
Reef Central.com
Reef2Reef.com
11. Feeding Your Coral?
All of the corals you are going to begin with get the majority of their energy from your aquarium lights (providing you have a good-quality light system), but they will also gather food from fish poop and any fish food they are able to capture.
There is a great variety of coral foods out there and feeding a couple of times a week once you have a lot of coral will also help to improve their coloration, maintain health and allow them to grow faster.
Some of the most popular coral foods are:
- Reef Chili by Bulk Reef Supply
- Reef Roids by Polyplab
- Coral Frenzy by Coral Frenzy
I personally use all of these, alternating which gets fed and my coral love this stuff. I would not begin feeding corals until you have a good amount in your aquarium and they are all settled and happy, but they will appreciate the extra food.
A little goes a very long way!
You can find a great selection of coral foods HERE at Amazon.com
To Finish
Buying your first coral is always one of the most fun times you will experience in this hobby and most aquarists will remember their first time!
By ensuring you have the right equipment, stable water parameters and you have done your research there is no reason why your first coral purchase will go without a hitch.
The next steps I recommend you take are to read every one of the articles below to help you fully understand what is required and ensure your knowledge is plentiful when you take this first step.
Enjoy this step in your journey!
Further Reading
- Ideal Water Parameter Values
- When Can You Start Adding Coral To A Tank?
- 19 Best Corals For Beginners – With Pictures
- How To Dip Corals – Easy Steps To Success
- Best Reef Tank LED’s – Your Guide For Softies, LPS & SPS