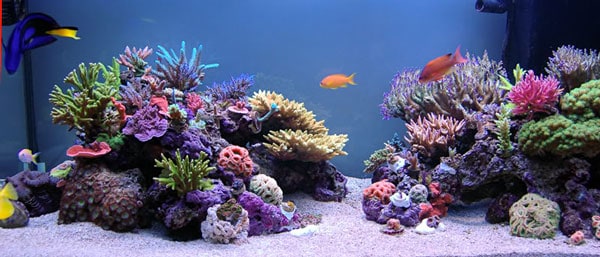
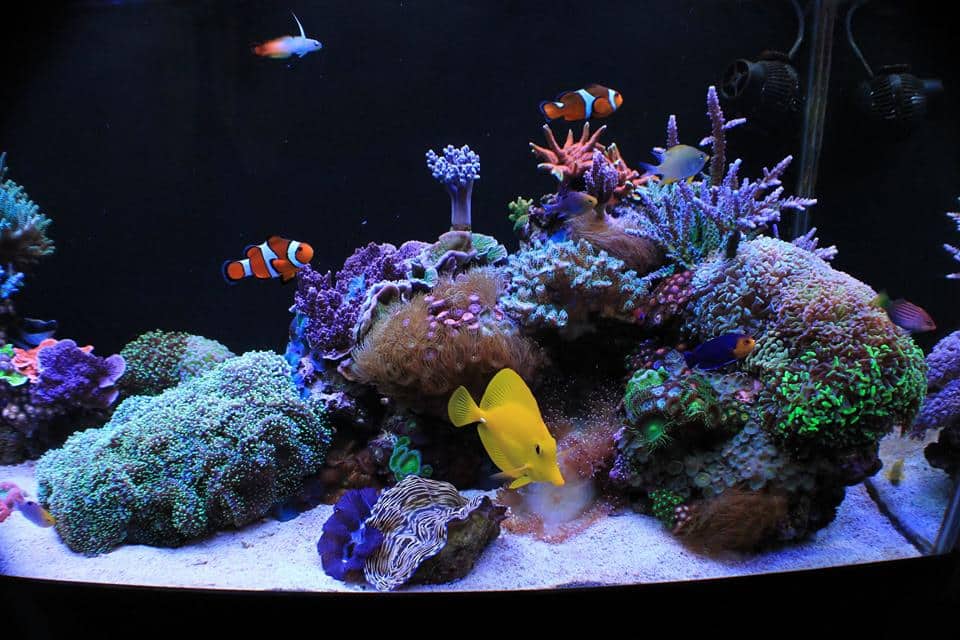
How many times have you walked into a local fish store, someone’s home or perusing the forums, and a beautiful reef tank has stopped you dead in your tracks? For me, it has been plenty. To this day I come across a picture of an incredible reef tank that blows me away, and it is why I jumped from freshwater to saltwater.
But what is it that makes you wish you could have that aquarium in your home right now? The colors, the unique layout, the pristine look? All of the above I bet!
Using the Following Design Tips You Can Create A Stunning Reef Tank Aquascape:
- Planning
- The Rule of Thirds
- Depth
- Focal Points
- Variety Of Rock Pieces & Shapes
- Caves & Overhangs
- Contrast
- Color Planning
- Tank Background
- A Vision of 2-3 Years
Let’s look at these tips to help you plan and create something that will instantly grab your guest’s attention and make you talk about your aquarium for the rest of the evening!
Planning Is Key!
All of those aquariums you have drooled over probably had two things in common:
- The owners had a vision of how they wanted their aquarium to look
- They planned out how to achieve that look using some or all of these techniques
Most aquarists I know, myself included, are always planning their next aquarium, learning from the past and the research they do to make their next box of water be EXACTLY what they want. Usually, the hardest part is deciding what type of aquascape to go with! I must have ‘Decided’ on a favorite aquascape over a dozen times before I finally got my dry rock delivered and then figured out my layout.
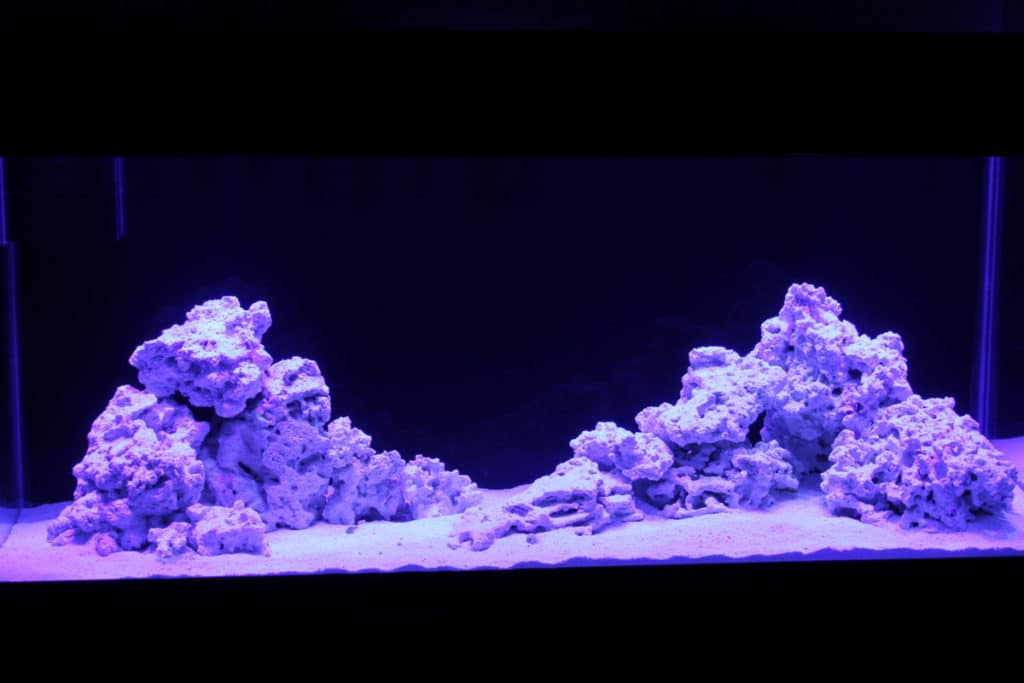
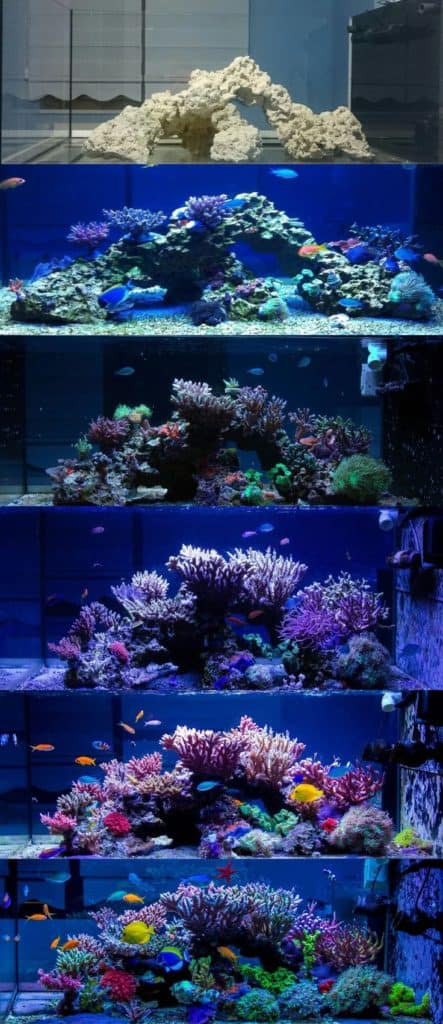
No here are 15 Tips that I found and used to help me create my perfect aquascape. By using some or all of these techniques you can create a stunning foundation of live or dry rock on which your corals will gro over time and turn this bland, barren rock into a small piece of one of Mother Nature’s most stunning natural wonders!
Note: I do not own the photos shown below. They are there to give reference to the aquascape. I’ve tried my hardest to find the original owner of every photo to give them the credit they so rightly deserve.
15 Tips To Create A Stunning Reef Tank Aquascape:
Design Tip #1: Inspiration – Google/Pinterest
Getting inspiration cannot be overestimated enough. Get looking around to find a reef tank that takes your breath away the moment you see it. If it’s not online but you see it in a store, magazine, friends house, take a photo of it! Inspiration is the key to finding the look you are after and if that look will fit in both the size and shape of your aquarium and with the style of your home.
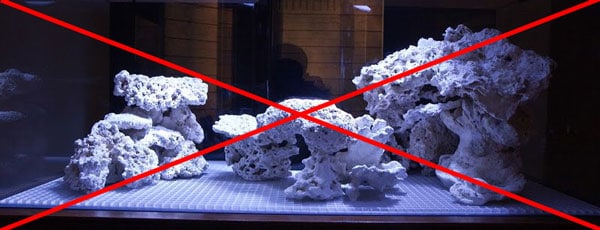
Long gone are the days of just piling rocks into a wall against the back glass of a saltwater aquarium! By following these tips you can craft something that is not only unique but adds that extra level of WOW to your living room.
To help you find some inspiration I have The Beginners Reef Pinterest Account and one of the Boards on there is all about Inspiring Aquarium Aquascapes. Whenever I find something new and unusual I add the photo to that board to give me ideas for a future build but to also help people like yourself.
You can find that Board By CLICKING HERE
Design Tip #2: The Rule of Thirds
The Rule of Thirds is a design composition technique used by many artists, photographers, architects, and other professionals to create a balance to the eye and make the piece they are crafting more dynamic and interesting.
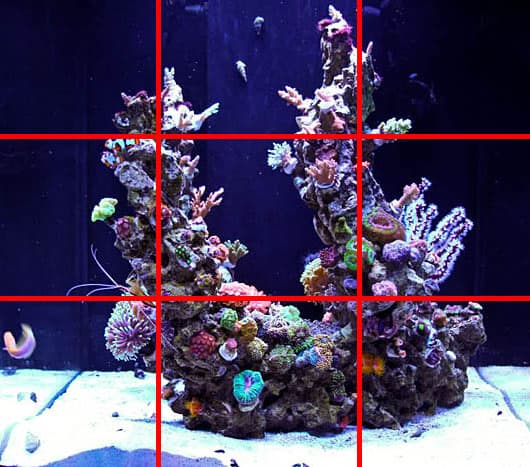
The technique is to split up the area in question into 9 equally sized squares with 4 intersecting points where the lines cross. The idea is to create your aquascape using these lines and plan to have or place something interesting at each of the intersecting points.
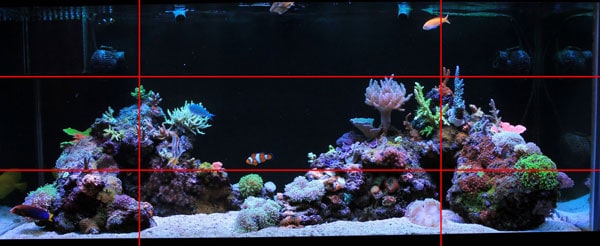
I tried to keep the squares equal when planning my tank but I found it bunched all the rock together and left no swimming room for the Yellow Tang I ‘Had To Have’. I ended up slightly stretching my center squares to become rectangles to help create a balance between the rule of thirds and my aquarium shape.
My intersecting points all had a very specific purpose. The two lower points were to create caves for my two shrimp to hang out in so I could see them, and the two upper points were the peaks of each rock pile with space for vibrant SPS corals to grow from.
The rule of thirds will work on any size or shape of an aquarium, it is just a matter of scale. If you have a nano reef, use small pieces of rock rubble and epoxy them together. If you have a large reef tank, use rock islands of varying sizes and shape to create unique focal points using the technique.
Design Tip #3: Create Depth
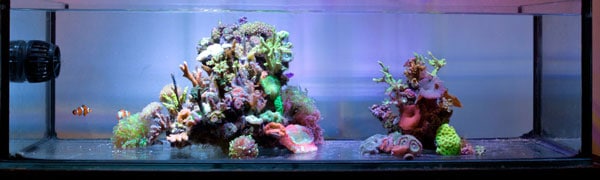
Crafting an aquascape with depth can be tricky in an aquarium due to the width of most aquariums. Cube and ‘Deep-Dimension’ aquariums make this easier because you have the depth to create valleys to lead the eye, but what about the rest of us?
The goal here is to trick the eye by using some clever rock placements to create the impression of depth.

Take this mountain photograph for example. We have depth because we have focal points in the foreground (waterfall and stream), we have multiple layers of mountains sitting behind one another helping to create the depth and finally, we have a valley to draw the eye into the distance. But how do we create this in our aquarium?
Using the rule of thirds place your largest structures on the vertical lines but then use smaller rock pieces to build your mountain slopes in towards one another and sloping towards the front of the tank. Mountains create beauty because they are not just rounded boulders so try and replicate your rock formations to do the same.
One trick is to use smaller rock rubble pieces to graft unique shapes into your rock such as overhangs, bridges, points, branches.
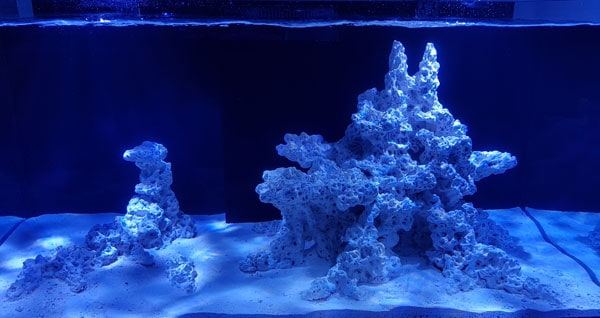
You may not be able to use the rule of thirds if you have a smaller tank but keeping this technique in mind will allow you to make something unique. Crazy4Acros managed to create depth very well in the way he built his rock formation, and this is in a small cube aquarium!
Design Tip #4: Focal Points
The focal points are what really add the Wow Factor to any reef tank and they are easy to create but just take a little bit of planning. They can be created using rock, or they can be from a specific type of coral you plan to put there in the future. I had a mix of both in my planning stages:
- The two shrimp caves I wanted to create use a contrast of dark areas against the vibrant colors of the surrounding corals
- The rock peaks were for SPS corals of contrasting colors further down the line
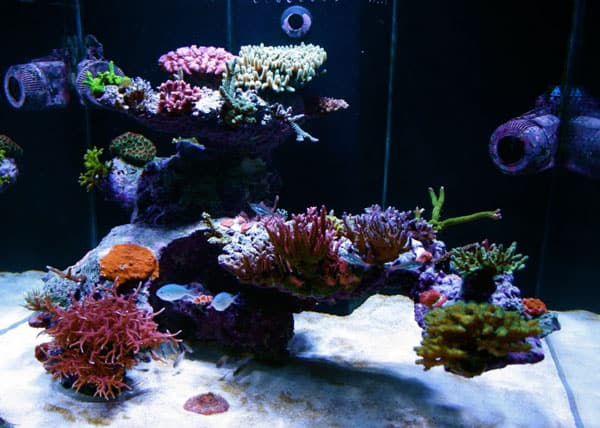
Many other aquarists chose to place a very unique coral at these points, especially in small aquariums where space is limited. Zoa and Ricordia gardens, large colorful corals like a bright red Gonipora, Bubble Tip Anemone, or Montipora Capriconis colonies will all draw your attention to these focal points with ease.
By placing these features/corals on the intersecting lines of the rule of thirds it will help to make your aquascape even more interesting and pleasing to the eye.
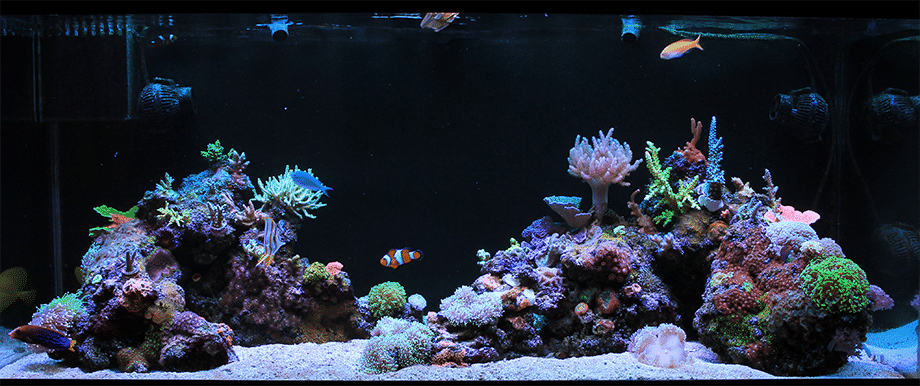
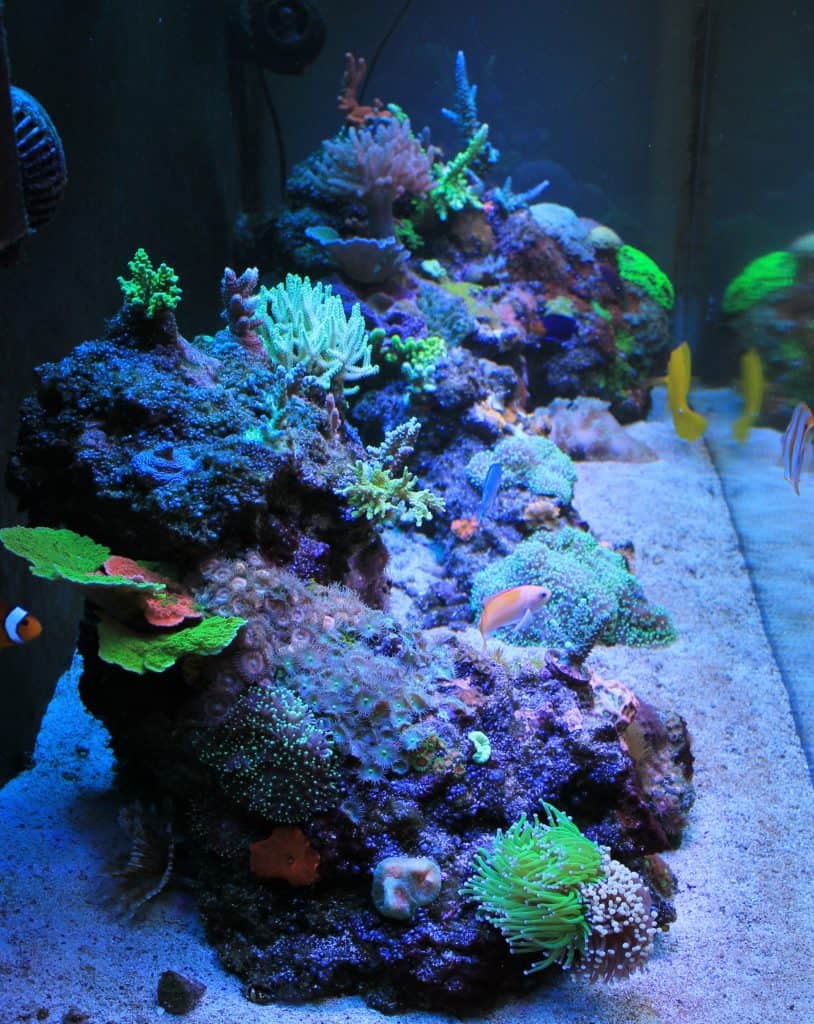
In this image, the owner has a Torch, a Gorgonia, and SPS corals placed close to these intersecting points to create great focal points for this aquarium as they grow! Even though their space is small they have managed to create a very interesting aquascape that will get better and better as the corals grow and fill in around one another.
Design Tip #5: Solid Foundations
When creating a unique reef tank aquascape it needs to be solid, every piece of it! I made the mistake of not properly securing one piece of rock in my tank and it has driven me nuts for years! Even blobs of epoxy putty haven’t fixed it, but that’s because there is coral everywhere and I’m limited to places to secure it. To ensure this doe not happen in my next tank I will be using some of the techniques mentioned further in this article!
When creating your aquascape there are now some great aquascaping epoxy putty’s available to make your entire rockwork become one solid mass. One of the most popular is Reef Cement from Nyos. This cement is very pliable when you mix it before will turn as hard as concrete as it sets!
Mix it in very small batches as it sets very quickly!
You can find it HERE at Amazon.com
If you need to get your rock structure to sit flat on the floor you can saw through the rock to give it a flat base with a regular hacksaw. If you want to make rubble or smaller pieces, then a hammer and chisel works wonders! Just be sure to wear gloves, goggles and a dust mask when working with any rock. Placing a towel over the rock before hitting it will also prevent any chips from flying off at high velocity!
Design Tip #6: Allow For Water Flow & Active Swimmers
Water flow is paramount in a coral reef aquarium and flow dead spots can lead to a build-up detritus, which then gives you Nitrate and Phosphate problems. If you can, imagine how your coral will grow when planning your aquascape. As it grows it will take up more space and prevent flow. SPS coral like in the photo below grow into solid pieces that heavily restrict water flow the bigger they get.
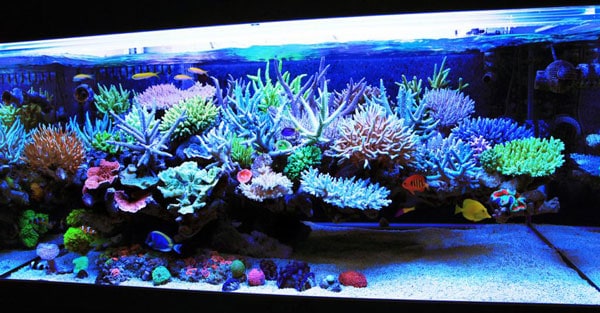
Your corals will need constant, irregular water flow to stay healthy. Make sure your aquascape leaves room for additional powerheads/wavemakers in the years to come. In recent years the invention of Gyre pumps has greatly increased how water can be moved around the aquarium from just a small pump footprint.
By planning for future space for a pump, these Gyres really help the aquarist.
You can find out more about water flow pumps and Gyres in my dedicated article here:
RICHARD’S TOP PICKS
Recommended
Powerheads, Wave Makers & Gyres
What kind of fish do you plan on keeping?
Tangs need lots of room to swim, Anthia’s and Chromis like to hover above the reef. If you wish to keep these fish plan your layout to help provide room and natural habitat for them. When your tank is empty it may look bare and you think you need to add more rock, but over time your corals will grow and fill this empty space, taking up room for your swimmers!
The more you can provide for your fish and corals, the more symbiotic and natural your aquarium will look!
The planning is all about trying to find the ultimate balance for all the tips in this article. It will take some thought and playing with the rock to find the best fit for your aquarium shape, the fish you wish to have and the coral you plan to grow.
Design Tip #7: Overhangs For Shrimp
Many people never think about this, but yet, most marine aquarists all have at least one shrimp in their aquarium. In all my years keeping saltwater, where do you think the shrimp like to ‘Hang Out’?
In the shade on the back of the aquarium where you never see them!
Shrimp are such a unique and fantastic addition to every aquarium and I love to watch mine in action. Why not try and create the perfect place for them where you can view them constantly. This was my thinking!
On each of my rock islands, I created caves to stacking the rock purposely for two shrimp and they love them. I have a Cleaner Shrimp on the left island and a Coral Banded Shrimp on the right island. They just hang upside down and do their thing. My daughter loves the Cleaner Shrimp’s cave. She calls it ‘The Carwash’ as the fish are always in there getting serviced by the Cleaner shrimp!

Design Tip #8: Rods, Pipes & Zip-Ties
Some of the most interesting aquascapes I have ever seen have all used some kind of ‘Backbone Structure’ to provide the mechanical support and then held together with Zip-Ties and or some form of reef cement. Tall, towering rock formations, bridges, and fingers are the most common uses.
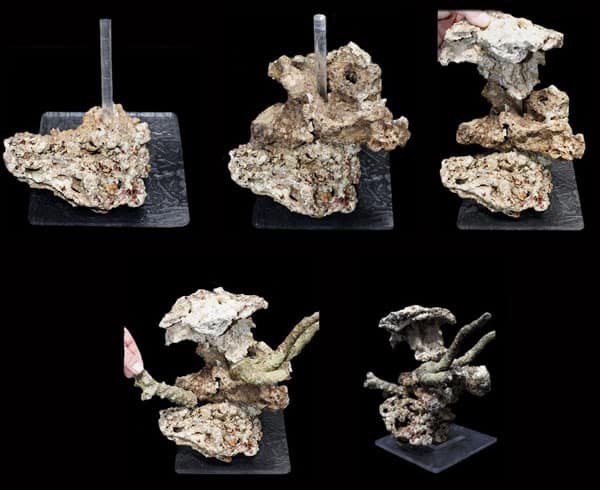
Dry Rock can easily be drilled with a regular masonry drill bit to allow acrylic rods to be inserted to help hold rock pieces together. The addition of securing with Zip-Ties and epoxying together will hold them solid forever. Mr Kang’s Korean Reef shown a few photos above uses this technique. He started with a large, heavy piece of rock which he flattened the bottom with a hacksaw.
After drilling holes and inserting the acrylic rods, he could then drill each piece of smaller rock and slide it onto the rods like a Kebab. Once he was happy, he fixed it all in place using epoxy cement to create the large rock fingers upon which to mount his corals.
You can find all sizes of Acrylic Rod on Amazon.com. HERE is a link to the most popular 3/8″ diameter rod. Just use a 1/2″ masonry drill bit for the hole.
Design Tip #9: Test Layout On Cardboard/Floor
By far the easiest way to plan an aquascape is outside of the aquarium. I’m glad I did this because as I was crafting a layout, it collapsed. Had I done this in my aquarium I would have been buying a new tank! Get a large piece of cardboard or a sheet of wood/MDF and draw out the INSIDE dimensions of your aquarium on it. Painters tape works well too. Just have the inside edges of the tape match the inside dimensions of your glass.
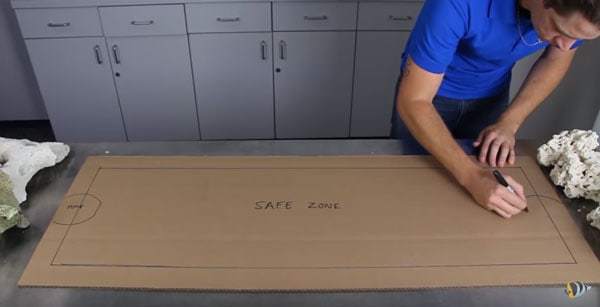
Next, leave a gap all the way around the edge of the aquarium to allow for flow and glass cleaning. 2-3 inches is minimum, but smaller is OK if it’s a nano tank. Now it’s time to start experimenting with your rock pieces using all the tips mentioned above. It’s a bit like the old Nintendo game of Tetris, finding a way to easily fit all the pieces together to craft the look you want.
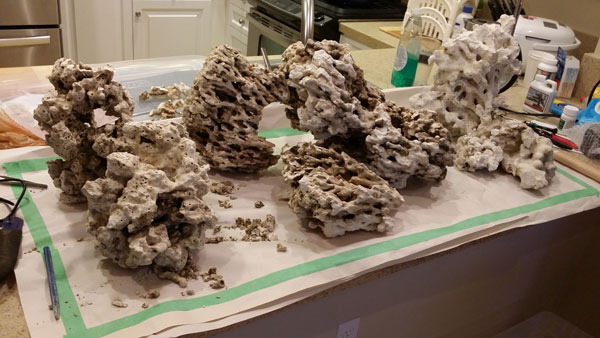
Play around, get the hammer and chisel out to nip bits off or create smaller pieces. Each time you have a layout, take a photograph of it then try something new. I think I went through a dozen different layouts until I got it just right. I ended up going back to one of the earlier photos to create my final layout.
Once you have the perfect layout, transfer it to your aquarium. Rock goes in first, then sand around the rock! ALWAYS.
DO NOT put egg crate under your rock to protect the glass! It will prevent the sand sifting snails and critters from keeping your sand bad free of detritus. You will have nitrate problems in the future if you put egg crate in the sand!
The rock is fine directly on the glass. Also, and sifting fish, snails, and starfish can dislodge your rock when they burrow into the sand and topple your rock if it’s not placed directly on the glass!
Design Tip #10: Aquascaping With Live Rock
Most of the tips mentioned above are all done with Dry Rock due to there being no time limit due to die-off when outside of saltwater. Creating the aquascape with Live Rock can be done, but you just need to follow a few more tips.
- Have a bin of saltwater already to temperature (78-80°F/25-27°C) ready to store your rock in until you are all set up with the cardboard/plywood layout
- Ensure rock stays damp at all times when trying your layouts – Using clean towels wet with saltwater works great
- When cutting or drilling liverock be extremely cautious of Palytoxin Poisoning – Always wear gloves, glasses, and mask
- Be prepared for a small cycle due to die-off during all transport and aquascaping.
For more information on Palytoxin Poisoning, I highly recommend reading my short article here:
Design Tip #11: Leave Space Above For Coral Growth
I have seen many tanks where this simple tip gets forgotten and in 3 years’ time, they have no light coming into their aquarium. When I planned my aquascape, I knew I wanted to keep SPS on the tops of my rock islands and I knew they were going to grow upwards more than outwards.
When no space is left above, the corals will begin to branch outwards as you trim the tops. The more they branch outwards, the more light they will block and begin to starve all the corals below them. By leaving ample growing room you can keep SPS corals fragged and prevent them from blocking light from the corals below.
Not only does the coral growth block the light, but also the water flow we mentioned earlier. Even though the tank may look empty of rock, resist the urge to add more – Trust me you will regret it when it’s joined together like concrete and you cannot remove some of it in 2-3 years’ time!
Design Tip #12: Shapes & Sizes of Rock
Varying the shape and size of rock pieces within your aquascape is a great way to can create really interesting features or focal points. Small rock pieces sticking out or constructed into bridges or ledges can be really cool!
The more interesting you can create the underlying foundation of your coral skeleton the more it will pop once you begin to cover it in coral. If you have a small nano aquarium you can create just one island, if you have a large aquarium then create multiple islands, bridges, fingers, you name it!
There are many different types of dry rock and live rock available from local stores or the online vendors that will enable you to find a combination to give you the perfect pieces to wow your house guests. A hammer and a chisel will also help create some rubble!
You Can View a Great Selection of Rock Pieces HERE at Amazon.com
Design Tip #13: Use a Color Wheel
Here is where we move from the layout of the rock structure to planning the color palette of the tank for years to come. This can be difficult to imagine for some people and is where the inspiration aquariums come into play. Color is the main focus that will draw your eye around the tank. When the corals are placed correctly and allowed to grow out, the planning taken in the first steps of the aquarium will really shine become apparent!
When looking at some of your favorite aquariums try and see how they have their colors arranged. This will serve as a guide on what corals to put where and come up with a plan. The best tool I found for creating fantastic visual elements in my aquarium is the artists color wheel:
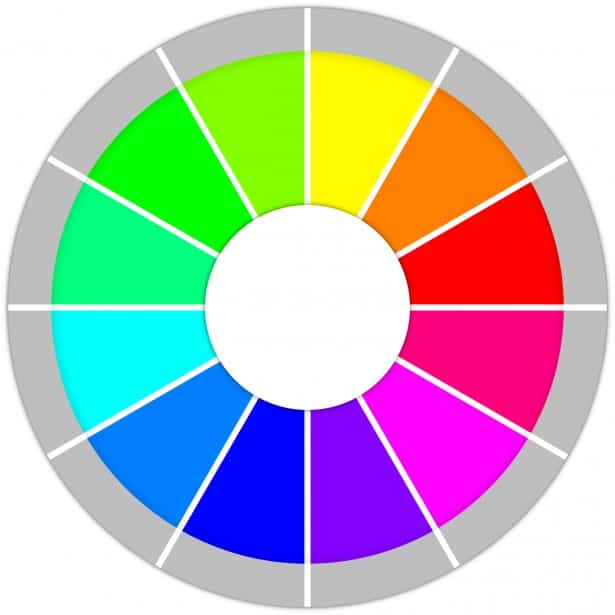
The idea behind the color wheel is to select and place corals next to one another based on their opposing colors on the wheel.
For Example:
Blue Mushrooms next to Orange Mushrooms
Pink Acans next to Green Acans
Blue Zoas next to Red Zoas
By doing this it will really allow the colors of each coral to really stand out and provide an eye-popping aquascape.
If you don’t know much about corals during this planning stage that’s fine. Just take a photo of your rock, print it out, and then circle what colors you would like in what areas. This way, as your knowledge of corals increase, you can look for the coral of that color to fit that spot.
Remember, Rome was not built in a day and it may take you over a year to find just the right corals to fill the gaps, but patience will pay off in dividends when you get it right and it all begins to grow out!
To help you with your coral selection here are a few articles to bookmark and read as you begin to get further into your reef tank journey:
Design Tip #14: Create Contrast
To help create another level to the interest to your reef you can also use contrast. The opposing colors from the color wheel begin the contrast phase of the aquarium but size, movement, and texture also play a crucial role.
By carefully selecting your corals based not only on their color, but the way they move and the size they will become, you can create some great focal points. I knew I wanted some clams in my tank but I knew they were at least 2 years away while I waited for my tank to mature.
In the meantime, I purchased the beginner corals and placed them according to my plan, so by the time I was able to keep clams, they fit perfectly into the area and the contrasting corals made them really pop!
Try to keep corals that move in the water flow in different areas of the tank to help keep the eyes moving around. Pulsing Xenia on one side, Hammers and Frogspawn on the other. SPS at the top of the tank, Acans, and Feather Dusters on the sand.
As your tank is cycling, this is the best time to research and plan not only your fish stocking list but your coral stocking and placement list!
Another way to add contrast is ‘Color vs Darkness’. I used my Shrimp Hang-Out Caves to create patches of darkness within my corals to help the color of the corals be more pronounced. They work really good, especially when the fluorescence of the actinic lights bring out the neon colors of the coral!
Design Tip #15: Use a Black Background
By far the best way to make coral colors pop is to paint the outside back wall of your aquarium Black.
Having a black background really contrasts your coral colors and there is no better way to make them really stand out! The other thing you have to do with a black background is to keep it clean, just as often as the front glass.
Keeping green film algae and coralline algae off it will ensure the darkness shows to make those corals ‘Pop’. Just be sure to remember Design Tip #9 and make sure you leave enough room when you layout your rock to be able to get the algae magnets or scraper back there easily. This will also help with the flow as your corals grow and make it easy to hide powerheads down there to increase flow as the years go by!
And Last Tip: Get The Correct Tools
Most of you will not require any tools to create your perfect aquascape, but sometimes you will just not be able to stack those rock pieces and not have them naturally ‘Click Together’.
Here is a list of some basic tools that will help you get the rock to fit just right:
- Goggles
- Facemask if drilling
- Gloves – Rock can be sharp
- Hammer
- Chisel
- Drill
- Masonry Drill Bit
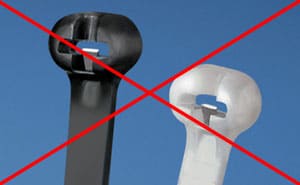
- Nylon Zip-Ties (DO NOT buy the ones with the steel clip within them)
- PVC Pipe for structure
- Acrylic Rods for structure
- Reef Cement Here at Amazon.com
Further Reading
To help your learning continue you may find the following articles helpful when setting up and during the early months of your new reef:
- Where Should I Place My Aquarium?
- How To Clean Aquarium Glass Without Scratching
- What Is Live Rock?
- How Much Do Aquariums Weigh?
- How Often Should You Change Water In Saltwater Aquariums?